meton-robean
meton-robean
**最大熵模型定义** 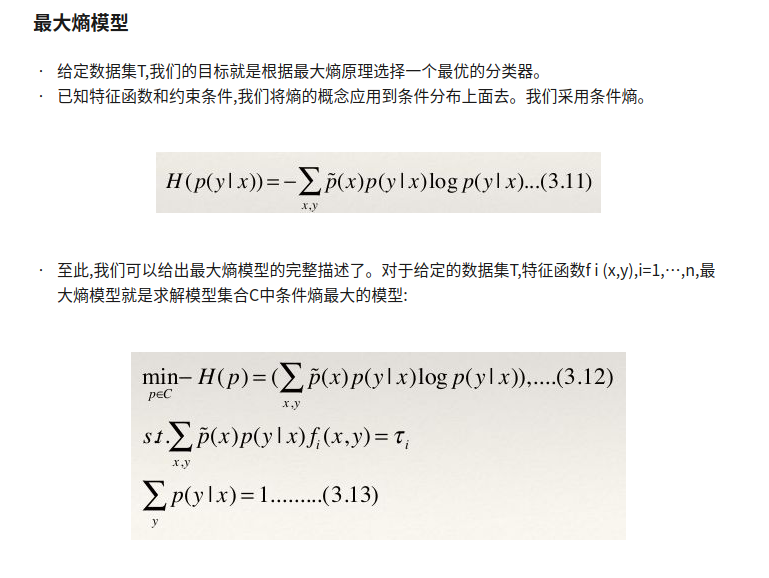

**最大熵模型的学习** 最大熵模型的学习过程就是求解最大熵模型的过程。求解约束最优化问题(3.12),(3.13)所得的解就是最大熵模型学习的解。思路如下: 利用拉格朗日乘子法将最大熵模型由一个带约束的最优化问题转化为一个与之等价的无约束的最优化问题,它是一个**min max问题**。 利用对偶问题的等价性,将原始问题转换为一个max min问题。 原始问题和对偶问题 利用拉格朗日乘子法定义关于(3.7)、(3.12)和(3.13)的拉格朗日函数如下: 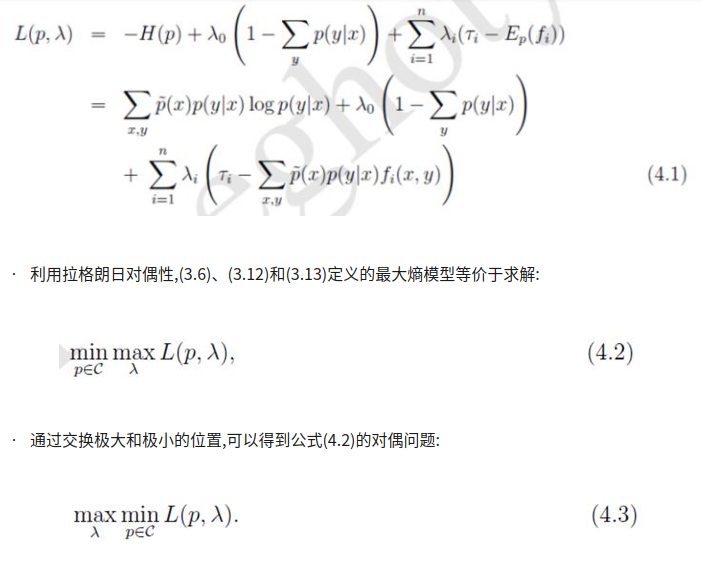
### 最大熵模型例子 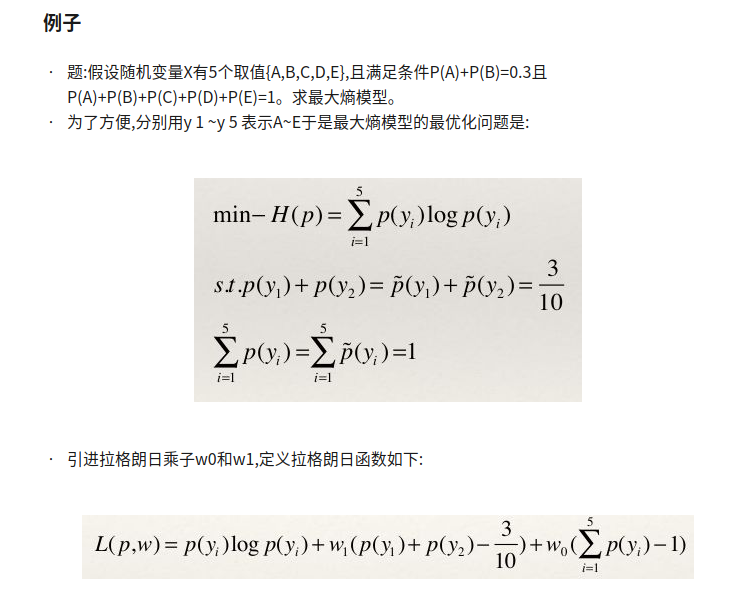 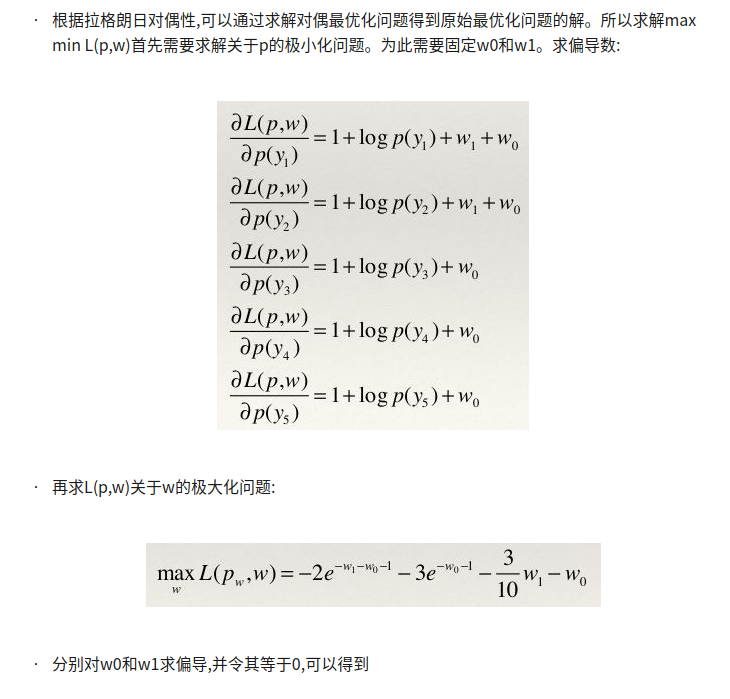 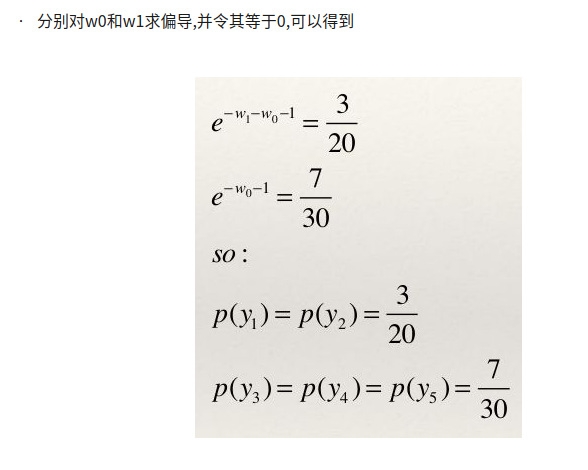
### 1.module的编写  - 将我们实现的PWMModule(这里没展示实现代码)用TLRegisterRouter封装起来,这样PWMTL就相当于一个外设模块(自动实现了tilelink,并且是作为client node)
### 2.module封装成trait   - trait一般成对实现,命名上很有规律。 - 其中HasPeripheryPWMTL将我们的外设module和pbus连接了 - HasPeripheryPWMTLModuleImp定义了外设的一个输出(具体做什么要看你设备的需要了)
### 3.将我们的traits混入rocket system变成一个整体  - 也是成对出现 - 前一步的trait混入这两个类 - 其实是编写module层面的TopWIthModule的配置class,实例化后是一个封装了的lazy module
### 4.进一步生成rocket层面的顶层配置类  - 这次是rocket层面的配置类编写(封装累加了上一步的东西,像蛋糕一样) - 这里利用case模板匹配,这里的case本质上是偏函数(scala语法),这样做是为了在最顶层,也就是下一步可以自由的进行参数化配置(改一次参数配置,就可以通过隐式参数的方式传给下一级,直到最底层module,而不用到处改参数)
### 5.将配置class实例化后添加到rocket的默认配置之上  - 这是cake中的最顶层配置了 - 当然这里没有在最顶层进行参数话设置,这个例子简单不需要。另一个例子,DMA例子:[【链接】](https://chipyard.readthedocs.io/en/dev/Customization/Adding-An-Accelerator.html#adding-a-dma-port)里面就在最顶层进行了参数配置: 
### 更多例子也是遵循cake pattern这个模式 - 添加DMA https://chipyard.readthedocs.io/en/dev/Customization/Adding-An-Accelerator.html#adding-a-dma-port - 添加rocc 加速器 https://chipyard.readthedocs.io/en/dev/Customization/Adding-An-Accelerator.html#adding-a-rocc-accelerator