interface.server
 interface.server copied to clipboard
A server for generating OSC and MIDI messages from interfaces created using Interface.js
#Using the Interface.js Server
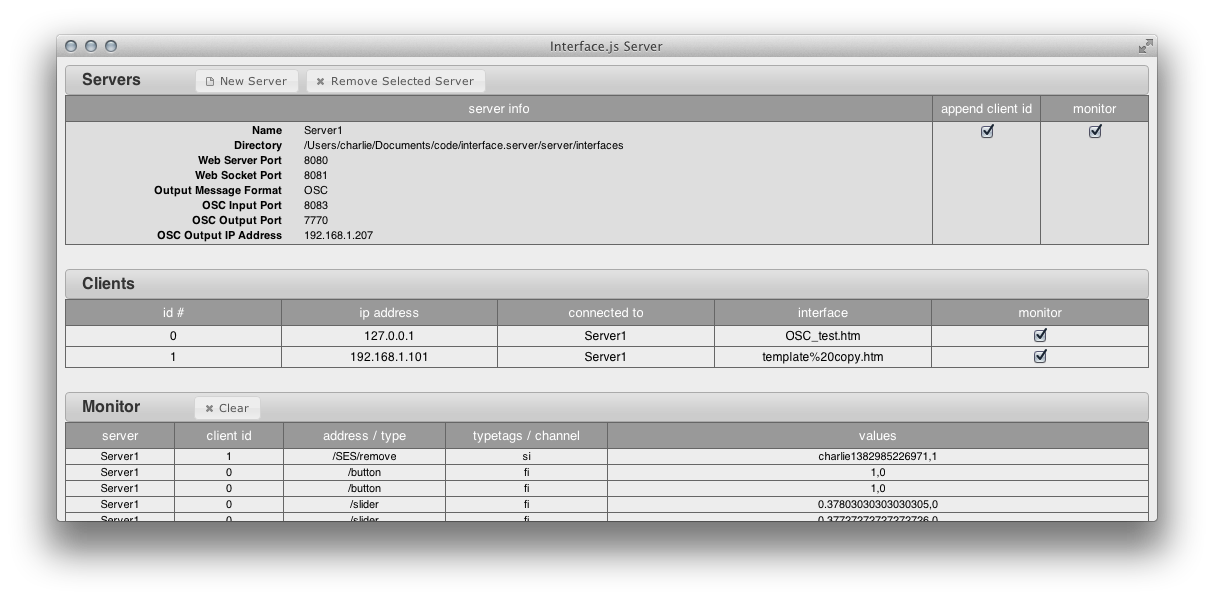
This project is designed as a server for interfaces created with Interface.js. The Interface.js Server has a number of purposes:
- Serving interfaces to browsers on the local area network.
- Translating the WebSocket protocol spoken by web browsers into OSC or MIDI messages.
- Allowing you to monitor connections and dataflow.
##Getting the binaries Prebuilt binaries of the server are available for OS X and Windows here.
##Build from source If you want to build the server from source instead of using prebuilt binaries or are using Linux, you'll need to download and install node.js. Node.js will provide most of the functionality we need to serve web pages, but we'll also need to add a few utility libraries to send OSC and MIDI and carry out a few other specialized tasks. We can install these utilities using the Node Package Manager, or NPM, which is installed with Node.js. After installing Node.js, open a terminal and run the following commands:
npm install midi
npm install omgosc
npm install connect
npm install ws
The last step is to download node-webkit. Linux users plase note that you should download the node-webkit binary rather than attempting to build node-webkit from source. Node-webkit enables desktop applications to be built using web technologies. Once you have Node-webkit installed, place this directory in the same location. You can then open the server as follows:
./nw projectDirectoryName
Note: make sure you've run git submodule init and git submodule update before you do this so that the interface.js repo is pulled.
##Using Interface.Server Upon launching the server, hit the "New Server" button. Configure the server by selecting a port for it to serve web pages on, a port to communicate over web sockets, and a port to receive and send OSC on (you can also output MIDI or Web Socket messages). You also must select the directory containing your interface files; some default interface files are included in this repo.
Now you can open up a laptop or mobile device and type the name of the computer that the server is running on and add a .local to the url to tell the browser the destination is on the local network. Finally, add the port that you configured the server to serve web pages on (default 8080). For example, if your computer's name is foo:
http://foo.local:8080
You should then be presented with a list of interfaces to choose from. Selecting any file in your browser will run the interface and the Interface server will transmit any messages it receives into either OSC, MIDI or WebSocket messages. MIDI messages will leave the virtual midi output named "Interface Out".
To define widgets that send OSC messages, simply set their target to be "OSC" and their key to be the OSC address you would like them to output to. For example, to send a message to /speed we could create the following slider
a = new Interface.Slider({
  bounds:[0,0,1,1],
  target:"OSC", key:'/speed',
});
For MIDI, we specify a target of "MIDI" instead of Interface.OSC. For the key, we pass an array specifying the type of message we want to send, the channel it should go out on and the number of the message. It's also important to limit the range of widgets to valid MIDI values between 0 - 127. Possible message types currently include 'noteon', 'noteoff', 'cc' and 'programchange'. For example, to create a button that outputs NoteOn on channel 1, number 64 we would use:
a = new Interface.Button({
  bounds:[0,0,1,1],
  min:0, max:127,
  target:"MIDI", key:['noteon', 0, 64],
});
The server directory comes with a couple of simple test files to experiment with MIDI and OSC, MIDI_test.htm and OSC_test.htm.
Metadata
Owner
Metadata
A server for generating OSC and MIDI messages from interfaces created using Interface.js