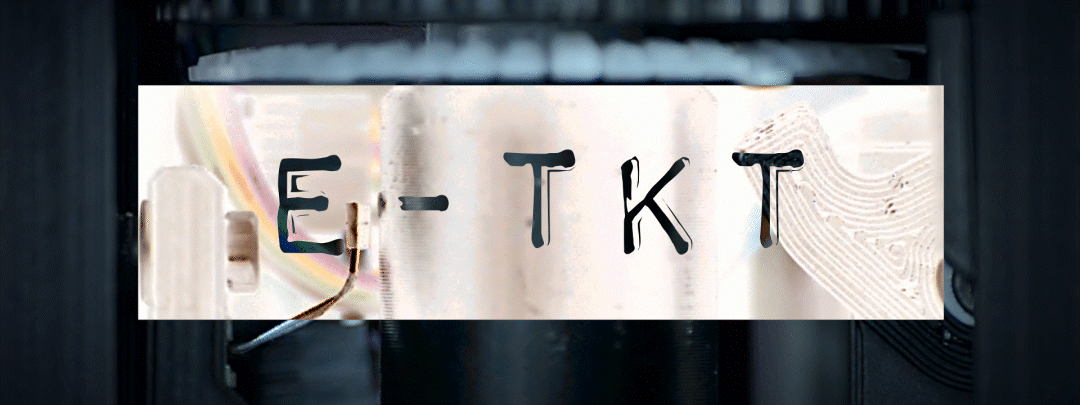
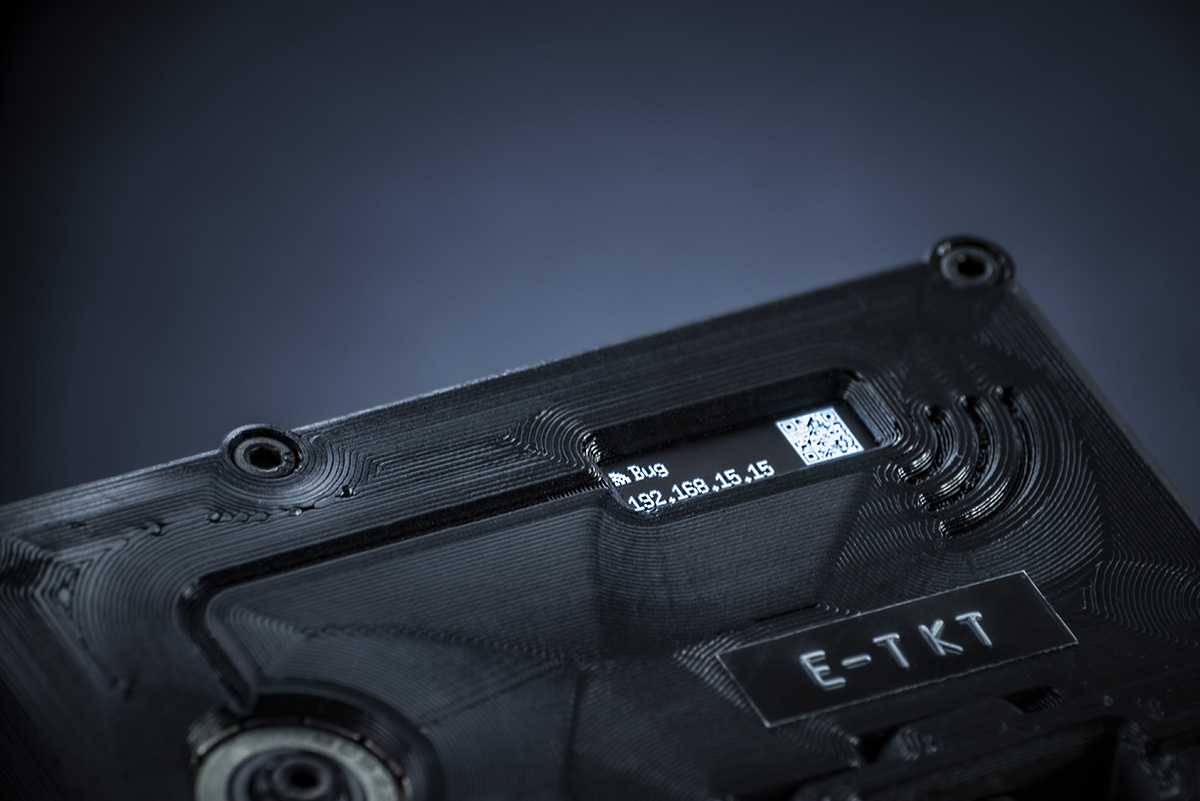
E-TKT
 E-TKT copied to clipboard
open source embossed label maker
E-TKT: anachronic label maker
Andrei Speridião 2022 - http://andrei.cc
📰 news - August 2022
- E-TKT is a finalist at the Hackaday Prize 2022, in the Hack it Back category;
- Project of the week on Maker Update #289, by Donald Bell;
- It has also been featured at Hackaday, Make and Hackster;
- E-TKT is certified by OSHWA;
- A manufactured PCB is being developed and the files are already committed, but they are still a work in progress. Aka: not stable and with issues. I'm working on that at this moment. Meanwhile, please refer to this readme for reference on the previous model;
- Huge thanks to Wesley Lee for the assistance on the PCB design and manufacture!
🎯 To keep up with detailed updates, please stay tuned on the Hackaday page logs 🎯
table of contents
- what is it?
- why?
- how does it work?
- features
- components
- 3D printing
- to do
- process
- libraries
- license
🙃 what is it?
étiquette f (plural étiquettes)
"ticket, memorandum, attach, stick, pierce, sting, to be sharp, goad, puncture, attach, nail"
- tag, label
- prescribed behavior
E-TKT is a DIY label maker that mixes both old fashioned and contemporary technology to create something as simple as... Labels!

🤔 why?
TLDR: curiosity, technical challenge and of course organizing stuff.
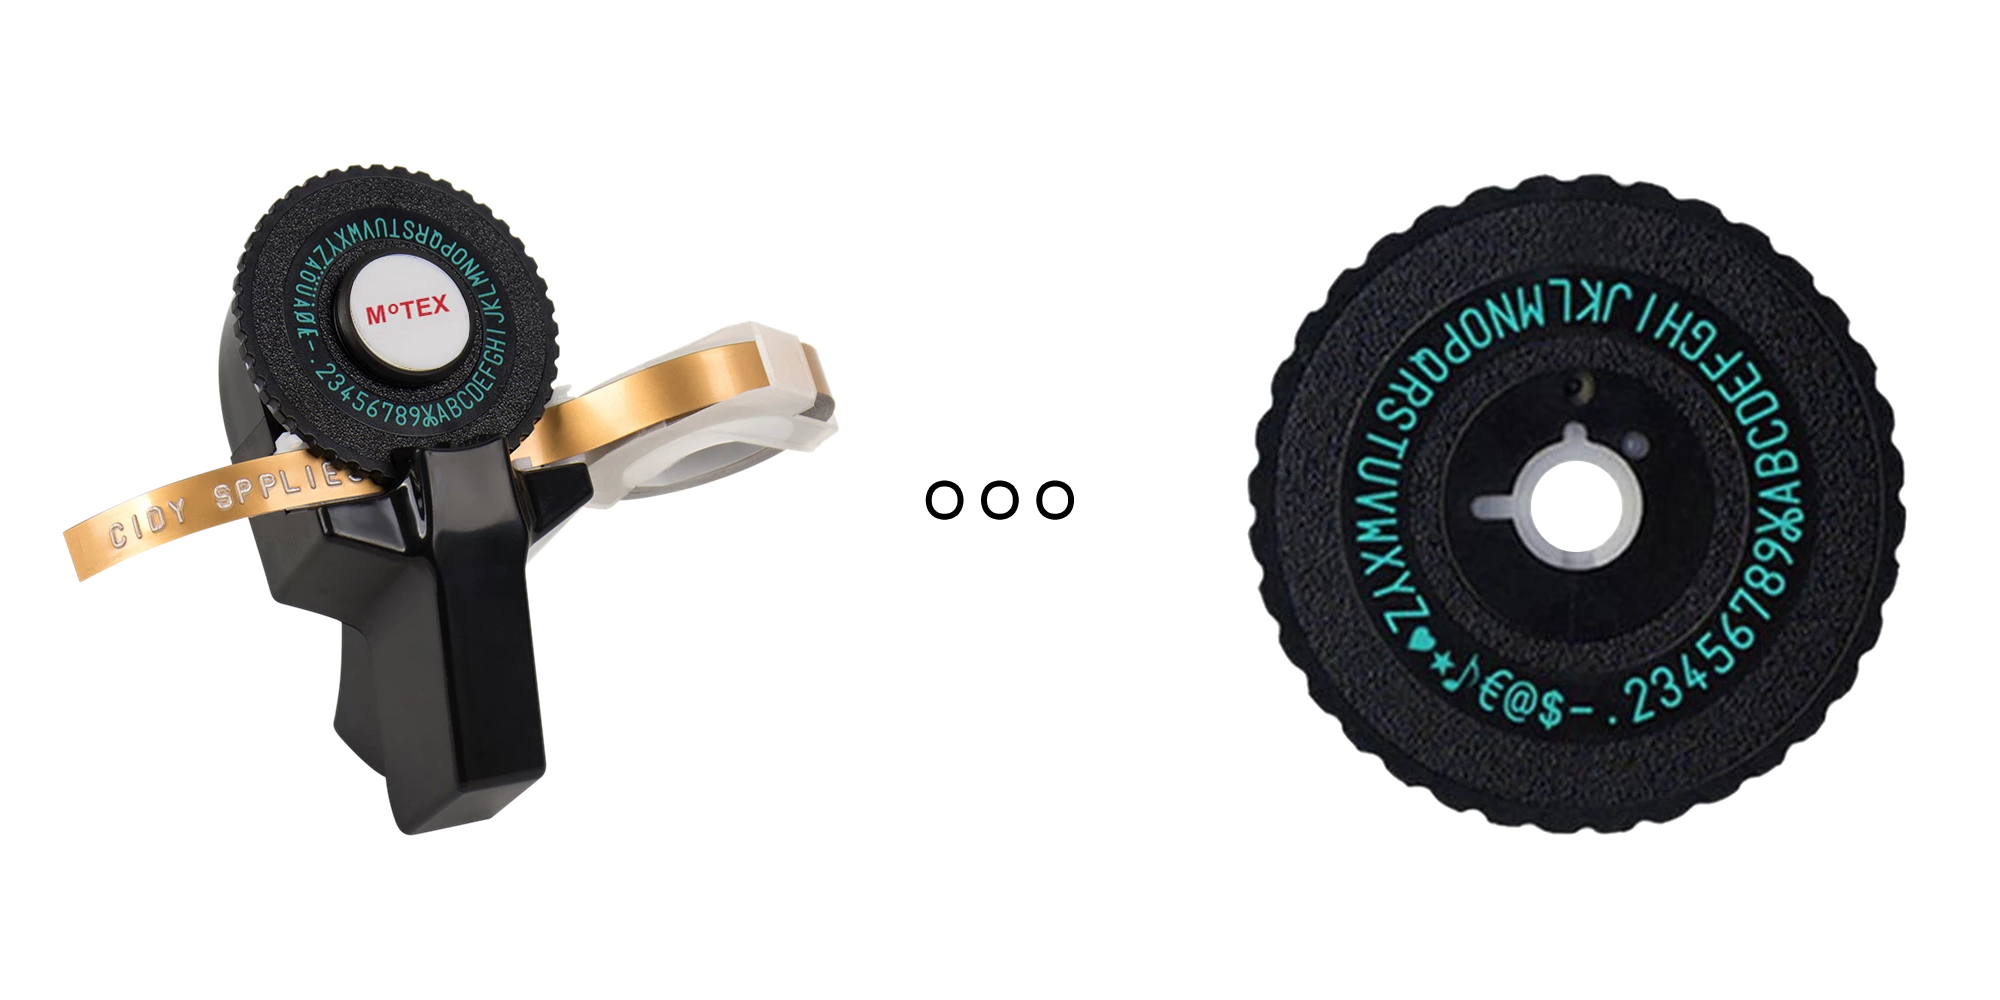
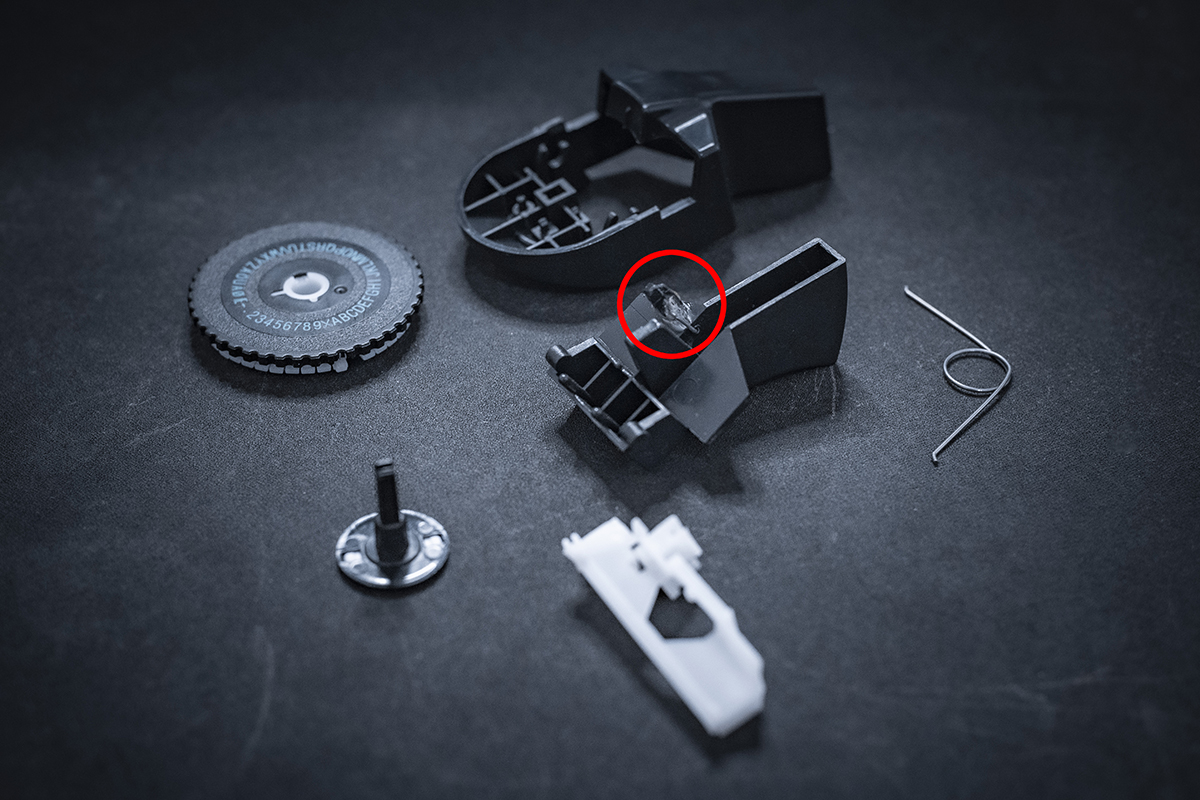
The initial spark for this project came from an ordinary manual labeling device that I bought to organize my workshop. I was VERY UPSET when I noticed that it was basically rubbish, getting broken and unusable after just a few operations. This little plastic hook (circled in red) grabs a gated cog (the white plastic part below) to feed the tape forward. I tried to fix and reinforce it, but the failure was unavoidable because there seems to be a critical flaw in the project: it is too weak for the lateral resistance imposed.
I knew I could easily buy a brand new modern electronic thermal label printer (such as Brother), but something about the vintage embossed finish fascinated me. Also, these new models use expensive proprietary cartridges that create a lot of trash after use.
After all, even though the pressing mechanism was poorly made, the characters' carousel was pretty sturdy and sharp. So I thought: can I build over its principles to create a functional device? If so, then why not make it physical-digital?
...why bother mixing an archaic printing method with current automation and connectivity features? Because why not? It was a technological blind spot to be explored!
...anachronism 🤓
I've later realized that it was what I’ve been attracted to. According to Wikipedia:
“An anachronism (from the Greek ἀνά ana, 'against' and χρόνος khronos, 'time') is a chronological inconsistency in some arrangements, especially a juxtaposition of people, events, objects, language terms and customs from different time periods”.
The point is: even though the process is digitalized, the resulting label is totally old school and there is no easy way of telling if it wasn't made in the traditional way.
⚙️ how does it work?

An ESP32 commands the label production and also serves an on demand web application to any device connected in a local network.
Neither internet is needed, nor installing any app.
The whole process of connecting the E-TKT machine to a local network and then launching the app is aided by a small OLED display that provides instructions and a dynamically generated QR code with the URL, according to the IP attributed by the WLAN.
The web app provides text validation, special characters, a preview of the exact size of the tape, an option to select the desired lateral margins and also real-time feedback during the printing (also present on the device screen). There are also commands for attaching a new reel, manually feeding and cutting the tape.
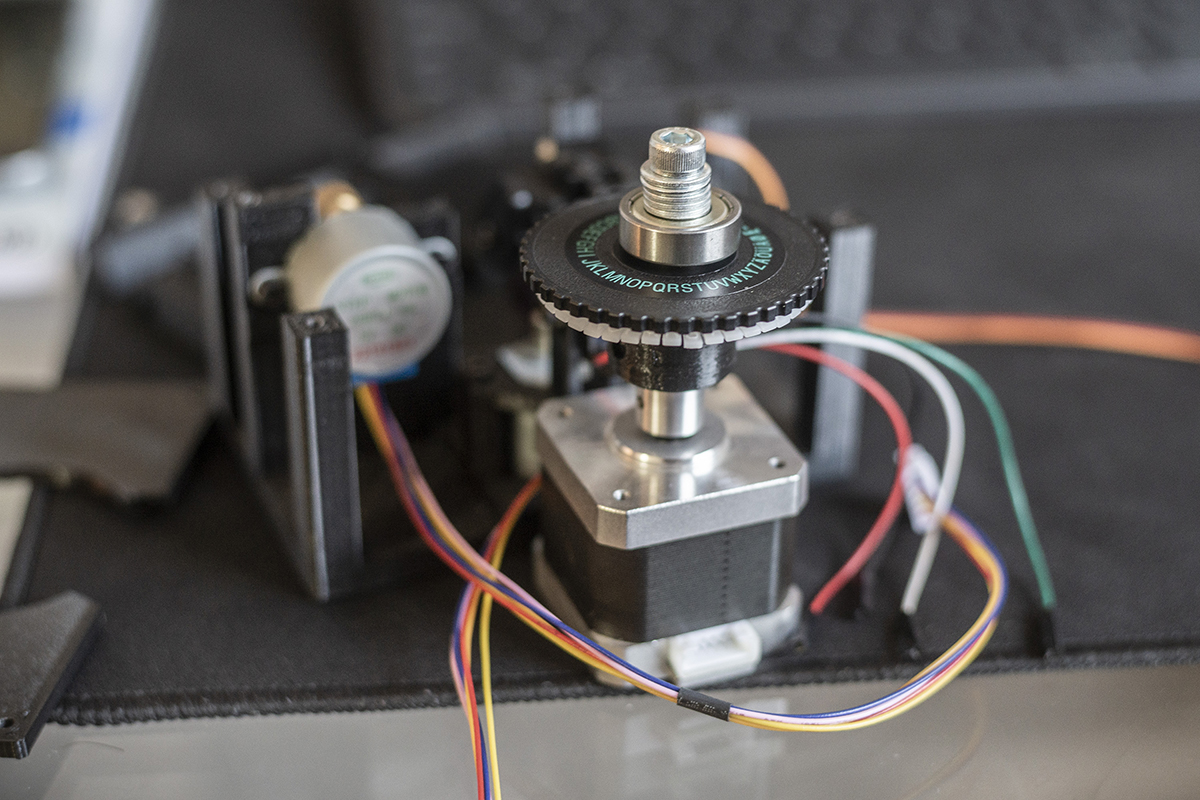
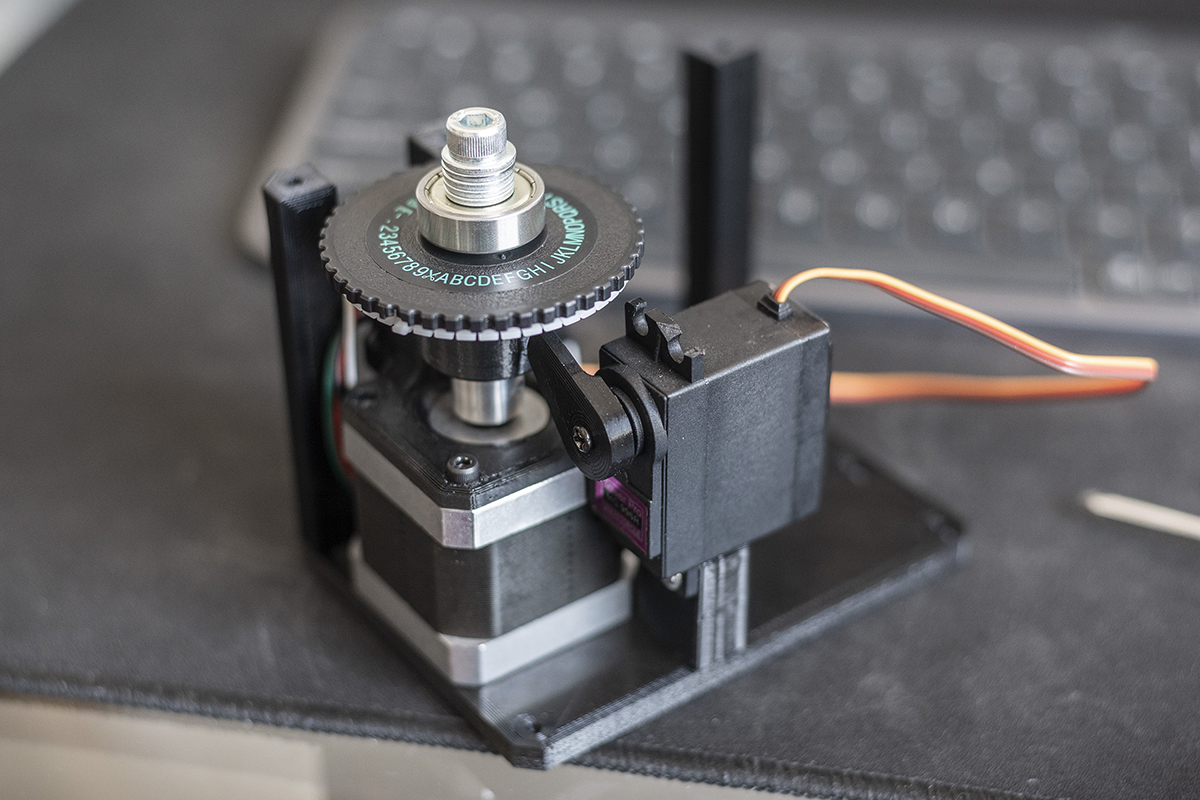
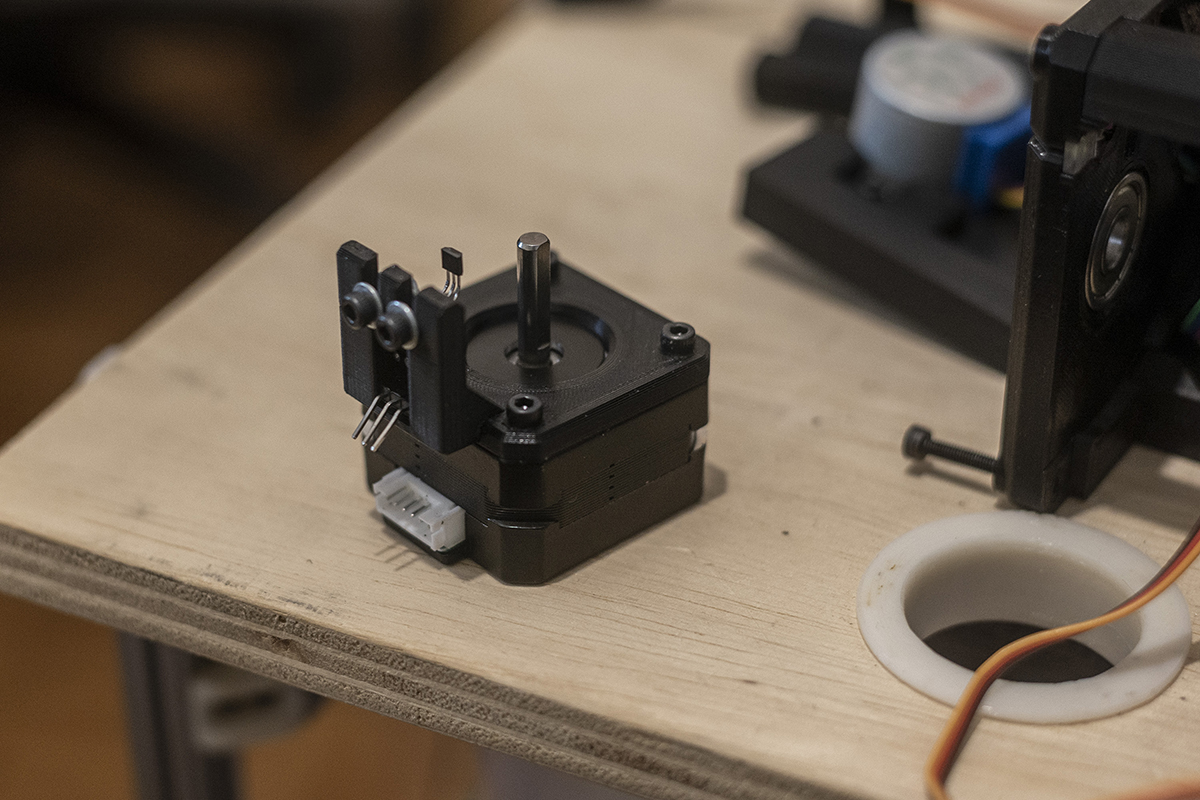
The label production itself uses the same mechanical principles as the original machine did, but is now automated. A stepper motor feeds the tape while another selects the appropriate character on the carousel according to a home position acquired by hall sensor. Then a servo motor imprints each character by pressing the carousel to the tape. That happens successively until the end of the desired content, when there is a special character position to cut the label. A light blinks to ask for the label to be picked.
💡 features
🌟 highlights
- No need for internet, app installation, data cables or drivers;
- Use from any device that is connected to a local network and has a web browser: desktop, tablet, smartphone;
- Compatible with ubiquitous and cheap 9mm generic tape (DYMO-compatible);
📱 web app

- Instant preview: what you see is what you’ll get;
- Real time check for character validity;
- Label length estimation;
- Margin modes: tight, small (1 space each side) or full (max input length);
- Buttons for special characters: ♡ ☆ ♪ $ @
- Reeling function: for when a new tape reel must be installed;
- Manual commands: feed & cut;
🔌 device


- Minimum label size to allow for picking it up;
- OLED screen + LED feedback:
- Instructions for configuring the wifi;
- QR code/URL for easily accessing the web app;
- Real time progress;
🧩 components
The estimated cost is around $70 (USD) without shipping, as of May 2022.
| # | TYPE | SUBSYSTEM | PART - DESCRIPTION | QTY | REF |
|---|---|---|---|---|---|
| 1 | structure | - | 3D print filament - PETG (~200g used) | 0.2 | link |
| 2 | structure | - | screw - M3x40mm | 1 | link |
| 3 | structure | - | screw - M3x20mm | 17 | link |
| 4 | structure | - | screw - M3x18mm | 3 | link |
| 5 | structure | - | screw - M3x16mm | 2 | link |
| 6 | structure | - | screw - M3x8mm | 6 | link |
| 7 | structure | - | screw - M3x6mm | 10 | link |
| 8 | structure | - | screw - M4x12mm | 1 | link |
| 9 | structure | - | hex nut - M3 | 10 | link |
| 10 | structure | - | washer - M3 | 9 | link |
| 11 | structure | - | silicone pad feet - 8x2mm | 4 | link |
| 12 | mechanic | extruder | spring - 7mm ⌀ x 6mm length | 1 | link |
| 13 | mechanic | carousel | pressing carousel - MOTEX / CIDY | 1 | link |
| 14 | mechanic | carousel | bearing - 608ZZ | 1 | link |
| 15 | mechanic | extruder | bearing - 623ZZ | 2 | link |
| 16 | mechanic | extruder | extruder gear - MK8 40 teeth / 5mm axis | 1 | link |
| 17 | electronic | - | dual side prototyping PCB - 0.1" pitch - 50x70x1.6mm | 1 | link |
| 18 | electronic | carousel | hall sensor - KY-003 | 1 | link |
| 19 | electronic | carousel | stepper motor - NEMA 17HS4023 | 1 | link |
| 20 | electronic | carousel | stepper driver - A4988 | 1 | link |
| 21 | electronic | extruder | stepper motor (28BYJ-48 5V) & driver (ULN2003) | 1 | link |
| 22 | electronic | press | servo - Towerpro MG-996R | 1 | link |
| 23 | electronic | carousel | neodymium magnet - 2mm ⌀ x 3mm length | 1 | link |
| 24 | electronic | - | ESP32 WROOM nodeMCU | 1 | link |
| 25 | electronic | level | 4-channel I2C-safe Bi-directional Logic Level Converter - BSS138 | 1 | link |
| 26 | electronic | UI | OLED screen - 128x32px 0.91" | 1 | link |
| 27 | electronic | UI | LED - white PTH 2x5x7mm square | 2 | link |
| 28 | electronic | power | step down - 6V - LM7806 | 1 | link |
| 29 | electronic | power | power supply - 7V 5A | 1 | link |
| 30 | electronic | power | DC-005 Power Jack Socket | 1 | link |
| 31 | electronic | wifi reset | tact switch - 6x6x4.5 | 1 | link |
| 32 | electronic | - | wiring - solid (prototype) | 1 | link |
| 33 | harness | - | USB type-A to micro-B data cable | 1 | link |
| 34 | harness | - | wiring (harnesses) - flexible, flat | 1 | link |
| 35 | harness | - | header jumper connector | 1 | link |
| 36 | harness | - | male header - 0.1" pitch | 2 | link |
| 37 | harness | - | female header - 0.1" pitch | 2 | link |
| 38 | harness | - | female connector - 8 pin 0.1" pitch dupont | 1 | link |
| 39 | harness | - | female connector - 3 pin 0.1" pitch dupont | 4 | link |
| 40 | harness | - | female connector - 4 pin 0.1" pitch dupont | 2 | link |
| 41 | consumable | - | label tape - 9mm DYMO compatible | 1 | link |
⚡ electronics / schematics

Power
- 7-12v to be provided by an external power supply with at least 35w to deal with servo peaks current while pressing the label. It supplies the stepper drivers directly.
- 6v out of the L7806 step down and is provided for both the servo and hall sensor.
- 3.3v is provided by the ESP32 WROOM board (as in its logical ports).
Logic Level
- As the ESP32 uses 3.3v logic, we need this conversion for parts that are running on higher voltage (servo and hall sensor).
Press
- The servo uses 6v, higher voltages tend to damage it.
Carousel
- NEMA stepper, driver and a hall sensor to match the position origin.
Wifi reset
- A tact button that when pressed while booting, clears the saved credentials.
Feeder
- Reduced stepper motor along with its standard driver.
User interface
- Running on 3.3v an I²C OLED display and two LEDs (no need for resistors).
🧵 3D printing
16 parts in total, using approx 200g of PETG filament.

📐 All the .stl provided are in the correct orientation for optimal printing:
- A_bottom
- B_wall (support)
- C_wall_track (support)
- D_pillar_1
- E_pillar_2
- F_pillar_3
- G_pillar_4
- H_pillar_5
- I_top (support only in the K_top_tapefeed area)
- J_top_screenholder
- K_top_tapefeed (support)
- L_caroulsel_cube
- M_carousel_hallholder
- N_carousel_coupling_1
- O_carousel_coupling_2
- P_press
🎛️ Settings
- Layer height: 0.25mm
- Infill: 20%
- Wall line count: 3 + 1 (Cura usually adds the later together with the infill)
- Top/bottom layers: 4
🛠️ to do
- [ ] Bugfix
- [ ] Manufactured PCB
🌑 process 🌘🌗🌖🌕
I - Experiment (Mar/2021)


- Using Arduino mega, communication via serial.
- Carousel homing with infrared sensor + one missing “teeth” led to inconsistent results and misalignment.
- Testing with SG-90 servo, but it was too weak to press the tape.
II - Communication (Mar/2021)

- Experiments using ESP8266 with self served app + receiving commands, still isolated from the main functionality.
- Wifi manager.
- First sketches for the web app user interface.
III - Printing Proof (Mar-Jun/2021)


- Stronger MG-996R servo resulted on successful tag printing.
- Hall sensor for homing with precision.
- Carousel direction on clockwise only to avoid tape screwing.
- Migration for the ESP32.
- Dual core tasks: one serves the network/app and the other controls all physical operations.
IV - Consistency and Usability (Sep-Oct/2021)


- More compact device, with smaller stepper motor for the carousel.
- Tested using NFC to open web app on smartphone, failed (security standards?).
- OLED display to help on configuration and feedback.
- QR code as an alternative to quickly open web app.
- Improvements on web app usability and visuals.
V - Optimization, Extras and Documentation (May/2022)
- Implemented special symbols.
- Few printing optimizations.
- Documentation with texts, schemes, photos and video.
🦝 - Extras
🔤 label printing improvements along the way
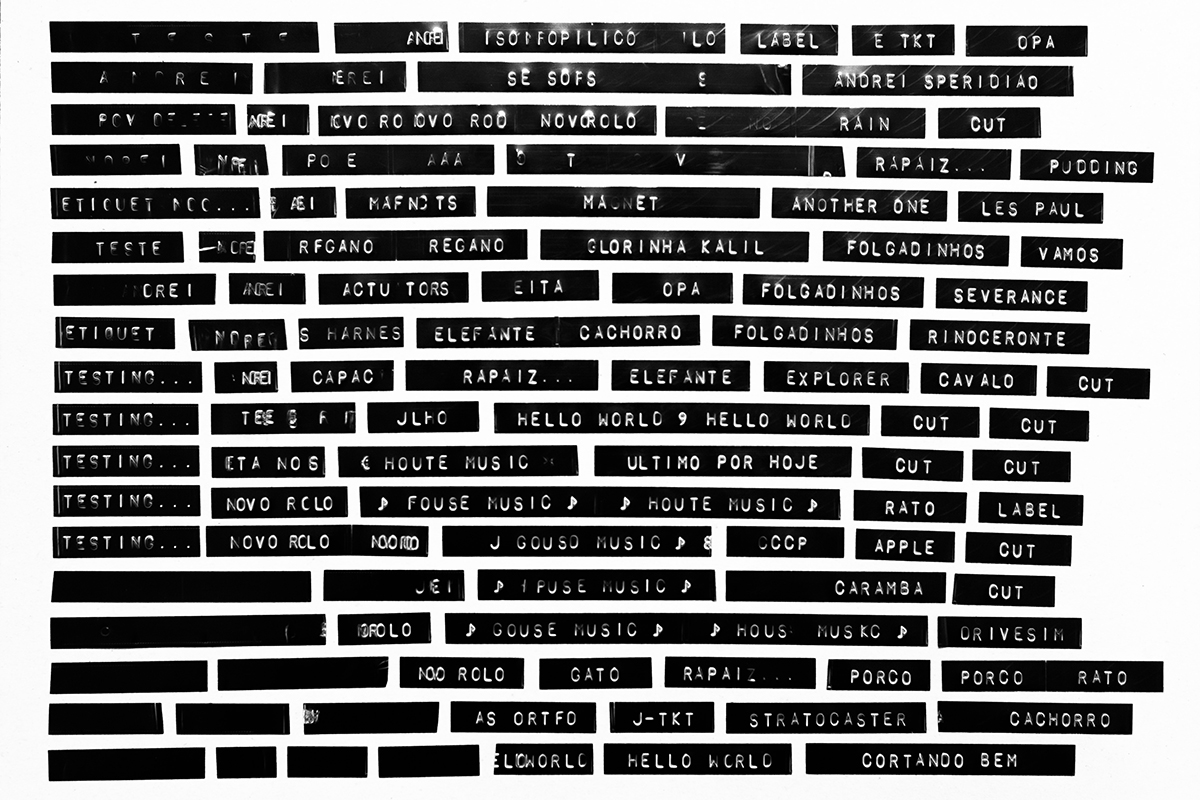
🤸 all the 3d printed iterations

📚 libraries
Framework: Arduino
Environment: NODEMCU-32s @3.3.2
- waspinator/[email protected]
- madhephaestus/[email protected]
- ottowinter/[email protected]
- alanswx/[email protected]
- olikraus/[email protected]
- ricmoo/[email protected]
⚖️ license
MIT @ Andrei Speridião
If you ever build one, I would love to know ;)