c-ray
 c-ray copied to clipboard
c-ray is a small, simple path tracer written in C

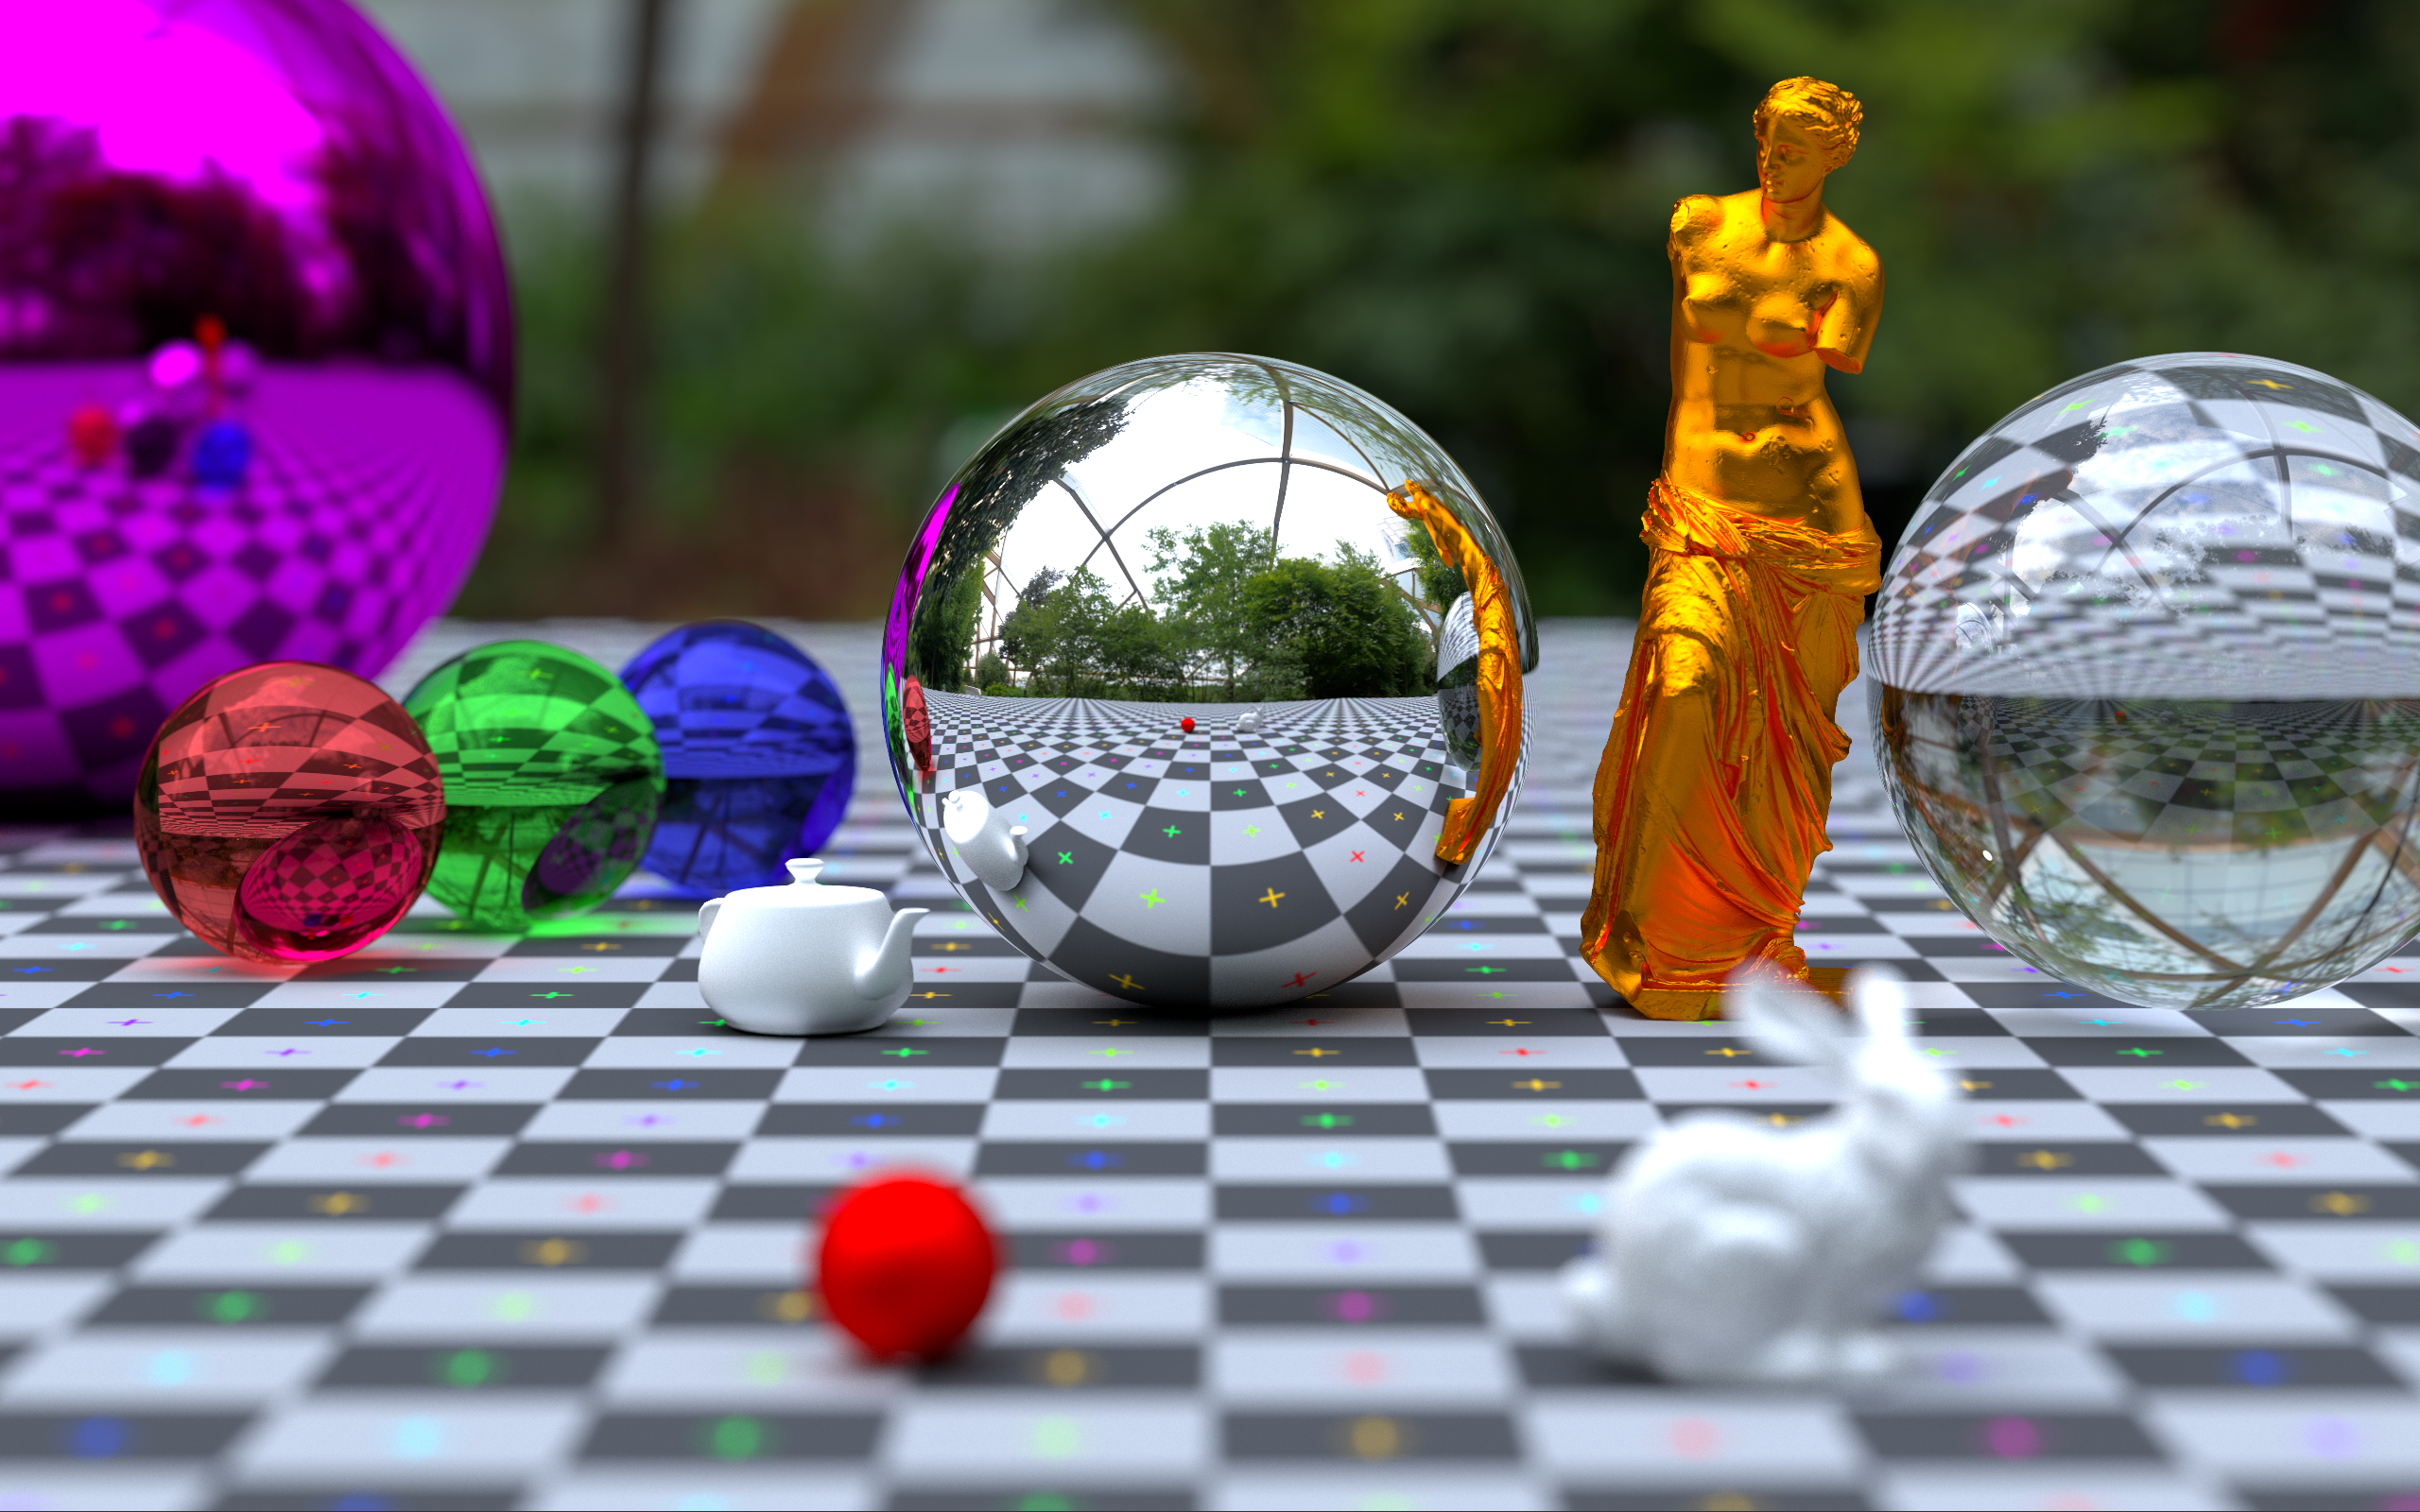
Example renders

(1000 samples, 1920x1080, 512 max bounces, 26min, scene by Scott Graham)
(2500 samples, 2560x1600, 512 max bounces, 43min)
Status
![]()
Synopsis
C-ray is a research oriented, hackable, offline CPU rendering engine built for learning. The source code is intended to be readable wherever possible, so feel free to explore and perhaps even expand upon the current functionality. See the contributing section in the wiki for more details.
C-ray currently has:
- Cluster rendering support (on *nix systems)
- A node-based material system
- A simple unidirectional Monte Carlo integrator
- Real-time render preview using SDL2
- Easy scene compositing using a JSON interface
- Multithreading (using pthreads or WIN32 threads)
- Wavefront OBJ support
- Object instancing
- PNG and BMP file output
- Two levels of BVH acceleration structures (by @madmann92)
- Antialiasing (MSAA)
- HDR environment maps for realistic lighting
- Gouraud interpolated smooth shading
- Benchmarking metrics
The default integrator supports:
- Metal
- Glass
- Lambertian diffuse
- Plastic
- Triangles and spheres
- Depth of field
- Russian Roulette path optimization
- Diffuse textures
- Normal maps
Things I'm looking to implement:
- Proper physically based materials in place of the current ad-hoc implementations
- Built a more robust API with an interactive scene state.
- Some procedural textures
- Python API wrapper
- Volumetric rendering
- Subsurface scattering
- Spectral rendering
Compatibility
C-ray has been verified to work on the following architectures
- x86 & x86_64 (Primarily developed on x86_64)
- ARMv6, ARMv7 and ARMv8 (Various Raspberry Pi systems)
- PowerPC 7xx and 74xx (PowerPC G3 and G4 systems)
- MIPS R5000 (1996 SGI O2)
- SuperSPARC II (1992 SUN SparcStation 10)
Usage
Please see the Wiki for details on how to use the JSON scene interface.
Dependencies
- CMake for the build system (Optional, a basic makefile is provided for *nix systems)
- SDL2 (Optional, CMake will link and enable it if it is found on your system.)
- Python3 (Optional, it's used for some utility scripts)
- Standard C99/GNU99 with some standard libraries
All other dependencies are included as source
Installation
macOS: Either follow these instructions, or the instructions for Linux below. Both work fine.
- Install SDL2 (See installing SDL below)
- Open the .xcodeproj file in Xcode
- Edit scheme by clicking
C-Rayin top left, make sure 'Use custom working directory' is ticked and set it to the root directory of this project. - Go into the
Argumentstab, and add by clicking+. Type in./input/scene.json, then click close - Build&Run with
CMD+R
Linux:
- (Optional) Install SDL2 (See installing SDL below)
- (Optional, this tends to work nicer) Run
cmake ., or optionallycmake . -DNO_SDL2=Trueto disable SDL2. - Run
maketo build the project - Run binary:
bin/c-ray input/scene.json(Making sure the working dir is the root directory). You can also pipe files intoC-rayand it will read from there. This is useful for scripts that invokeC-ray. Example:cat input/scene.json | bin/c-rayNote: Reading the json fromstdinassumes that the asset path is./, can be specified with--asset-path
Windows:
- Install Build Tools for Visual Studio
- Optional: Download SDL2 Development libaries from here and extract: https://www.libsdl.org/download-2.0.php (https://www.libsdl.org/release/SDL2-devel-2.0.8-VC.zip)
- Open a
Developer Command Prompt for VS 2019, navigate to where you cloned c-ray and set path to SDL2DIR (where you extracted the files to, should have a few folders like 'include' and 'lib'):set SDL2DIR=E:\sdl2\SDL2-devel-2.0.8-VC\SDL2-2.0.8 - Run cmake:
cmake -G "Visual Studio 16 2019" . - (Optional) Copy your
SDL2.dllintobin\Release\andbin\Debug\ - Build the generated solution:
msbuild c-ray.sln /p:Configuration=Release - Run:
bin\Release\c-ray.exe input\scene.jsonortype input\scene.json | bin\Release\c-ray.exe
Usage
All the .json files in input/ are test scenes provided with c-ray, assets for those scenes are (mostly) bundled with the repository as well.
If you make a cool scene and have Python3 installed, you can bundle up the scene into a portable .zip file using the scripts/bundle.py script.
Installing SDL
On macOS, use homebrew to install SDL. brew install sdl2
On Windows, download from https://www.libsdl.org/release/SDL2-devel-2.0.8-VC.zip
On Linux using APT, run sudo apt install libsdl2-dev
Tests
You can run the integrated test suite by invoking the test script like this:
./run-tests.sh
This will compile C-ray with the correct flags, and then run each test individually in separate processes. If you want to run them in a shared process, do
./bin/c-ray --test
In either case, you will get a log of all the tests, and their status.
Credits
3rd party libraries included in this project
lodePNG PNG compression library: http://lodev.org/lodepng/
stb_image.h by Sean Barrett: https://github.com/nothings/stb/blob/master/stb_image.h
SDL2: https://www.libsdl.org/index.php (Optional)
JSON parsing library: https://github.com/DaveGamble/cJSON
PCG random number generator: http://www.pcg-random.org
Contributors
- Huge thanks to @madmann91 for the new BVH accelerator and overall ~60% performance improvement!
Please file an issue detailing any improvements you're planning on making. I openly welcome contributions!
You can also ping me on Discord: vkoskiv#3100