circuitpython-online-ide-1
 circuitpython-online-ide-1 copied to clipboard
CircuitPython online IDE is a browser-based IDE for CircuitPython supported microcontrollers. No installation needed. Handy and powerful.
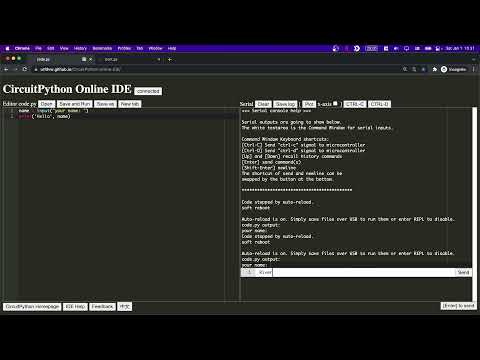
CircuitPython online IDE
Open the IDE: https://urfdvw.github.io/CircuitPython-online-IDE/
Why
The goal is to provide a CircuitPython IDE with Zero-Setup, that can be helpful for
- anyone that wants to start a project quickly
- people who are working on public computers
- remote education where teachers don't expect students to install anything by themselves
Features
- Runs on any device with the Chrome browser, including Chromebooks, or Chromium based browsers such as MS Edge
- Serial Console for communication and Read-Evaluate-Print loop (REPL)
- Serial data plotter
- Code editor with Python highlighting
- Editor's REPL mode shortcuts
- History command recall
- Auto completion
- Auto change shortcuts in MacOS
- Multiple file tabs
- 中文界面
Workflow (a.k.a. How to use)
This guide assumes that CircuitPython is already installed. About how to install CircuitPython to supported devices, please check CircuitPython Website.
For the latest updates about this IDE, please subscribe to the youtube channel called CircuitPythonic
Or follow Twitter account River Wang
First of First
- Plugin your CircuitPython supported board, and make sure it shows up as a drive.
- There should NOT be a
.uf2file in the drive.- If so, that means you are in boot mode, where CircuitPython is installed.
- To exist boot mode, try:
- clicking the
resetbutton on the board - Plug and unplug the board
- clicking the
- There should NOT be a
- If there is not a
code.pyormain.pyfile, create a text file calledcode.py.- This file can be downloaded from our IDE by click on
Save as
- This file can be downloaded from our IDE by click on
- Open the CircuitPython online IDE. Then connect your CircuitPython supported board by click the
Connectbutton
Script Script mode
- Once plugin the CircuitPython supported board, the initial mode is 'Script mode' which will run the saved script file
code.pyormain.py. - To switch back to 'Script mode' from 'REPL' mode, Click on the
CTRL-Dbutton on the UI, whitch sends the0x04signal to the board. - Click on the
Openbutton on the UI to open the code file on the CircuitPython supported board.- Opening the file will remove everything in the Editor. Click on the
Save asbutton to backup the code before opening it if necessary
- Opening the file will remove everything in the Editor. Click on the
- After editing, click on
Save and Runbutton on the UI orCtrl-Son the keyboard to save the code to the original file.- This will trigger the board to reset and start to run the code.
- If necessary, click on the
Save asbutton to download the edited code as a separate file. - Command window can be used for serial communication in the 'Script mode', such as feeding inputs when
input('message')is used.
REPL mode
- Click on the
CTRL-Cbutton on the UI (which sends the0x03signal to the board) to start the REPL mode.- You might need to click for more than one time. Stop until you see
>>>in the terminal.
- You might need to click for more than one time. Stop until you see
- Write one or multiple lines of code in the Command window. Hit
Enteron the keyboard to send the command(s) to the board.- When writing multiple lines, use
Shift-Enterto create a newline - The button on the right bottom in the UI is used to switch the keyboard shortcuts of 'send' and 'newline'.
- When writing multiple lines, use
- In the Editor: write one or multiple lines of code.
- Hit
Shift-Enteron the keyboard to run the current line.- The cursor will move to the following line, so keep on hitting to run a sequence of lines.
- Select multiple lines of code, then hit
Shift-Enteron the keyboard to run the selected code. - Hit
Ctrl-Enteron the keyboard to run the current 'Cell' in REPL.- Cells are multiple lines of codes starts with
#%%.
- Cells are multiple lines of codes starts with
- Hit
- In the Command window, use keyboard button
UpandDownto recall command history. - Click on the
Save asbutton on the Editor UI to download the code in the Editor as a separate file. - Click on the
Save logbutton on the Serial UI to download the serial conversation log as a text file.
Plot
- Click on the [Plot] button to toggle plot window
- You need to start the plot by serial output
startplot: xname y1name y2name ..., separated by space.- In python, this is done by
print("startplot:", "xname", "y1name", "y2name").
- In python, this is done by
- Plot data should immediately follow the start line in the serial output. Each line should contain the data of one timestep,
xdata y1data y2data ..., separated by space.- In python, this is done by
print(xdata, y1data, y2data), wherexdataand alike areintorfloatvariables.
- In python, this is done by
- Check the box [x-axis] in the IDE to use the first dimension as the x-axis. Otherwise, all dimensions of the data are considered as paralleled y-axes, and the x-axis on the figure is going to be the index.
- Plot can be real-time or off-line.
- Example python code for plotting:
#%% imports
import math
from time import sleep
from time import monotonic as time

#%% set
time_start = time()

#%% loop
# the start indicator and labels
# separated by `,` in `print()`
print('startplot:', 't*cos(t)', 't*sin(t)')
for i in range(100):
    sleep(0.1)
    t = time() - time_start
    # print the data for plotting
    # dimensions separated by `,` in `print()`
    print(t*math.cos(t), t*math.sin(t))
# please check and uncheck the [x-axis] box to see the difference.
Keyboard Shortcuts
MacOS shortcuts in ()
Editor
- [Ctrl-S] ([Cmd-S]): Save the file
- This will trigger reset and run the saved Script
- [Ctrl-Space]: auto completion
REPL Mode Specific:
- [Ctrl-Enter] ([Cmd-Enter]) RUN the current Cell
- Cells are multiple lines of codes start with
#%%
- Cells are multiple lines of codes start with
- [Shift-Enter] RUN the current line of code
- or selected lines of code
- [Alt-Enter] ([Option-Enter]) RUN and REMOVED the current line of code
- or selected lines of code
- [Alt-Up] and [Alt-Down] ([Option-Up] and [Option-Down]) RECALL Command Window history
- [Alt-Shift-Enter] ([Option-Shift-Enter]) GRAB Command Window content to Editor
System Related:
- [Ctrl-Shift-C] ([Ctrl-C]) Send "ctrl-c" signal to microcontroller
- [Ctrl-Shift-D] ([Ctrl-D]) Send "ctrl-d" signal to microcontroller
Command window
- [Ctrl-Shift-C] ([Ctrl-C]) Send "ctrl-c" signal to microcontroller
- [Ctrl-Shift-D] ([Ctrl-D]) Send "ctrl-d" signal to microcontroller
- [Up] and [Down] recall history commands
- [Enter] send command(s)
- [Shift-Enter] newline
- The shortcut of send and newline can be swapped by the button at the bottom.
Planned Features
- change unsaved indicator
- 中文帮助
References
This project is inspired by the following projects. Some codes are copied from them.
- https://github.com/sensebox/circuitpython-web-ide
- https://github.com/Mr-Coxall/CircuitPython-IDE