blog
 blog copied to clipboard
表单(Form)小结
介绍
这段时间做了个后台的前端项目。说实话,之前并没有做过后台的项目。在做了后台项目后,发现最重要的是要熟练掌握表单相关的技术。这篇文章将我所做的后台项目中用到的表单相关的知识做一个总结,也算是一种积累吧。:)
一个简单的表单示例
下面是一个简单的表单示例:
<form id="main-form" action="http://somesite.com/prog/adduser" method="post">
  <label for="name">姓名: </label>
  <input type="text" name="name" id="name"><br>
  <label>
  	性别:
		<input type="radio" name="sex" value="Male">男
  	<input type="radio" name="sex" value="Female">女<br>
  <label>
  <input type="submit" value="Send"> <input type="reset">
</form>
页面如图所示:
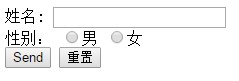
当我们点击send按钮时,就能向服务器端发送表单。点击重置按钮时,input中的value值将会是我们设置的默认值。 form的action属性值为服务端处理我们提交的表单的URI。 method是表单提交的方式。
input标签是表单中的控件,用户在input中输入的值,或者用户选择了某个radio选项的值就是这个控件的value值。当提交表单时,input中的name和value值编码后传给服务器端,服务器端解码后根据name和value键值对获取用户提交的信息。
表单提交的过程
成功控件
成功控件是能被提交给服务端的控件,每个成功控件都有其name已经value值,以被作为form数据的一部分传给服务器端。一个成功控件必须在form标签之中,并且有name值。
此外,成功控件还需满足以下条件:
- 控件不能设置为disabled。
- 如果form包含多个提交按钮,只有被点击的提交按钮才是成功控件。
- 被选中的checkbox才算成功控件。
- 被选中的radio才算成功控件。
- select选项,被选中的option才是成功控件,如果没有option被选中,那么这个select不是成功控件,将不被提交。
- 包含了文件的file控件才是成功控件。
注意:如果控件的display属性被设置为none,控件仍然可以是成功的。
提交表单
表单提交可以分为以下几步:
- 1、验证成功的控件,如上文所诉。
- 2、创建表单数据集,由成功控件的name和value组成的键值对序列。
- 3、编码表单数据集,编码方式由form元素的enctype属性来指定。
- 4、提交编码后的表单数据集。
对多个提交按钮,做不同提交任务的处理
我们经常会碰到这样的需求,一个页面中有多个不同的按钮,点击按钮时服务端做不同的处理。此时我们改如何处理呢? 一种方式是可以给提交按钮设置不同的name,服务端通过判断name来判断用户点击了哪个按钮,然后做相应的处理。另一种方式是给提交按钮设置相同的name,不同的value,服务端通过判断value值来判断用户点击了哪个按钮。
以上两种方式将判断的工作交给了服务端。对于前端,我们可以用ajax的方式提交表单来实现多个提交按钮的处理。用ajax提交的另一个好处是可以防止页面刷新或者跳转到action指定的页面。
如果用jQuery,我们可以这么提交:
$("#main-form").on("submit", function(e) {
  e.preventDefault();
  $.post(this.action, $(this).serialize());
});
用jQuery,如果想上传部分表单,我们可以这么提交
<div id="divCustomerInfo">
	<p>名称: <input type="text" name="CustomerName" /></p>
	<p>电话: <input type="text" name="CustomerTel" /></p>
</div>
$("#btnId").click(function(){
  $.ajax({
    url: "test.htm",
	type: "POST",
    data: $('#divCustomerInfo :text').fieldSerialize(),
    success: function(responseText){
      alert(responseText);
    }
  });
  return false;
});
利用H5的FormData对象,我们可以这么提交:
document.getElementById("main-form").onsubmit = function(e) {
  e.preventDefault();
  var f = e.target,
    formData = new FormData(f),
    xhr = new XMLHttpRequest();
  xhr.open("POST", f.action);
  xhr.send(formData);
}
对于jQuery,还有一个强大的插件jquery.form.js,利用这个插件,我们可以这么提交:
 $('.send-message').click(function(e){
  e.preventDefault();
  if(self.validateForm(VALIDATE_TYPE.TEST_MESSAGE)){
    $('#main-form').ajaxSubmit({
      url: '/message/send_test_message.htm',
      success: function(res){
        if(typeof res === 'string')
          res = JSON.parse(res);
        console.log(res);
        if(res.result === 'success'){
          $('.test-success').removeClass('hide');
        }
        else{
          alert(res.errorMsg);
          $('.test-success').addClass('hide');
        }
      },
      error: function(xhr, type){
        $('.test-success').addClass('hide');
        alert('提交测试失败,请重试!');
        console.log('Ajax error! ' + type);
      }
    });
  }else{
    $('.test-success').addClass('hide');
  }
});
利用ajaxSubmit,我们可以设置提交的url,以及成功和失败的回调函数,在处理业务时的确方便很多。而且不用手动序列化提交的表单数据。 ajaxSubmit还有一个强大的地方是能够处理文件的提交。
表单文件上传
下面是一个表单文件上传的例子:
<form action="/message/upload_image.htm" method="post" enctype="multipart/form-data" class="postimg-form">
  <div class="form-group">
    <input name="file" id="file" type="file" class="send-file"  style="display: inline-block;"/>
  </div>
  <div class="urlinput-wrap">
    <span>图片URL:</span>
    <input name="picurlList" type="text" value="$!{picurlList}"  class="img-url not-hidden"></input>
  </div>

  <button type="button">取消</button>
  <input type="submit" class="commit-changepic">确定</button>
</form>
对于文件上传,必须采用post方式,并且form元素的enctype需要设置为multipart/form-data。
表单的enctype一般常用的有两种:
-
application/x-www-form-urlencoded:
这是默认的编码方式。它只处理表单域里的value属性值,采用这种变法方式的表单会将表单域的值处理成URL方式。
-
multipart/form-data:
这种编码方式会以二进制流的方式来处理表单数据,这中编码方式会把文件域指定的文件内容也封装到请求参数里。
用form的submit提交文件,会导致刷新页面,或者无法在提交成功后在回调函数中处理相应的业务。
而一般的ajax无法满足文件的上传(HTML5提出了XMLHttpRequest对象的第二版,从此ajax能够上传文件了。)。所幸的是,ajaxSubmit可以支持文件的提交。
示例代码如下:
$('.commit-changepic').click(function(e){
  e.preventDefault();
  $('.postimg-form').ajaxSubmit({
    success: function(res){
      console.log(res);
      console.log(res.fileUrl);
      if(res.fileUrl){
        $('.poster-img').attr('src',res.fileUrl);
        $($('.img-url')[0]).val(res.fileUrl);
      }else{
        alert('图片上传失败!');
      }
    },
    error: function(res){
      console.log(res);
      alert('图片上传失败!');
    }
  });
});
用H5的FormData上传文件,示例如下:
if(window.FormData) {
var formData = new FormData();
// 建立一个upload表单项,值为上传的文件
formData.append('upload', document.getElementById('upload').files[0]);
	var xhr = new XMLHttpRequest();
	xhr.open('POST', $(this).attr('action'));
	xhr.onload = function () {
		if (xhr.status === 200) {
			console.log('上传成功');
		} else {
			console.log('出错了');
		}
	};
	xhr.send(formData);
}
ajaxSubmit上传文件的原理还不清楚(猜测可能使用iframe实现的),有空可以研究一下。。。
Hi, thanks for your interest. Sorry, we are running busy and were not able to update the huggingface demo. We recently released the new models and code. Please feel free to try it using this repo.