OnAirScreen
 OnAirScreen copied to clipboard
Multi purpose "OnAir Lamp" solution targeted for use in professional broadcast environments
OnAirScreen
Multi purpose "OnAir Lamp" solution targeted for use in professional broadcast environments http://saschaludwig.github.io/OnAirScreen/

![]()
Precompiled Linux/Win/Mac versions
If you need ready-to-run Linux/Win/Mac executables, please visit https://www.astrastudio.de/shop/.
I also have a RaspberryPi version and a ready-to-run RaspberryPi SD-Card image in my shop.
And if you need extended support, please contact me.
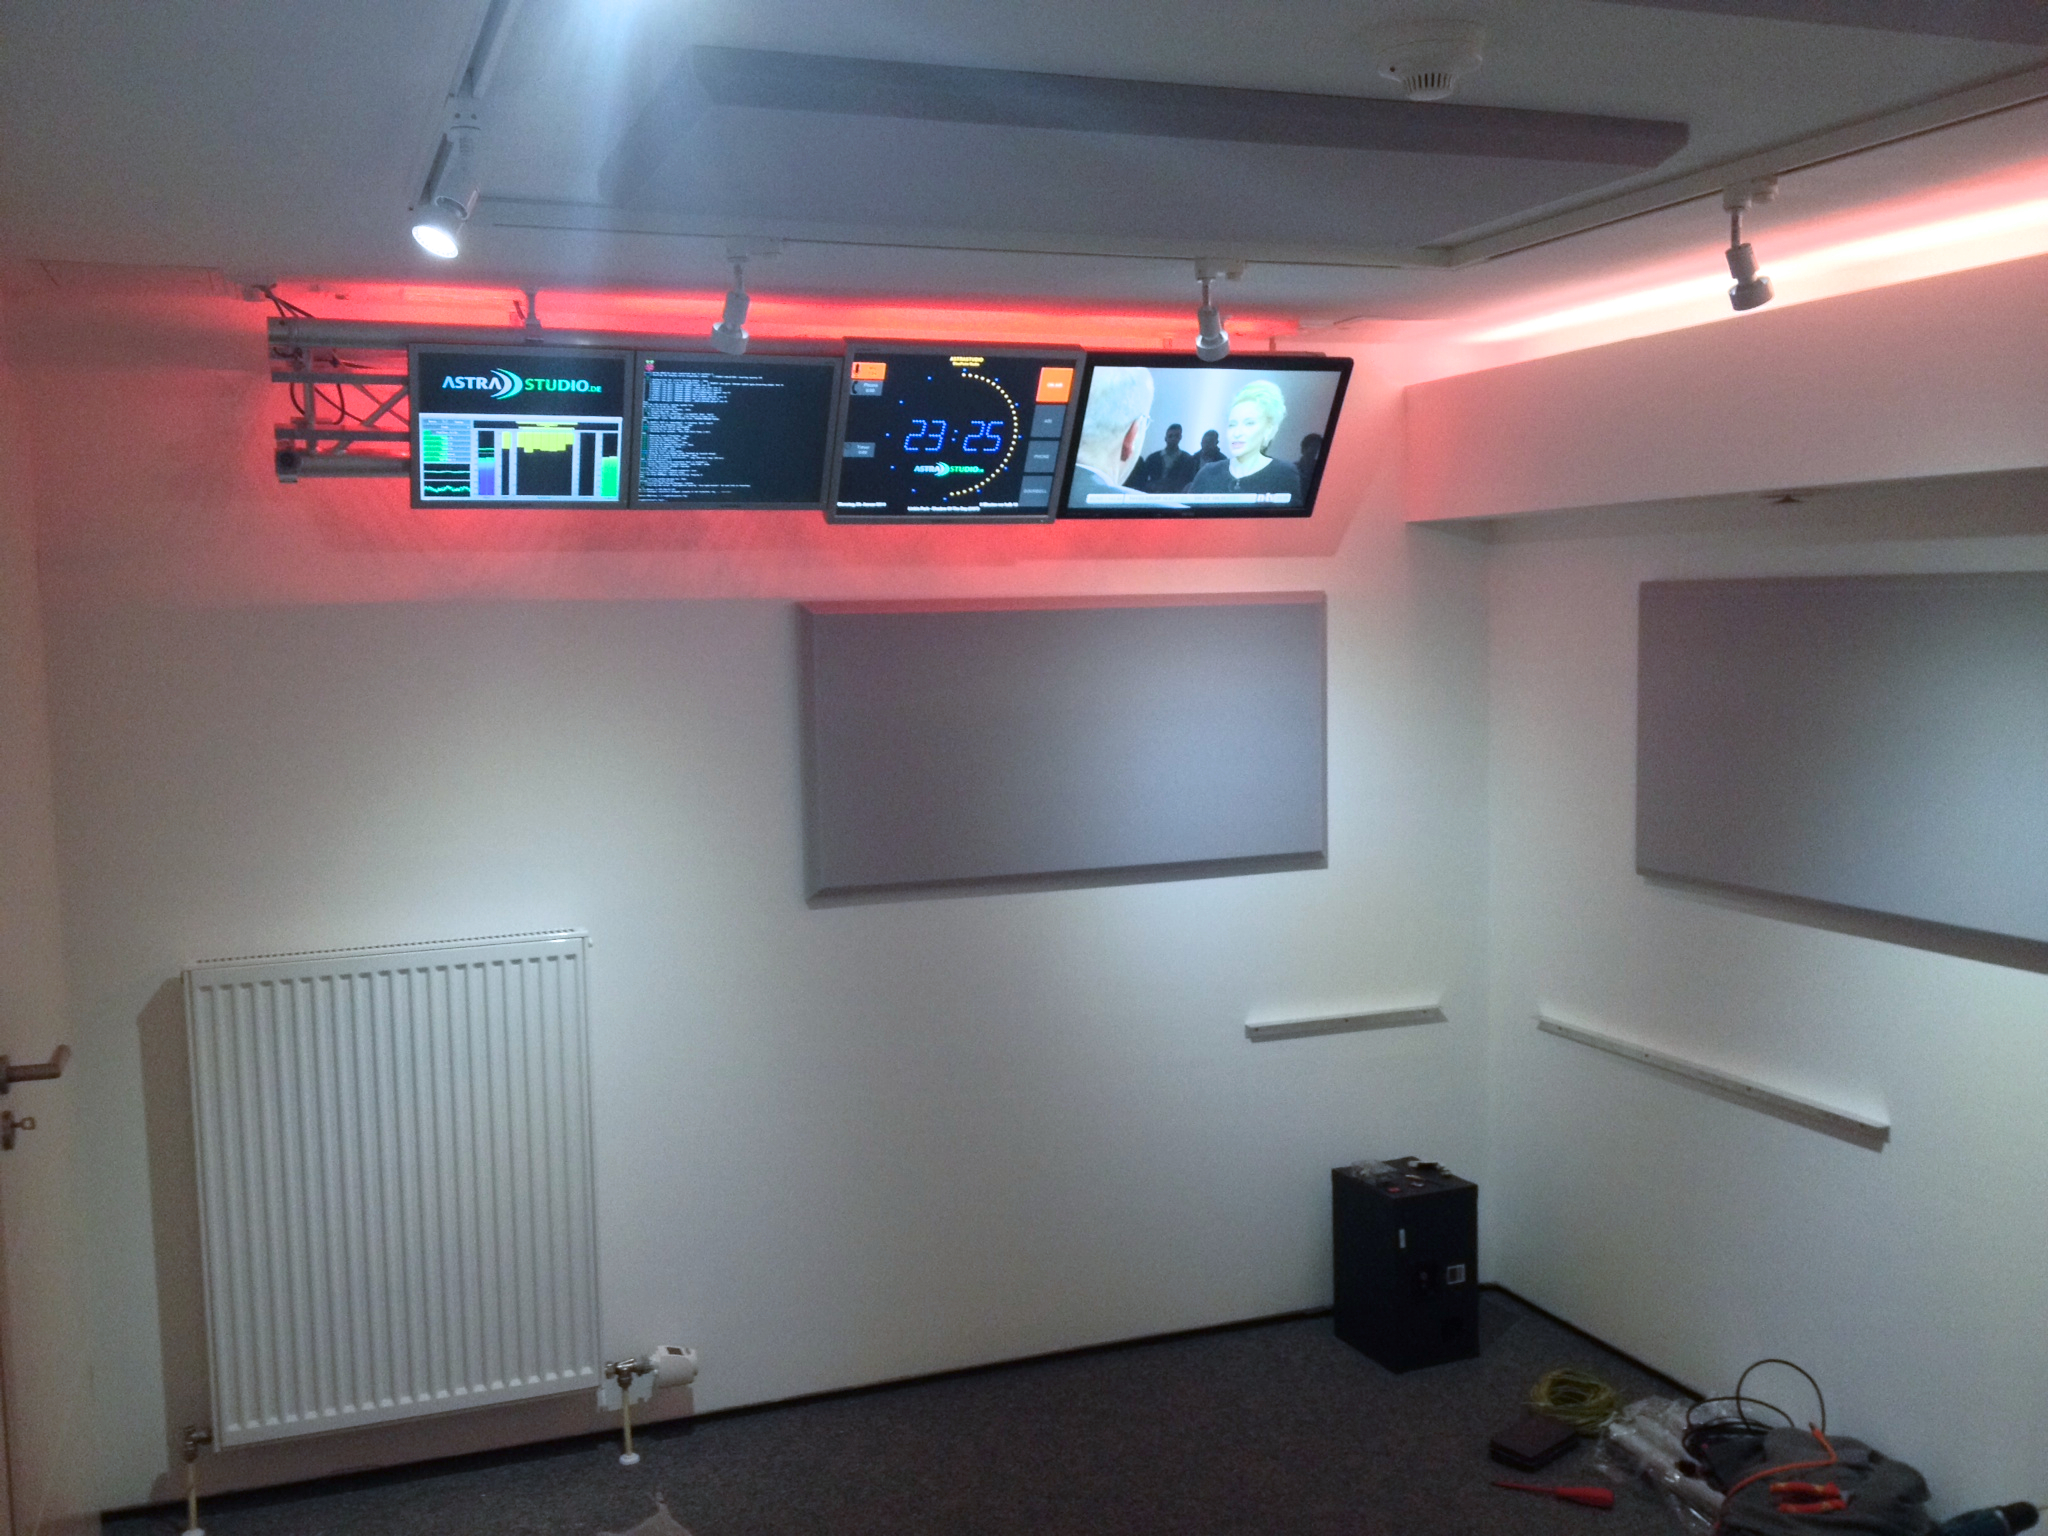
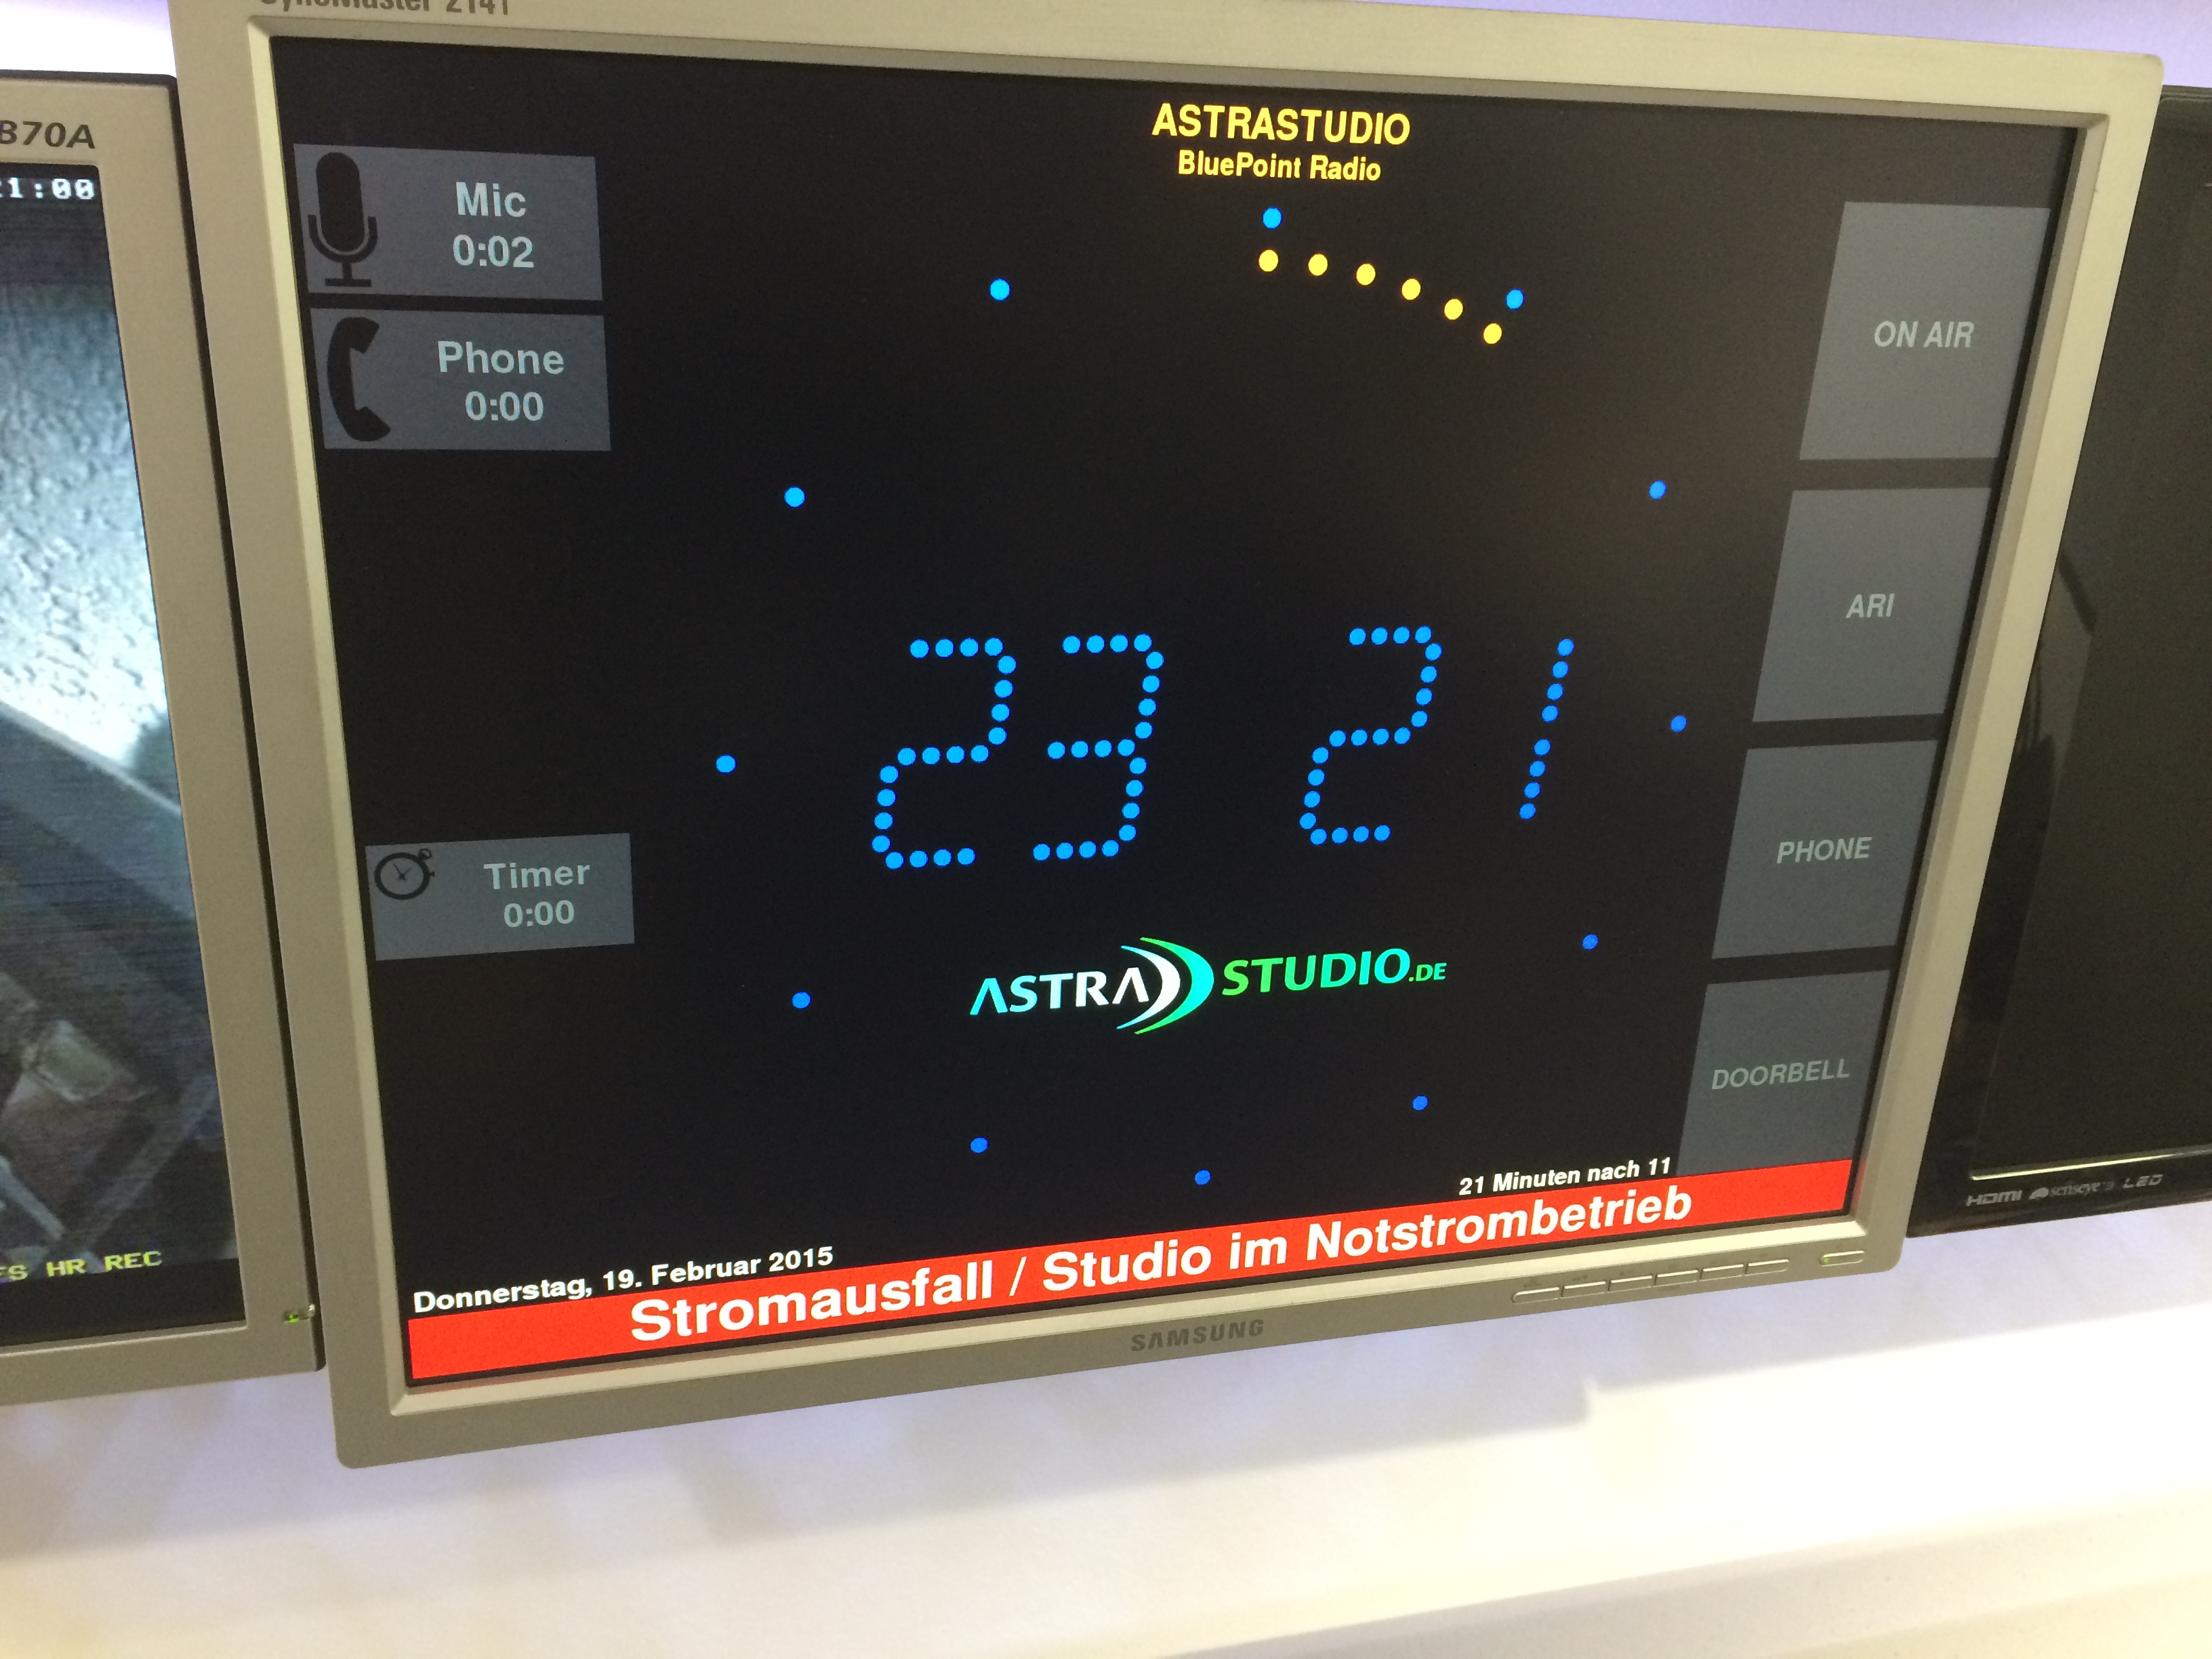
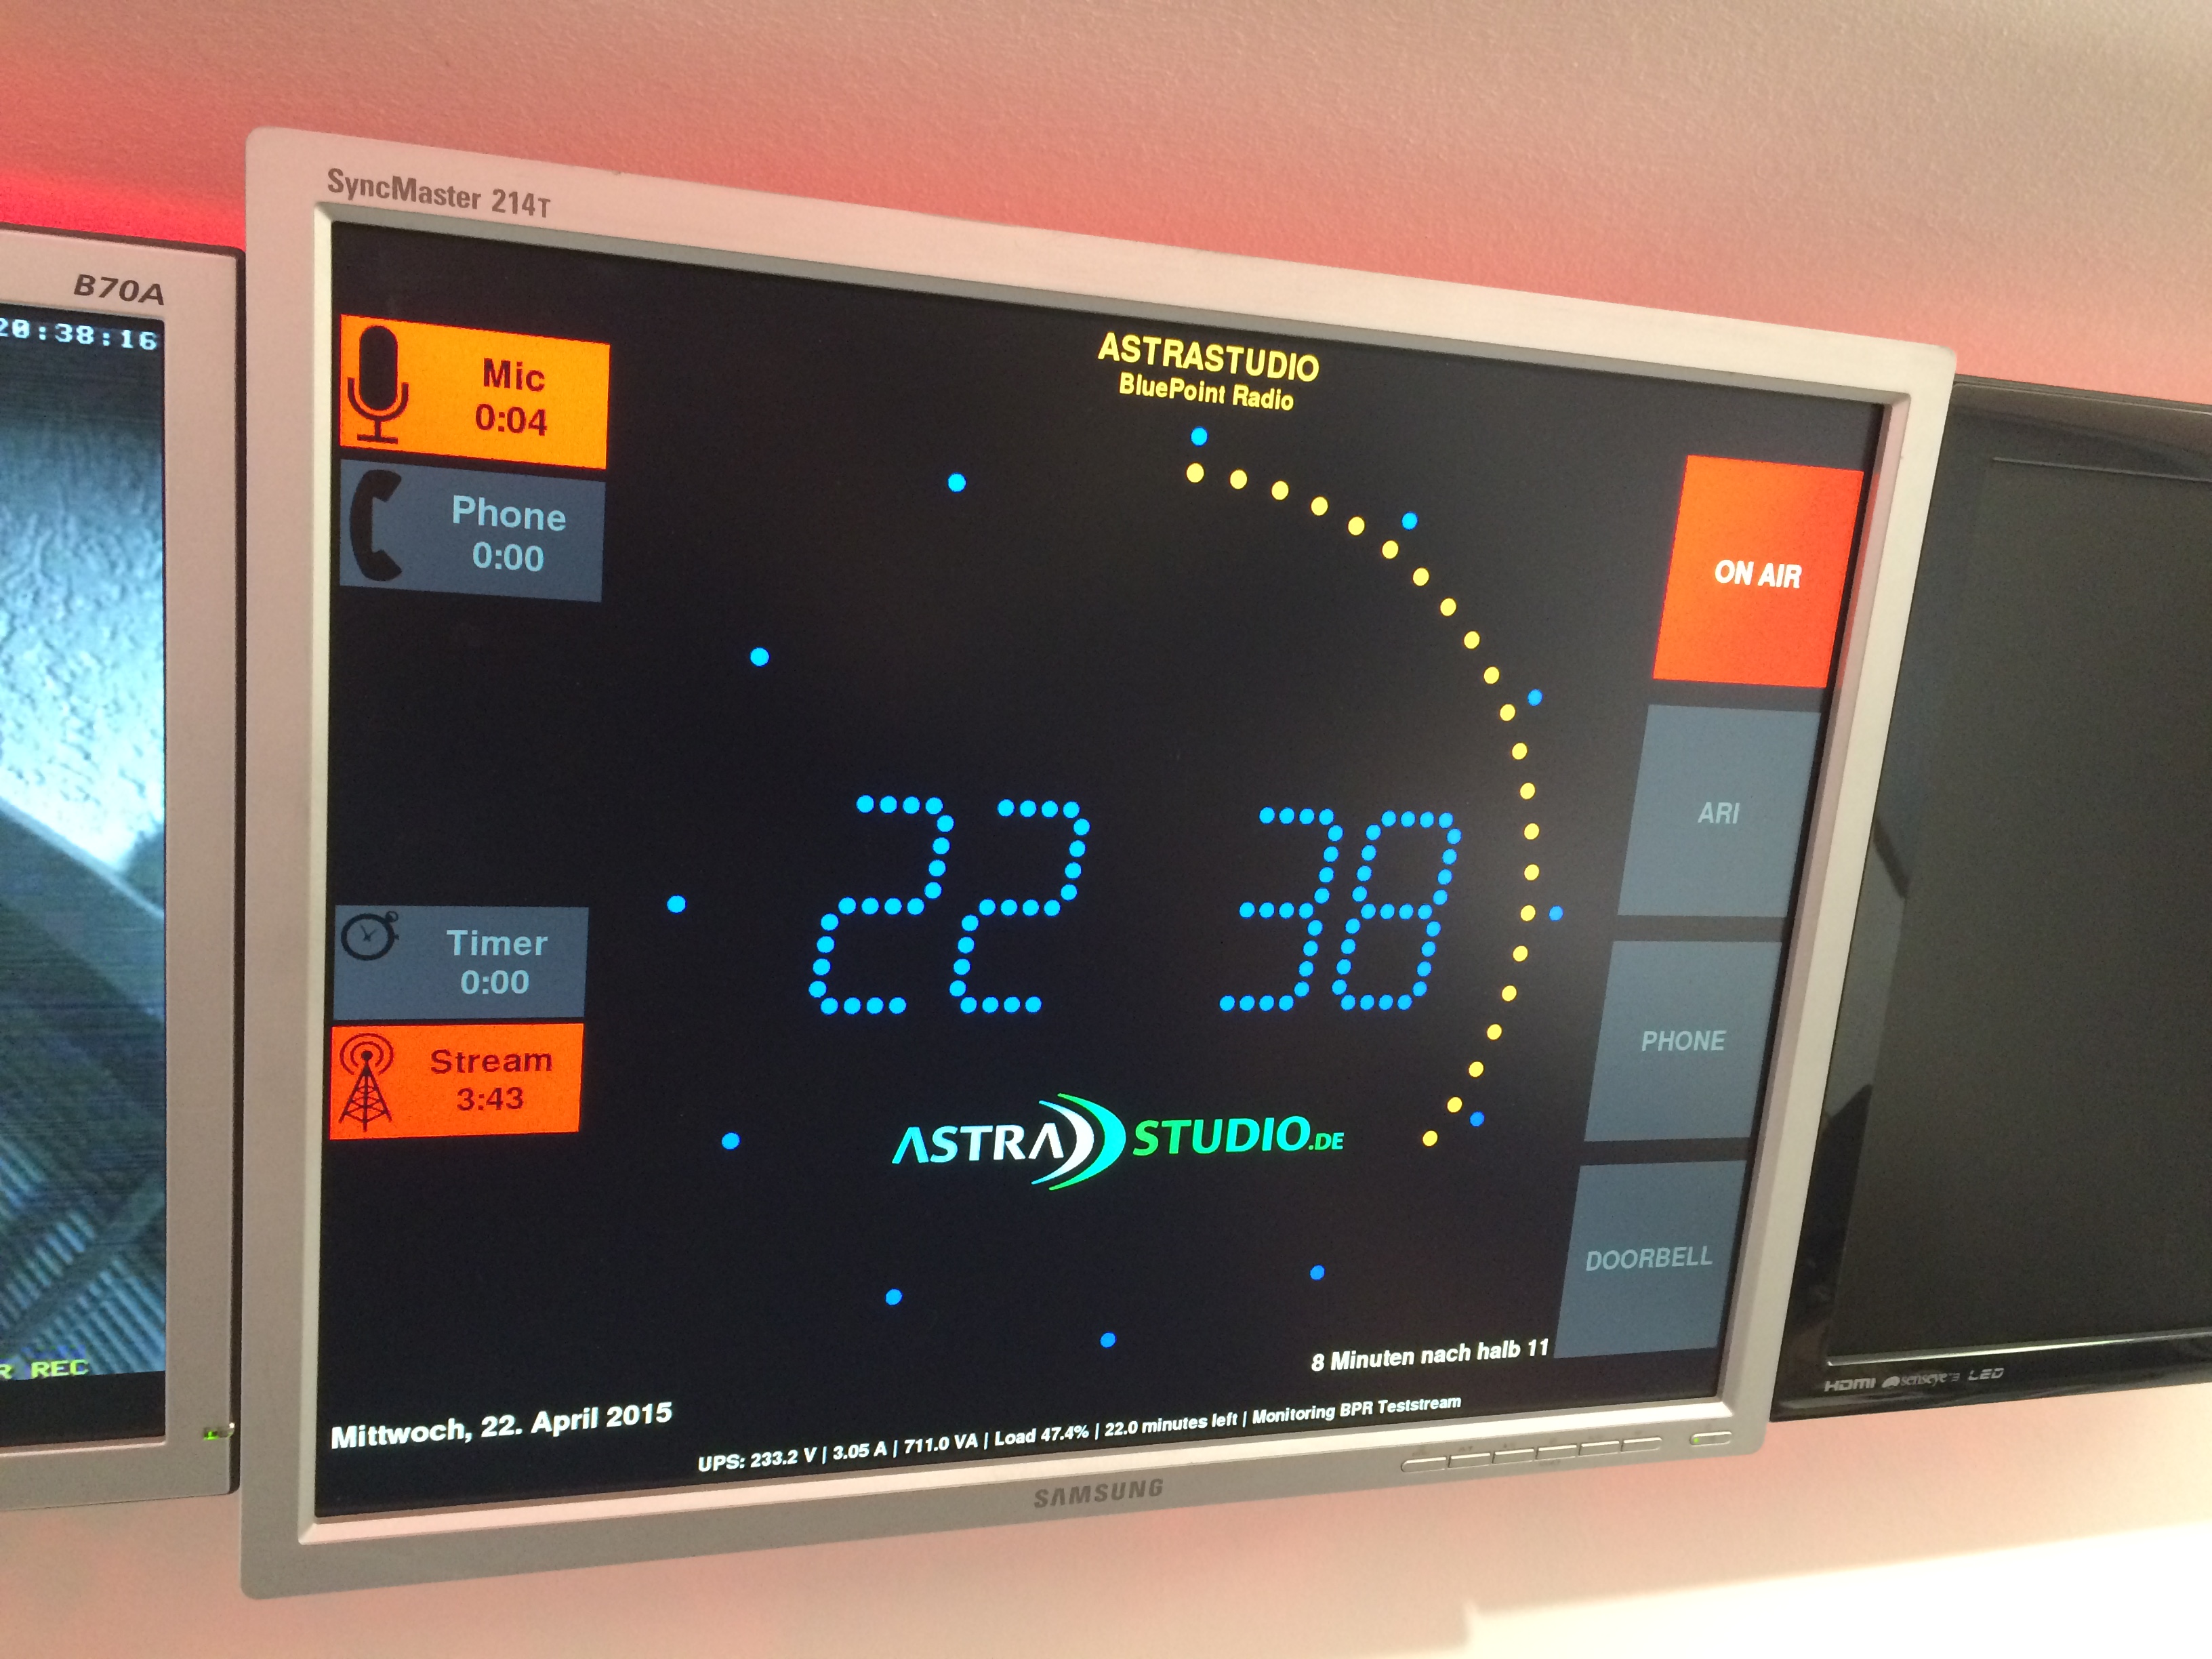
Screenshots
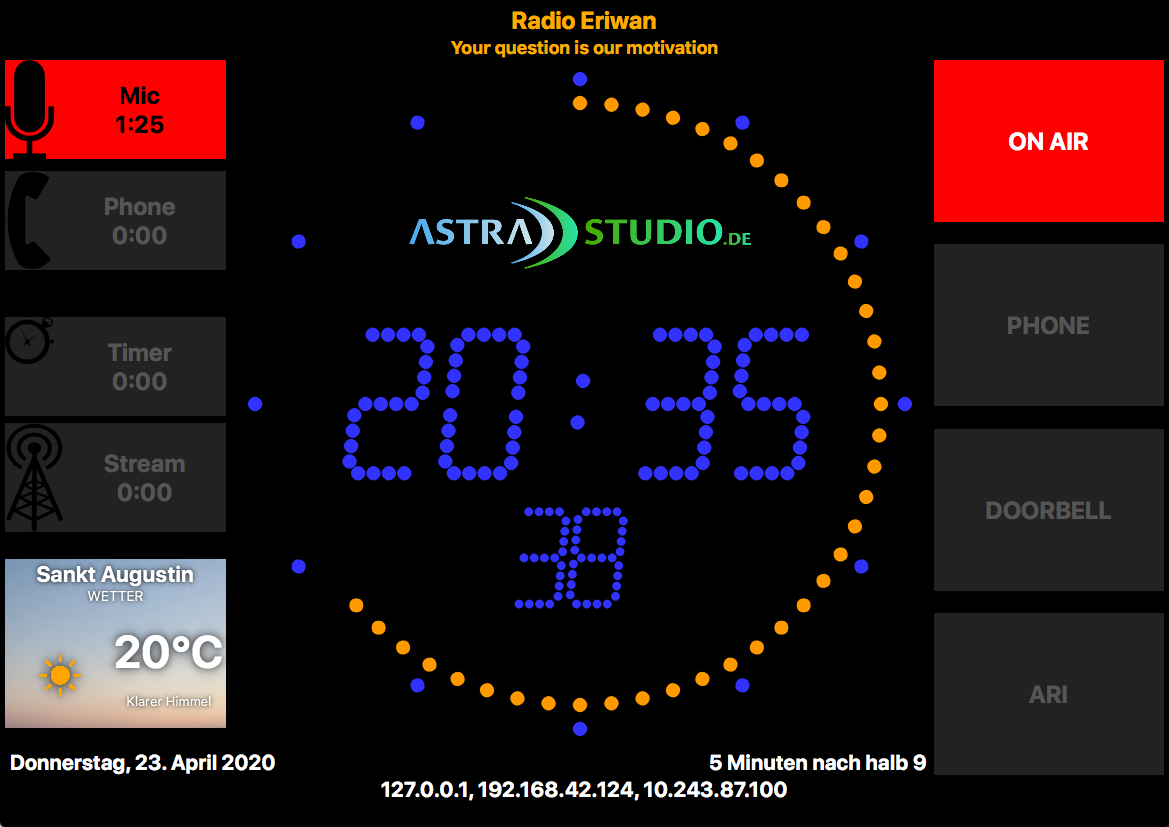
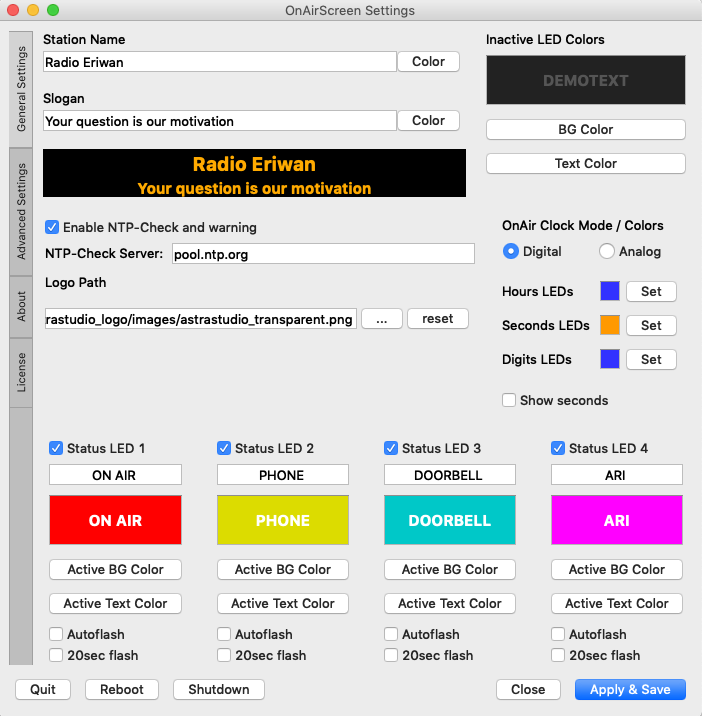
Pictures of OnAirScreen in use
Features
- flexible integration into existing studio setups
- customizable logo, colors and labels
- 4:3 and 16:9/16:10 monitor aspect ratio support
- easy installation (Win/Linux/Mac binaries available)
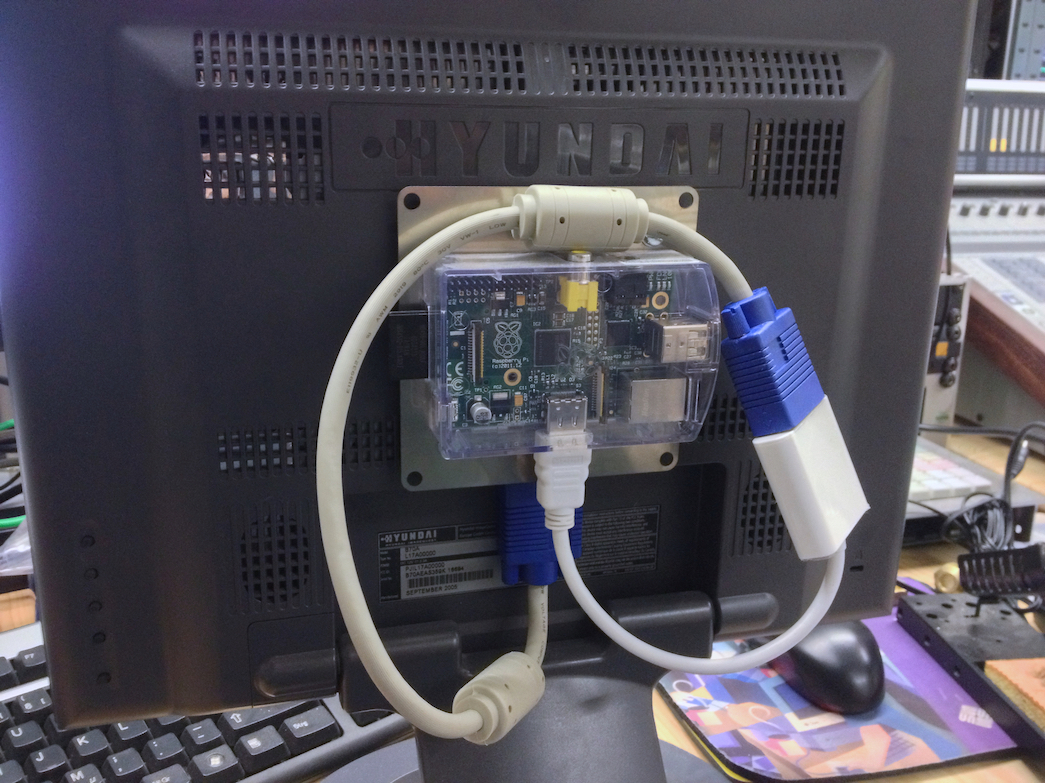
- runs on RaspberryPi
- runs on Windows, Mac, Linux
- controlled via keyboard and network
- Weather Widget
- static or blinking colon in digital clock mode
- OnAir Timer, Stopwatch, Countdown and more
OnAirScreen Function Keys
| Hotkeys | Function |
|---|---|
| Ctrl+F or F | Toggle fullscreen |
| Ctrl+Q or Q or Ctrl+C or ESC | Quit OnAirScreen |
| Ctrl+S or Ctrl+, | Open settings dialog |
| Space or 0 | Timer start/stop |
| . or , or R | Timer reset to 0:00 |
| 1 | LED1 on/off |
| 2 | LED2 on/off |
| 3 | LED3 on/off |
| 4 | LED4 on/off |
| M or / | Mic Timer start/stop |
| P or * | Phone Timer start/stop |
| Enter | opens set timer dialog |
On OSX use the command ⌘ key instead of Ctrl
OnAirScreen API Commands
API via UDP
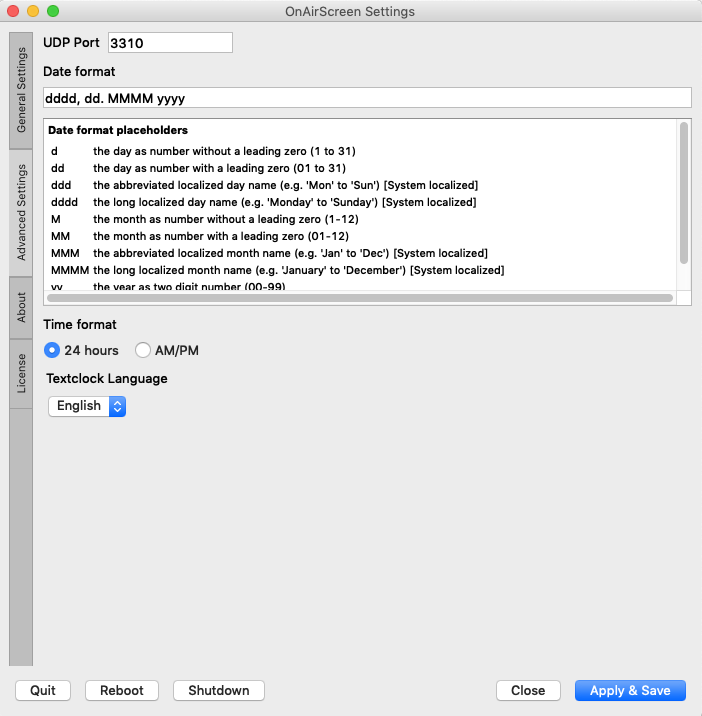
OnAirScreen can receive API commands via UDP port 3310
Here is an easy example on how to control a local OnAirScreen instance on a linux system.
Set LED1 Text to "FOO" and switch LED1 on:
echo "CONF:LED1:text=FOO" > /dev/udp/127.0.0.1/3310
echo "LED1:ON" > /dev/udp/127.0.0.1/3310
API via HTTP
OnAirScreen can receive API commands via HTTP (port 8010 by default).
Here is an easy example of how to control a local OnAirScreen instance on a linux system.
Set LED1 Text to "FOO" and switch LED1 on:
curl http://127.0.0.1:8010/?cmd=CONF:LED1:text=FOO
curl http://127.0.0.1:8010/?cmd=LED1:ON
API Commands
| UDP Command | Function |
|---|---|
LED1:[ON/OFF] |
switch LED1 on/off |
LED2:[ON/OFF] |
switch LED2 on/off |
LED3:[ON/OFF] |
switch LED3 on/off |
LED4:[ON/OFF] |
switch LED4 on/off |
NOW:TEXT |
set TEXT in first footer line |
NEXT:TEXT |
set TEXT in second footer line |
WARN:TEXT |
set TEXT and switch on red warning mode |
AIR1:[ON/OFF] |
start/stop Mic Timer |
AIR2:[ON/OFF] |
start/stop Phone Timer |
AIR3:[ON/OFF/RESET/TOGGLE] |
start/stop/reset/toggle Radio Timer |
AIR3TIME:seconds |
set Radio Timer to given value in seconds |
AIR4:[ON/OFF/RESET] |
start/stop/reset Stream Timer |
CMD:REBOOT |
OS restart |
CMD:SHUTDOWN |
OS shutdown |
CMD:QUIT |
quit OnAirScreen instance |
Remote Configuration Commands
CONF:General:stationname=TEXT
CONF:General:slogan=TEXT
CONF:General:stationcolor=COLOR
CONF:General:slogancolor=COLOR
CONF:LED[1-4]:used=[False|True]
CONF:LED[1-4]:text=TEXT
CONF:LED[1-4]:activebgcolor=COLOR
CONF:LED[1-4]:activetextcolor=COLOR
CONF:LED[1-4]:autoflash=[False|True]
CONF:LED[1-4]:timedflash=[False|True]
CONF:Clock:digital=[True|False]
CONF:Clock:showseconds=[True|False]
CONF:Clock:digitalhourcolor=COLOR
CONF:Clock:digitalsecondcolor=COLOR
CONF:Clock:digitaldigitcolor=COLOR
CONF:Clock:logopath=PathToLogo
CONF:Network:udpport=PORT
CONF:Network:tcpport=PORT
CONF:CONF:APPLY=TRUE
Donation
Do you like OnAirScreen? Feel free to donate.
![]()
![]()
Metadata
Owner
Metadata
Multi purpose "OnAir Lamp" solution targeted for use in professional broadcast environments