OS-X-HP-EliteDesk-800-G2-DM-Clover
 OS-X-HP-EliteDesk-800-G2-DM-Clover copied to clipboard
Published
20 hours ago •
 randyzhong
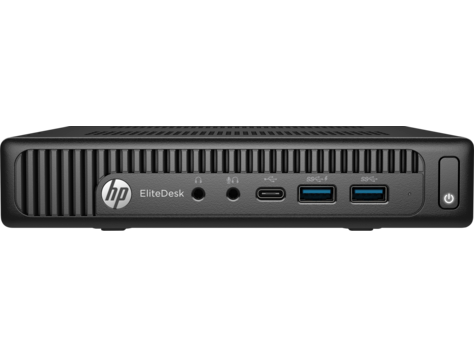
Files needed for installing Mac OSX on HP EliteDesk 800 G2 Desktop Mini Business PC 65W/35W. Feel free to contribute!
macOS Big Sur Support
This new release support Big Sur (May 16, 2021) now! Or you can go to OpenCore version for the OpenCore version
OS-X-HP-EliteDesk-800-G2-DM-Clover
This repository contains the files and scripts to install macOS on the HP EliteDesk 800 G2 Desktop Mini Business PC (35 W/65 W).
Hardware Specs
Basic info
Here is my EliteDesk 800 G2 DM specs:
- Product Number: L2X86AV
- Product Name: HP EliteDesk 800 G2 DM 65W
- BIOS: N21 Ver.02.21 11/01/2016
Specs:
- CPU: Intel® Core i7-6700 @ 3.40 GHz processor (65 W model only)
- GPU: Integrated Intel® HD Graphics 530 (2 DisplayPorts + 1 VGA Port)
- Memory: 1 x 8GB Micron DDR4-2400
- Storage: SAMSUNG MZ7LN256HMJP-000H1
- LAN: Intel® I219M Gigabit Network Connection LOM
- WLAN: BCM943224PCIEBT2 300Mbps 2.4&5G WiFi bluetooth 4.0 Mini PCIe
- Audio: Realtec ALC221 Audio Codec (all ports are stereo, 1 internal speaker, 1 front headphone, 1 front CITA port)
Configure BIOS Settings
To start, set BIOS to defaults. Then insure:
-
Advanced -> Boot Options
- Disable Fast Boot
- Disable CD-ROM Boot
- Enable USB Storage Boot
- Disable Network (PXE) Boot
-
Advanced -> Secure Boot Configuration
- Select Legacy Support Enable and Secure Boot Disable, press F10 to save changes, system will reboot and lead you to Secure Boot and ask you to input a 4 digits security code for authorization, type in the code shows on the screen and enter to reboot and then press F10 again to enter BIOS configuration
-
Advanced -> System Options
- Disable Virtualization Technology (VTx)
- Disable Virtualization Technology for Directed I/O (VTd)
- Enable M.2 SSD if you're using a NVME SSD
- Uncheck M.2 WLAN/BT if you're using a Intel 8265NGW or other unsupported card
- Check Allow PCIe/PCI SERR# Interrupt (Uncheck it if have interruption issues)
Advanced -> Built-in Device Options
- Disable Wake on LAN
- Set Video memory size to 64MB or larger
- Disable LAN/WLAN Auto Switching
- Disable Wake on WLAN
Advanced -> Port Options
- Enable all if no specific reasons.
Advanced -> Power Management Options
- Disable Extended Idle Power States
Advanced > Option ROM Launch Policy (Dual displays support)
- Configure Option ROM Launch Policy to All UEI
Press F10 to save changes.
Installation
- To be updated
Tested OS
- macOS Catalina 10.15.7
- macOS Big Sur 11.3.1
Clover
- Clover r5135
Kexts
- VirtualSMC.kext (1.2.3)
- SMCProcessor.kext (1.2.3)
- SMCSuperIO.kext (1.2.3)
- CPUFriend.kext (1.2.3)
- IntelMausi.kext (1.0.6)
- USBPorts.kext (1.0)
- Lilu.kext (1.5.3)
- AppleALC (1.5.8)
- WhateverGreen.kext (1.4.9)
- RTCMemoryFixup.kext (1.0.7)
- AirportBrcmFixup.kext (2.1.2)
- BrcmBluetoothInjector.kext (2.5.8)
USB 3.0 Ports
USB 2.0 Device
- HS01: Back left up USB2
- HS02: Back left down USB2
- HS03: Front Left USB2
- HS04: Back right down USB2
- HS05: Back right up USB2
- HS13: Front right USB2
USB 3.0 Device
- SS01: Back left up USB3
- SS02: Back left down USB3
- SS03: Front left USB3
- SS04: Back right down USB3
- SS05: Back right up USB3
- SS08: Front right USB3
Type-C
- HS09: Front Type-C
Bluetooth
- HS07: Internal Bluetooth (Thanks to git-ken-hub and anthonyuk)
Known Issues:
- VGA port is not supported
- Front Headphone/Mic combo jack is not working
- Sleep is not working (Reboot or blackscreen when trying to wake it)
- Upgrade to macOS Big Sur 11.0.x from Catalina faces one time Real-Time Clock (RTC) Power loss (005) error, safely ignore it. When upgrade is finished, no RTC erros on normal reboot
Metadata
18
Stars
3
Forks
Watchers
Owner
Metadata
Files needed for installing Mac OSX on HP EliteDesk 800 G2 Desktop Mini Business PC 65W/35W. Feel free to contribute!