jSensors
 jSensors copied to clipboard
Monitorize all the hardware sensors of your PC using Java


jSensors
Monitorize all the hardware sensors of your PC using Java
Windows Example Output
Scanning sensors data...
Found CPU component Intel Core i7-3770
Sensors:
Temp CPU Core #1: 46.0 C
Temp CPU Core #2: 43.0 C
Temp CPU Core #3: 45.0 C
Temp CPU Core #4: 45.0 C
Temp CPU Package: 46.0 C
Found GPU component AMD Radeon HD 7470
Sensors:
Temp GPU Core: 53.0 C
Found disk component ST250DM000-1BD141
Sensors:
Temp Temperature: 34.0 C
Linux Example Output
Scanning sensors data...
Found CPU component ISA adapter
Sensors:
Temp Core 0: 75.0 C
Temp Core 2: 76.0 C
Found GPU component PCI adapter
Sensors:
Temp temp1: 62.0 C
Found disk component Virtual device
Sensors:
Temp temp1: 67.0 C
Temp temp2: 67.0 C
IMPORTANT NOTE: if you are getting 0.0 as temperature value, try to launch as Administrator
Installation
To install jSensors you can add the dependecy to your software project management tool: http://mvnrepository.com/artifact/com.profesorfalken/jSensors/2.2.1
For example, for Maven you have just to add to your pom.xml:
 <dependency>
      <groupId>com.profesorfalken</groupId>
      <artifactId>jSensors</artifactId>
      <version>2.2.1</version>
 </dependency>
Basic Usage
Use as a library
In order to retrieve sensors data, it is only necessary to call the method components().
It will retrieve a list of hardware components: CPUs, GPUs, Disks...
Get CPU sensors (temperature and fans)
    Components components = JSensors.get.components();

    List<Cpu> cpus = components.cpus;
    if (cpus != null) {
        for (final Cpu cpu : cpus) {
            System.out.println("Found CPU component: " + cpu.name);
            if (cpu.sensors != null) {
              System.out.println("Sensors: ");

              //Print temperatures
              List<Temperature> temps = cpu.sensors.temperatures;
              for (final Temperature temp : temps) {
                  System.out.println(temp.name + ": " + temp.value + " C");
              }

              //Print fan speed
              List<Fan> fans = cpu.sensors.fans;
              for (final Fan fan : fans) {
                  System.out.println(fan.name + ": " + fan.value + " RPM");
              }
            }
        }
    }
Same for other hardware components as GPU or Disks.
Use as a standalone application
First of all, download the JAR file containing all dependencies: https://github.com/profesorfalken/profesorfalken.github.io/raw/master/files/jSensors-2.2-jar-with-dependencies.jar
Execute jSensors and get all sensors data:
java -jar jsensors-2.2.1-jar-with-dependencies.jar
This will generate a console output.
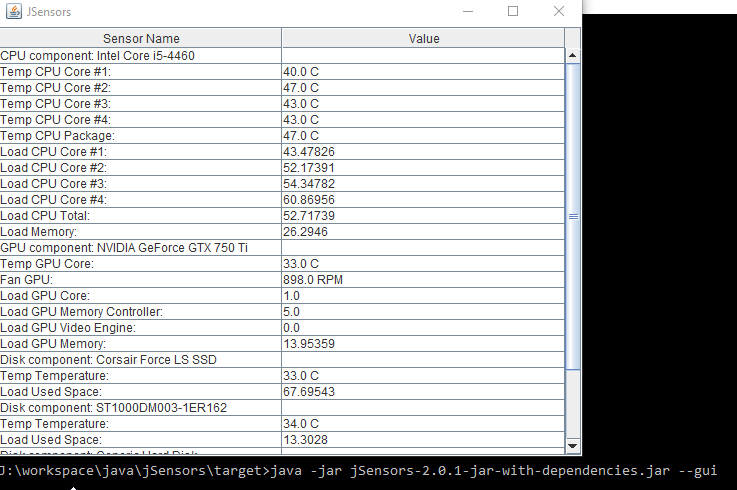
It is also possible to show a simple gui with all the sensors data:
java -jar jsensors-2.2.1-jar-with-dependencies.jar --gui
Result:
Configuring jSensors
In order to change jSensors configuration you can either:
Override config file for your project
You only have to create in your classpaht a file with the name jsensors.properties.
For the moment the only modificable parameters (and its default values) are:
# Test mode
# REAL: test on real hardware
# STUB: use simulated/hardcoded results to test
testMode=REAL
# Stub Content
# string value of the simulated results
stubContent=""
# Debug mode
# If activated it logs in console all retrieved details
debugMode=false
Override config element for one request
When performing a request we can easily override config elements:
    Map<String, String> overriddenConfig = new HashMap<String, String>();
    overriddenConfig.put("debugMode", "true");

    [...]
    Components components = JSensors.get.config(overriddenConfig).components();
Metadata
Owner
Metadata
Monitorize all the hardware sensors of your PC using Java