wordclock
 wordclock copied to clipboard
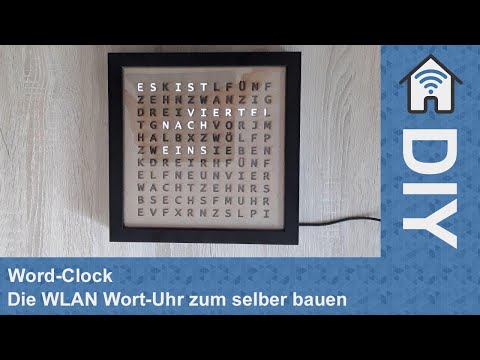
DIY WordClock
WordClock
![]()
![]()
![]()
Font and german layout based on https://www.mikrocontroller.net/articles/Word_Clock
Requirements
Healthcheck
WordClock
Assemble
Customizations
Modify user_config.h to change config
| Key | Values | Comment |
|---|---|---|
| GRID_ROWS | 10 11 |
count of rows |
| GRID_COLS | 11 | count of cols |
| GRID_FIRST | 0: top-left 1: top-right 2: buttom-left 3: buttom-right |
position of first led |
| GRID_LANGUAGE | de_DE: german de_DE_alt: german alternative |
langauge |
| GRID_SINGLE_MINUTES | 0: before 1: after |
position of minutes leds |
Installation
Make your Arduino ready for Wemos D1 mini e.g. https://makesmart.net/esp8266-d1-mini-programmieren/
- Change the grid settings in the
wordclock/user_config.h. - Upload the sketch
wordclock/wordclock.inoto your Wemos D1 mini (or other ESP8266). - Enjoy
Usage
The WordClock creates a WiFi-Hotspot with the name "WordClock". Connect e.g. your smartphone to the hotspot and you will be forwared to the config page, where you can set the WiFi credentials.
Check in your router what IP-adress your WordClock got. Open a webbrowser and go to http://[YOUR_WORDCLOCK_IP]. For (example) the IP-adress 192.168.178.20 go to http://192.168.178.20.
Functions
Set color
You can set a foreground and background color on your clock.
Set time offset
You can set a time offset to specify your timezone.
Set DND
You can set a time span in which the clock should be switched off.
PWA
You can use the webbrowser function "Add to start screen" to install the webinterface as an app to your android (and possibly ios) smartphone.
Create own grid-layout
To create your own grid-layout visit the Wiki: Create Grid-Layout
Support me / Follow me
![]()
![]()
![]()
![]()
![]()