me
 me copied to clipboard
学习 MacOS 开发 (Part 20: Quartz 2D)
CGContext 和 CGContextRef
/Applications/Xcode.app/Contents/Developer/Platforms/MacOSX.platform/Developer/SDKs/MacOSX12.3.sdk/System/Library/Frameworks/CoreGraphics.framework/Headers/CoreGraiphcs/CGContext.h中定义了CGContextRef
typedef struct CF_BRIDGED_TYPE(id) CGContext *CGContextRef;
搞明白这句用了我2个小时,真心不容易。
复习struct和typedef
- typedef:
typedef unsigned long ulong;, 这个不解释了 - typedef pointer:
typedef int *intPointer, 即intPointer是int的address reference
typedef int *intPointer;

int main() {
  int x = 3;
  intPointer p = &x;
  printf("%d\n", *p); // 3

  return 0;
}
- typedef struct:
typedef struct {
  char *name;
} User;

int main() {
  User user;
  user.name = "hui";
  printf("name: %s\n", user.name); \\ hui

  return 0;
}
- typedef struct pointer:
typedef struct {
  char *name;
} User;

typedef User *UserRef;

int main() {
  User user;
  UserRef userref = &user;
  user.name = "hui";
  printf("name: %s\n", userref->name); // hui

  return 0;
}
复习声明和定义
typedef struct User *UserRef;

int main() {
  return 0;
}
这个程序是可以编译和运行的,但我们并没有定义User的结构,这个就有点让我懵逼了。按照 #244 的思路开了一个新的user.c
typedef struct {
  char* name;
} User;

void hello() { }
然后gcc -c user.c,通过nm查看symbol:
~ nm user.o
0000000000000000 T _hello
然后google发现,struct只是处于编译时,根本到不了链接,仔细琢磨一下就明白了。
所以,我做了一个demo:
- user.c 定义struct user
- user.h 定义user模块的方法声明
- app.c 使用user模块
第一步:先来制作user模块
#include <stdio.h>
#include <stdlib.h>

typedef struct {
  char *name;
} User;

User *create() {
  User *result = malloc(sizeof(User));
  result->name = "nonocast";
  return result;
}

void hello(User *user) {
  printf("hello %s\n", user->name);
}

void release(User *user) {
  free(user);
  user = NULL;
}
编译clang -c user.c得到user.o
第二步: 编写调用侧app
app.c
#include <stdio.h>
#include "user.h"

typedef struct User *UserRef;

int main() {
  UserRef userRef = create();
  hello(userRef);
  release(userRef);

  return 0;
}
因为要用到这些方法,所以需要在前导进行定义,就引出了user.h
#ifndef USER
#define USER

typedef struct User *UserRef;

UserRef create();
void hello(UserRef user);
void release(UserRef user);

#endif
编译clang -c app.c得到app.o
第三步: 链接
clang -o app app.o user.o, 然后./app运行输出hello nonocast
小结:
- 通过这个方式,完美的将struct声明和实现进行了分离
- 调用侧通过user.h可以使用UserRef,使用create, hello, release这些方式
- 同时彻底隔离调用侧和User这个struct,将User处于黑盒之中
- CGContext也同样如此,在quartz的dylib中实现,但是放给调用侧的就是CGContextRef和一堆方法,你们去玩吧
- swift中的CGContext并不是dylib中C层面CGContext,只是CGContextRef的alias而已,此CGContext非彼CGContext
CGContext 的创建
Quartz本身和GUI无关,CGContext就是一个struct, 官方文档说A Quartz 2D drawing environment., 就是一组state, 所以这也解释了saveGState和restoreGState, 就是将当前状态压栈和出栈的过程。
又因为我们接触GUI才会接触到Quartz,比如需要在界面上绘制,这才有了UIKit的UIGraphicsGetCurrentContext()和AppKit的NSGraphicsContext.current?.cgContext, 这两句都是在NSView中获取当前View的CGContext,拿到View的CGContext,你当然就可以为所欲为,等同于Windows中的dc (drawing context),句柄而已。
NSView 绘制起点
- 新建一个storyboard (swift)的MacOS App
- 新建CavnasView
- 将ViewController中的View类型改为CanvasView
- 运行
CanvasView.swift
import Cocoa

class CanvasView : NSView {
  override func draw(_ dirtyRect: NSRect) {
    guard let ctx = NSGraphicsContext.current?.cgContext else {
      return
    }

    ctx.saveGState()

    ctx.setFillColor(NSColor.gray.cgColor)
    ctx.fill(dirtyRect)

    ctx.setFillColor(NSColor.yellow.cgColor)
    ctx.addArc(center: CGPoint(x: 0, y: 0), radius: 100, startAngle: 0, endAngle: 2 * .pi, clockwise: true)
    ctx.fillPath()

    ctx.restoreGState()
  }
}
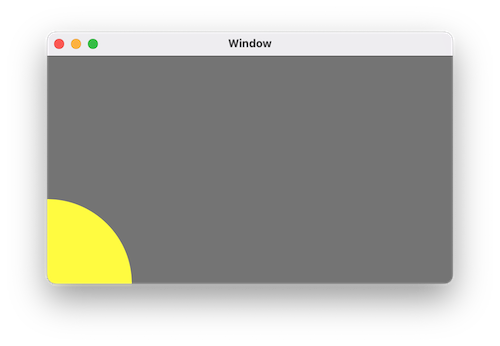
运行效果如下:
注:
- 如果是iPhone就需要通过UIGraphicsGetCurrentContext获取句柄
- 如果ObjC,则是drawRect
SwiftUI 绘制起点
SwiftUI需要通过NSView进行过渡 #253
ContentView
struct ContentView: View {
  var body: some View {
    Canvas()
  }
}
Canvas
import Cocoa
import SwiftUI

struct Canvas : NSViewRepresentable {
  func makeNSView(context: Context) -> some NSView {
    NSCanvasView()
  }

  func updateNSView(_ nsView: NSViewType, context: Context) {

  }
}

class NSCanvasView : NSView {
  override func draw(_ dirtyRect: NSRect) {
    guard let ctx = NSGraphicsContext.current?.cgContext else {
      return
    }

    ctx.saveGState()

    ctx.setFillColor(NSColor.gray.cgColor)
    ctx.fill(dirtyRect)

    ctx.setFillColor(NSColor.yellow.cgColor)
    ctx.addArc(center: CGPoint(x: 0, y: 0), radius: 100, startAngle: 0, endAngle: 2 * .pi, clockwise: true)
    ctx.fillPath()

    ctx.restoreGState()
  }
}
放下GUI,从 Terminal 开始
c version: app.c
#include <CoreGraphics/CoreGraphics.h>
#include <CoreServices/CoreServices.h>
#include <ImageIO/ImageIO.h>
#include <math.h> // for M_PI
#include <stdint.h>
#include <stdio.h>

/*
- alpha: A value that specifies the opacity level.
  Values can range from 0.0 (transparent) to 1.0 (opaque).
*/

struct Bitmap {
  CGContextRef ctx;
  CGColorSpaceRef colorSpace;
  uint8_t *data;
  int pixelsWide;
  int pixelsHigh;
  int bytesPerRow;
  int byteCount;
};

typedef struct Bitmap *BitmapRef;

BitmapRef createBitmap(int, int);
void displayBitmap(BitmapRef);
void drawBitmap(BitmapRef);
void saveBitmap(BitmapRef);
void releaseBitmap(BitmapRef);
void info(BitmapRef);

int main() {
  BitmapRef bitmap;
  bitmap = createBitmap(500, 300);
  drawBitmap(bitmap);
  saveBitmap(bitmap);

  releaseBitmap(bitmap);
  return 0;
}

// Programming with Quartz 2D p257
// omit dpi options
void saveBitmap(BitmapRef bitmap) {
  float resolution = 144;
  CFDictionaryRef options = NULL;

  CGImageRef image = CGBitmapContextCreateImage(bitmap->ctx);
  CGContextDrawImage(bitmap->ctx, CGRectMake(0, 0, bitmap->pixelsWide, bitmap->pixelsHigh), image);

  CFStringRef path = CFSTR("output.png");
  CFURLRef url = CFURLCreateWithFileSystemPath(NULL, path, kCFURLPOSIXPathStyle, false);

  CGImageDestinationRef dest = CGImageDestinationCreateWithURL(url, kUTTypePNG, 1, NULL);
  CGImageDestinationAddImage(dest, image, NULL);

  CFRelease(url);
  CFRelease(path);
  CGImageDestinationFinalize(dest);
  CFRelease(dest);
}

void drawBitmap(BitmapRef bitmap) {
  CGContextRef ctx = bitmap->ctx;
  int w = bitmap->pixelsWide;
  int h = bitmap->pixelsHigh;
  bool transparent = true;
  if (transparent) {
    CGContextClearRect(ctx, CGRectMake(0, 0, w, h));
  }

  CGContextSaveGState(ctx);

  CGContextSetRGBFillColor(ctx, 0.4, 0.4, 0.4, 1.0);
  CGContextFillRect(ctx, CGRectMake(0, 0, w, h));

  CGContextSetRGBFillColor(ctx, 1.0, 1.0, 0.0, 1.0);
  CGContextAddArc(ctx, 0, 0, 100, 0, 2 * M_PI, true);
  CGContextFillPath(ctx);

  CGContextRestoreGState(ctx);
}

void displayBitmap(BitmapRef bitmap) {
  unsigned char *data = bitmap->data;
  for (int h = 0; h < bitmap->pixelsHigh; ++h) {
    for (int w = 0; w < bitmap->pixelsWide; ++w) {
      int i = h * bitmap->bytesPerRow + w * 4;
      printf("[%02X %02X %02X %02X]", data[i], data[i + 1], data[i + 2], data[i + 3]);
    }
    printf("\n");
  }
  printf("---\n");
}

BitmapRef createBitmap(int pixelsWide, int pixelsHigh) {
  // https://developer.apple.com/library/archive/documentation/GraphicsImaging/Conceptual/drawingwithquartz2d/dq_context/dq_context.html#//apple_ref/doc/uid/TP30001066-CH203
  BitmapRef bitmap = malloc(sizeof(struct Bitmap));
  bitmap->pixelsWide = pixelsWide;
  bitmap->pixelsHigh = pixelsHigh;
  bitmap->bytesPerRow = pixelsWide * 4;
  bitmap->byteCount = bitmap->bytesPerRow * pixelsHigh;

  bitmap->colorSpace = CGColorSpaceCreateWithName(kCGColorSpaceGenericRGB);
  printf("byte count: %d\n", bitmap->byteCount);
  bitmap->data = malloc(bitmap->byteCount);
  memset(bitmap->data, 0x00, bitmap->byteCount);

  bitmap->ctx = CGBitmapContextCreate(bitmap->data, bitmap->pixelsWide, bitmap->pixelsHigh, 8, bitmap->bytesPerRow, bitmap->colorSpace, kCGImageAlphaPremultipliedLast);
  if (bitmap->ctx == NULL) {
    free(bitmap->data);
    bitmap->data = NULL;
    fprintf(stderr, "Context not created.");
    return NULL;
  }

  CGContextSetAllowsAntialiasing(bitmap->ctx, true);
  return bitmap;
}

void releaseBitmap(BitmapRef bitmap) {
  if (bitmap->data) {
    free(bitmap->data);
    CGColorSpaceRelease(bitmap->colorSpace);
    CGContextRelease(bitmap->ctx);
  }
  free(bitmap);
}

void info(BitmapRef bitmap) {
  printf("pixelsWide: %d\n", bitmap->pixelsWide);
  printf("pixelsHigh: %d\n", bitmap->pixelsHigh);
  printf("bytesPerRow: %d\n", bitmap->bytesPerRow);
  printf("byteCount: %d\n", bitmap->byteCount);
}
说明一下BitmapRef中data用来存放pixel buffer,如下操作:
- 创建3x3像素:
bitmap = createBitmap(3, 3); - 填充白色:
CGContextSetRGBFillColor(ctx, 1, 1, 1, 1);
然后通过displayBitmap(bitmap)打印内存数据如下:
./app
byte count: 36
[FF FF FF FF][FF FF FF FF][FF FF FF FF]
[FF FF FF FF][FF FF FF FF][FF FF FF FF]
[FF FF FF FF][FF FF FF FF][FF FF FF FF]
项目代码放在这里: download
CGImageCreateWithMaskingColors
吐槽一下这个方法,传入这个方法的CGImage必须是kCGImageAplhaNone,也就是bitsPerPixel是24,但是CGContext Create竟然不支持24bit, 所以就需要额外做一次转换,或者通过CGImageCreate方法去创建,总之很绕,报错也没有错误原因,不折腾该用CoreImage或Vision来做masking工作。