me
 me copied to clipboard
学习 C++ (Part 5: Qt and QML)
Quick
因为"讨厌"(最早MFC写烦了), 所以这么多年就躲着C++,自然也就放弃了Qt,看到OBS用一套Qt代码就搞定了跨平台,还是让我非常惊讶。速度重新看了一下Qt,只能说好强啊,C/C++ yyds !
Qt的几个概念:
- Qt可以通过brew qt配合vscode,但还是建议用qtCreator上手
- Qt 6已经通过qtCreator直接build, deploy多平台 (Windows, MacOS, iOS, Android),牛b
- Qt Widget是传统方式,可以理解为WinForm或者xib
- Qt Quick是现代方式,采用QML,可以理解为WPF或者SwiftUI
import QtQuick

Window {
    width: 640
    height: 480
    visible: true
    title: qsTr("Hello World")
}
所以我们简单看下Qt Widget后就直接进入QML/Quick.
QtWidget
通过qtCreator可以直接生成template,我们看下shell下的hello world,
app.cxx
#include <QApplication>
#include <QLabel>

int main(int argc, char* argv[]) {
  QApplication app(argc, argv);
  QLabel *label = new QLabel("<h2><i>hello</i> <font color=red>world</font></h2>");
  label->show();
  return app.exec();
}
qmake -project 生成项目文件foo.project
# 这3句为生成后自行添加,否则需要#include <QtWidgets/QApplication>
QT       += core gui
greaterThan(QT_MAJOR_VERSION, 4): QT += widgets
CONFIG += c++17

TEMPLATE = app
TARGET = foo
INCLUDEPATH += .

SOURCES += app.cxx
然后make foo.pro生成Makefile,然后make就可以得到一个foo.app, 通过open foo.app就能看到你的hello world窗口。
多提一句,macOS下QApplication是在QtWidgets.framework中,所以在c_cpp_properties中配置如下:
"includePath": [
  "/Users/nonocast/qt/6.3.0/macos/lib/QtWidgets.framework/Headers",
  "${default}"
]
看看Button Click的实现:
#include <QApplication>
#include <QPushButton>

int main(int argc, char* argv[]) {
  QApplication app(argc, argv);
  QPushButton *button = new QPushButton("Quit");
  QObject::connect(button, SIGNAL(clicked()), &app, SLOT(quit()));
  button->show();
  return app.exec();
}
- SIGNAL和SLOT是Qt的两个Marco, 其目的就是关联clicked和quit这两个event,没有lambda的苦
Auto Layout
Qt Widgets通过Layouts和Spacers来实现自动布局,逻辑和Android比较类似,其中Layouts主要就是Vertical Layout和Horizontal Layout,Spaces就是Horizontal Spacer和Vertical Spacer。
- 默认情况下MainWindows是没有layout的,所以需要指定Horizontal或者是Vertical Layout,两种方式: 1选择MainWindow然后在toolbar点Vertical Layout, 2在MainWindow右键菜单中Layout/Vertical Layout。这样加入后续的控件就会水平或垂直排列,这个和WPF StackPanel一致。
- 而visual控件,比如text edit或者push button的尺寸则是通过自身的size policy进行设置,是fix还是extending,做过Android和WPF都很容易理解。

所以通过不断的嵌套VLayout和HLayout来实现总体布局的自适应。
Next example

- 这个example来自Lee Zhi Eng - Qt5 C++ GUI Programming Cookbook - 2016.
- 在mainWindow设置Horizontal Layout, 然后分别加入VLayout和HLayout,在VLayout加入3个Button, 在HLayout加入Tab Widget
- 选中button右键Go to slot关联click事件
- 在mainwindow.cpp可以通过ui->button1关联到界面上的button
mainwindow.cpp
#include "mainwindow.h"
#include "ui_mainwindow.h"
#include <QStyle>

MainWindow::MainWindow(QWidget *parent) : QMainWindow(parent), ui(new Ui::MainWindow) {
  ui->setupUi(this);
  ui->button1->setProperty("pagematches", true);
}

MainWindow::~MainWindow() {
  delete ui;
}

void MainWindow::on_tabWidget_currentChanged(int index) {
  ui->button1->setProperty("pagematches", false);
  ui->button2->setProperty("pagematches", false);
  ui->button3->setProperty("pagematches", false);

  if (index == 0) {
    ui->button1->setProperty("pagematches", true);
  } else if (index == 1) {
    ui->button2->setProperty("pagematches", true);
  } else {
    ui->button3->setProperty("pagematches", true);
  }

  ui->button1->style()->polish(ui->button1);
  ui->button2->style()->polish(ui->button2);
  ui->button3->style()->polish(ui->button3);
}

void MainWindow::on_button1_clicked() {
  ui->tabWidget->setCurrentIndex(0);
}

void MainWindow::on_button2_clicked() {
  ui->tabWidget->setCurrentIndex(1);
}

void MainWindow::on_button3_clicked() {
  ui->tabWidget->setCurrentIndex(2);
}
QML
Qt Meta Language or Qt Modeling Language (QML) is a Javascript-inspired user interface mark-up language used by Qt for designing user interfaces. Qt provides you with Qt Quick components (widgets powered by the QML technology) to easily design touch-friendly UI without C++ programming. We will learn more about how to use QML and Qt Quick components to design our program's UI by following the steps given in the following section.
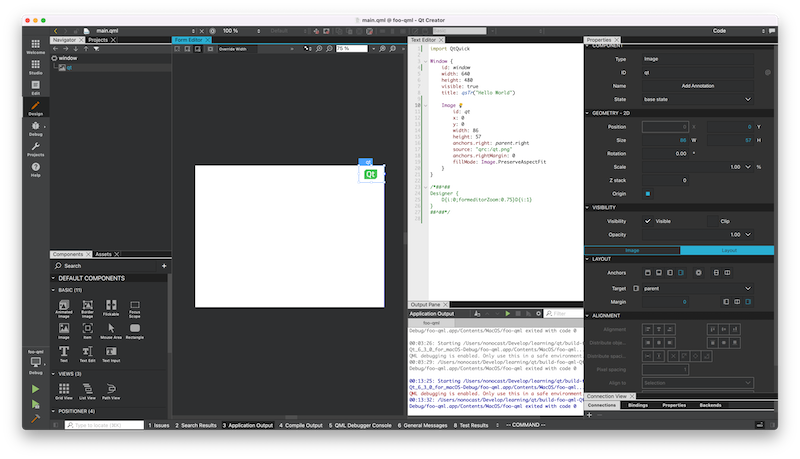
放一张图片也折腾了我好久,要注意几点:
- 插件里面打开qml/qmldesigner,我也不知道这个为什么不是默认打开的,搞得很不希望我用一样
- 将需要用的图片复制到项目目录中,项目根目录或者images都行
- 然后新建qrc资源文件,
qrc:/images/qt.png,这个可以有两种理解方式:- prefix: /, 然后path是
images/qt.png, 即在/下加入目录 - prefix: /images, 然后path是qt.png
- 都可以,我会采用第二种
- prefix: /, 然后path是
- 然后打开designer, 拖入一个image,直接在code editor中将source改为
qrc:/images/qt.png - 反复尝试,只有qrc:/这种可以在designer和runtime时都可以正常显示,如果只是images/qt.png,那只能在designer中显示,感觉是bug
然后QML更新了自动布局的方式,之前通过V/HLayout才能做布局,现在改用了Google的Adnroid方式,
- 设定参考对象 (anchors target)
- 设定Anchors type 这样就很容易或者说不需要借助第三方(V/HLayout)来实现自适应。
full
Image {
  id: image
  anchors.fill: parent
  source: "qrc:/images/qt.png"
  fillMode: Image.PreserveAspectFit
}
right corner
Image {
  id: image
  anchors.right: parent.right
  anchors.rightMargin: 0
  source: "qrc:/images/qt.png"
  fillMode: Image.PreserveAspectFit
}
QML Click
hello
Button {
  id: button
  x: 58
  y: 38
  text: qsTr("Button")
  onClicked: {
    console.log("button clicked")
  }
}
通过QML实现Button click关联Dialog
Button {
  id: button
  x: 58
  y: 38
  text: qsTr("Button")
  onClicked: msg.visible = true
}

MessageDialog {
  id: msg
  title: "Title"
  text: "Button pressed"
  onAccepted: visible = false
}
C++ Invoke
注入一个对象(instance)的基本步骤:
- 新建一个Service Class
service.h
#ifndef SERVICE_H
#define SERVICE_H

#include <QObject>

class Service : public QObject {
  Q_OBJECT
public:
  explicit Service(QObject *parent = nullptr);

  Q_INVOKABLE void requestBackendData();
};

#endif // SERVICE_H
service.cpp
#include "service.h"
#include <QDebug>

Service::Service(QObject *parent) : QObject{parent} {
}

void Service::requestBackendData() {
  qDebug() << "request backend data...";
}
在engine注册对象,
main.cpp
#include "service.h"
#include <QGuiApplication>
#include <QQmlApplicationEngine>
#include <QQmlContext>

Service service;

int main(int argc, char *argv[]) {
  QGuiApplication app(argc, argv);

  QQmlApplicationEngine engine;

  engine.rootContext()->setContextProperty("service", &service);

  const QUrl url(u"qrc:/wee-qml/main.qml"_qs);
  QObject::connect(
      &engine, &QQmlApplicationEngine::objectCreated, &app,
      [url](QObject *obj, const QUrl &objUrl) {
        if (!obj && url == objUrl)
          QCoreApplication::exit(-1);
      },
      Qt::QueuedConnection);
  engine.load(url);

  return app.exec();
}
然后在QML通过Connections关联后就可以直接调用对象,
import QtQuick
import QtQuick.Controls
import QtQuick.Dialogs

Window {
    id: window
    width: 640
    height: 480
    visible: true
    title: qsTr("Hello World")

    Connections {
        target: service
    }

    Button {
        id: button
        x: 58
        y: 38
        text: qsTr("Button")
        onClicked: {
            service.requestBackendData()
        }
    }
}
WebView
hello.pro
QT += core gui webenginewidgets
main.cpp
#include "mainwindow.h"

#include <QApplication>
#include <QWebEngineView>

int main(int argc, char *argv[]) {
  QApplication a(argc, argv);

  QWebEngineView view;
  view.load(QUrl("https://google.com"));
  view.show();
  return a.exec();
}
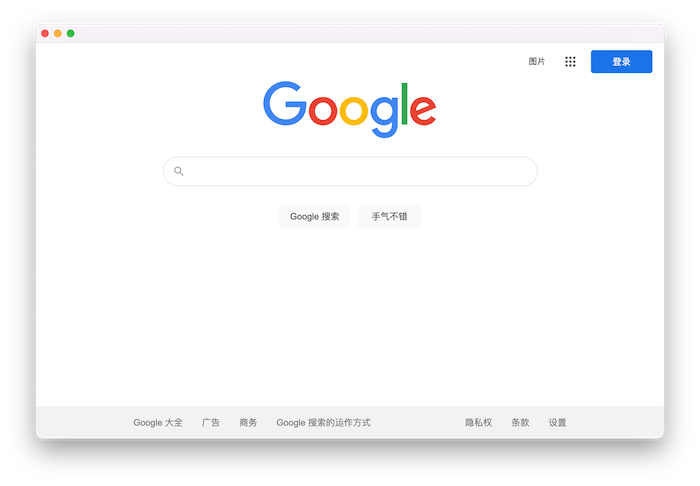
注:
- Qt安装目录下MaintenanceTool检查Qt WebEngine是否勾选
Widget or QML?
2021: 关于Qt选择qml还是widget的深度思考 - 知乎
评论中这句话还是比较务实: "我个人觉得如果这个应用是用手指头操作,那么用 QML 更合适,如果是用鼠标操作,那么用 Widget 更合适。"
参考阅读
- Qt Documentation | Home
- qmlbook/qmlbook: The source code for the upcoming qml book
- QmlBook In Chinese 中文
- Qt 学习之路_w3cschool
- QML与C++通信 | TechNemo的小站