iobroker-javascript-vs-code-extension
 iobroker-javascript-vs-code-extension copied to clipboard
A Visual Studio Code extension for script development in Visual Studio Code.
VS Code extension for ioBroker javascript adapter
ioBroker is a mighty IoT platform and enables you to write custom scripts with its JavaScript adapter.
This extension for Visual Studio Code enables you to develop the scripts completely in Visual Studio Code, without the need of the web interface.
Features
Open the command pallet (Strg + Shift + P OR F1) and type iobroker: to see all available commands.
Connect to your ioBroker instance by invoking the command iobroker: Connect to ioBroker. You can see the process in the gif above. If your connection fails, check the created file .iobroker-config.json and re-run the command iobroker: Connect to ioBroker for another connection attempt.
If .iobroker-config.json is found in the root of your workspace, the extension automatically starts a connection attempt.
Password protected ioBroker installations
If your ioBroker installation is protected via password, the extension will ask for it during the connection attempt. The username is stored in the config file .iobroker-config.jon and the password is stored in the VS Code internal secret storage. If the password was changed, the extions will automtically ask for the new one. It might be necessary to restart VS Code in the case supplying the new password fails.
Type definitions
If you choose to configure ioBroker type definitions, the current defintions are downloaded from GitHub. Additionaly a tsconfig.json is created
(if it does not exist yet) with the necessary settings. This enables Visual Studio Code to know
the ioBroker specific javascript functions.
View: Script explorer
The script explorer can be found in the activity bar behind the ioBroker logo. It shows all scripts, which are on the configured iobroker server. If the script content differs on the local disk from the remote version on the ioBroker server, a star (*) is shown next to the script name.
Click on script to show its contents. If the script is not downloaded yet, only a preview is openend.
Every time a script object is changed, the script explorer refreshes its view.
View: Changed scripts
The Changed scripts view can be found in the activity bar behind the ioBroker logo. It shows all scripts, where the local version differs from the server version. Only scripts which are already uploaded to the server are shown (This might change in the future).
The same scripts are also shown in the script explorer marked with a star.
Download scripts
Either download only one script (iobroker: Download script) or all scripts at once (iobroker: Download all scripts). To download a single script you have to following options:
- Go to the script explorer and press the download button next to the script you want to download
- Use the command
iobroker: Download script. This command is only for updating an existing script as it downloads the script in the active text editor.
Upload scripts
To upload a single script you have the following options:
- Go to the script explorer and press the upload button. This will only work, if the script resides on your disk.
- Use the command
iobroker: Upload script. This command uploads the script in the active text editor.
Start/Stop scripts
To start/stop a single script you have the following options:
- Go to the script explorer and press the start or stop button.
- Use the command
iobroker: Start script, respectivelyiobroker: Stop script. This command starts/stops the script in the active text editor.
Show diff between local and server version of a script
Use the diff button in either the script explorer or the changed scripts view to show a diff of all the changes made locally.
Move scripts
Scripts can be moved from one directory to another on your ioBroker server. Moving a script over the VS Code file browser is not supported yet.
Scripts can only be moved over the script explorer. Right click on the script you want to move, select Move and choose the directory you want the script to move to.
If the script is synced to your local disk, it will also be moved there.
Create scripts and subdirectories
Right click on an existing directory to create a new file in this directory or in the root directory. It is possible to create subdirectories, TypeScript files and JavaScript files. Newly created scripts are immediatly uploaded to the server as stoped scripts.
Delete scripts
Scripts can be deleted on your ioBroker server via the script explorer. Right click on a script, select Delete and confirm that the script shall be really be deleted. If the script is synced to
your local disk, it will also be deleted there.
Delete directories recursively
Directories can be deleted on your ioBroker server via the script explorer. Right click on a directory and select Delete and confirm that the directory and ALL of its content shall be deleted. If the directory is synced to your disk it will be deleted with all of its content.
Change JS Instance
The JS Instance for a script can be changed over the script explorer. Right click on a script and select Change instance via a quick pick.

Show script logging
Press Strg + Shift + U to open the "Output" view. Open the drop down and select ioBroker (all) or ioBroker (current script).
ioBroker (all): As long as a connection to ioBroker exists, this will show the output of all scripts.ioBroker (current script): As long as a connection to ioBroker exists, this will show only the outputs of the script in the currently active tab. This output gets not cleared, if the tab is changed. If you need to clear the output use Visual Studios featureClear Output.
Hover over state id string to show value
Hover over any string with a full state id to show current data of the state:
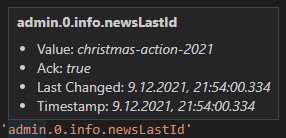
This only works for states and not for channels.
Auto completion (IntelliSense) of iobroker state ids
Press Strg + . in any string to show the IntelliSense menu. If the string contains parts of
an ioBroker state id (for example admin.0.), IntelliSense will show all states/channels/devices/... under the
given partial state id. In case of admin.0. it will look like this:

If you press . instead of enter to select an item the next item will appear automatically.
The whole auto completion process in action:
Extension Settings
After the first activation a .iobroker-config.json file is created in the root directory of your workspace. It contains all settings.
Current limitation: Hot reloading the settings is currently not supported. After changing a setting, restart VS Code.
Available settings
An example with all available settings can be found here.
| Key | Description | Mandatory | Default |
|---|---|---|---|
ioBrokerUrl |
The url has to be prefixed with http/https. Specify no port here. | Yes | |
socketIoPort |
Use the port of the admin adapter (usually 8081). Do not use the port of the socket.io Adapter (usually 8084) as this will not work, because of missing permissions. | Yes | |
scriptRoot |
Relative directory path, which is used as root of ioBroker scripts. | Yes | |
adminVersion |
The admin version to connect to. Valid values: Admin4, Admin5, Admin6, Admin7 |
Yes | |
autoReconnect |
Should a lost connection be automatically be restored? | No | true |
allowSelfSignedCertificate |
Is it allowed to connect to a self signed certificate? | No | false |
username |
The user name for ioBroker. Only necessary for password protected ioBroker installations | No | |
collectDebugLog |
Should the debug log be created directly on start up? | No | false |
scriptExplorer.collapseDirectoriesOnStartup |
Should the directories in the script explorer be collapsed on startup. | No | true |
autoUpload |
Automatically upload scripts on save? | No | false |
scriptAutoRun |
Automatically start a uploaded script? | No | false |
Admin versions
The extension currently supports the following Admin versions:
- Admin4 (Deprecated Some features like password protected installations are not supported)
- Admin5
- Admin6
- Admin7
Known Issues
If you got any problems, please open a GitHub issue.
Release Notes
See the section Releases on Github for release notes.