i2a
 i2a copied to clipboard
Published
20 hours ago •
 mavidser
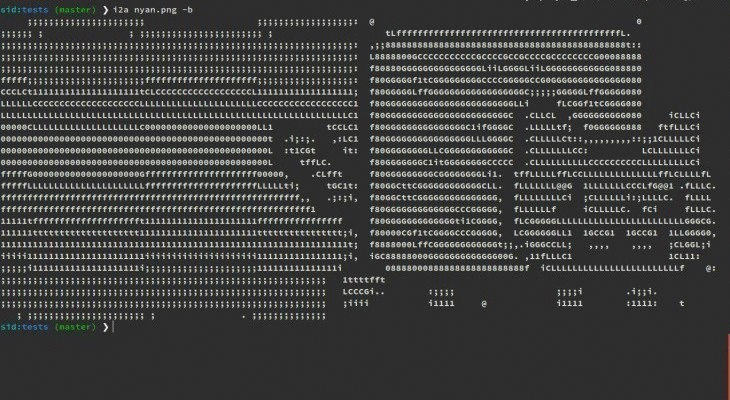
i2a creates ASCII art from images right on your terminal.
i2a
i2a creates ASCII art from images right on your terminal.
Installation
Step 1: Install dependencies
OSX:
$ brew install libtiff libjpeg webp little-cms2
Linux (Ubuntu):
$ sudo apt-get build-dep python-imaging
$ sudo apt-get install libjpeg8 libjpeg62-dev libfreetype6 libfreetype6-dev
For other operating systems, check out the instructions on this page.
Step 2: Install i2a
Option 1: Pip
$ pip install i2a
Option 2: From source
$ git clone https://github.com/mavidser/i2a.git
$ cd i2a/
$ python setup.py install
Usage
Basic usage
$ i2a image.jpg
Colored output
$ i2a --colors --bold image.jpg #Bold for making the output prettier
Write the art to a file
$ i2a image.jpg > ascii.txt #Use no filters like bold, color, or bg when writing to a file
If the terminal has a light background
$ i2a image.jpg --invert
or
$ i2a image.jpg --bg=BLACK
Options
A complete list of available options:
-
--colors: Show colored output. i2a assumes that the terminal supports 256 colors. -
--bold: Show bold characters. Makes the output is easier on eyes. -
--invert: Invert the colors. Suitable for a light background. -
--bg=(BLACK|WHITE): Specify your own background color. -
--height=<val>: Set the height in number of characters. -
--width=<val>: Set the width in number of characters. -
--contrast=<factor>: Manually set contrast (default value: 1.5, for original image: 1.0). -
--alt-chars: Use an alternate set of (more detailed) characters.
Contributing
- Create an issue in the issue tracker describing the feature.
- Fork the project.
- Create a new branch -
git checkout -b new-feature - Commit the changes and push to your branch -
git push origin new-feature - Open a pull request, referencing the issue you created.
Changelog
See the releases page.
License
See the LICENSE file.