diy-iidx
 diy-iidx copied to clipboard
Arduino Leonardo code to make a Beatmania controller. Included CAD files for laser cutting materials.
Beatmania IIDX Controller (DIY)
Check http://consandstuff.github.io/ for full instructions.
CODE INSTRUCTIONS:
Folder iidxsdvx/IIDX 9+1e+9leds/Arduino Leonardo/ contains 2 folders.
This folder contains the code for IIDX layout. (9 buttons, 1 encoder, 9 LEDs)
-
leovx: for low quality encoders (24ppr)
-
leovxhq: for high quality encoders (600ppr)
If you have encoders with ppr different than 24ppr or 600ppr, you have to change some values inside the code.
Part List / Hardware
Things usde to make this controller. You can find links here: http://consandstuff.github.io/rhythmcons/beatmania-iidx/iidx-small/pics/pic003.png
- Arduino Leonardo
- 1 High quality encoder (600ppr)
- 9 50x33 beatmania buttons
- 2 33x33 square buttons
- 9 Omron D2MV-01-1C3 (50gr.) microswitch
- Crimp connectors
- 14 moles 2.54 4pin wires with male and female connectors
- 1 perfboard
Part List / Building Materials
Most of these parts should be CNC cut or laser cut (which is expensive). You can also use a cardboard box or wood MDF planks. I used clear acrylic because it's cheaper, also using only one thickness will make it even less expensive.
Main mounting plate
- 3 or 5mm Black/Clear Acrylic with holes for button pad and disc encoder, also screw holes. I used 5mm clear acrylic, but I found out it's better to use 3mm black acrylic for the DJDAO FPS look.
Button pads
- 5mm Clear acrylic with holes for buttons and encoders. Black looks way better, I used clear.
Turntable mounting plate
- 5mm Clear acrylic with holes for encoder and screws.
Turntable base
- 2x5mm round discs with holes for encoder and mounting screws. Use this base to bring your turntable to your desirable height.
Turntable disc
- 5mm round disc with hole to fit the encoder. You can also cover this with a rubber skin for maximum gripness. The acrylic itself is really slippery.
Mounting Box
- I used 9-12mm MDF for the box walls, 5,5mm MDF for the base and 3mm MDF for the back door. Every cut and hole was made by me with a saw and some sandpaper. Using an electric saw and a sandpaper machine is a lot easier.
PIN DIAGRAM
The pins are assigned to every button and encoder. You'll see that the PCB has many pins from A0 to A5, and from 0 to 13, so you'll have 19 pins in total. Remember that buttons use one pin, but encoders will use 2 pins. The PCB also has 3 grounds (GND) to choose from, and a 5v output for the 600ppr encoder.
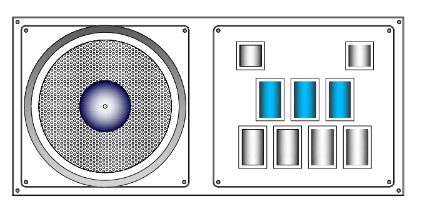
Beatmania IIDX Layout
Tested working. See code included.
| Button | Pin # | Button # | LED Pin # |
|---|---|---|---|
| Start | 11 | Button 8 | 2 |
| VFX | 12 | Button 9 | 3 |
| Button 1 | 13 | Button 1 | 4 |
| Button 2 | A0 | Button 2 | 5 |
| Button 3 | A1 | Button 3 | 6 |
| Button 4 | A2 | Button 4 | 7 |
| Button 5 | A3 | Button 5 | 8 |
| Button 6 | A4 | Button 6 | 9 |
| Button 7 | A5 | Button 7 | 10 |
| ENCODERS | DATA 1 | DATA 2 |
|---|---|---|
| Encoder Tuntable | 0 | 1 |
That leaves pins 2 to 10 for LEDS (9 LEDS, enough for each button)
Assembly / Building the controller
- Take the keypad of your choose. In this case I'll be using the IIDX&SDVX hybrid keypad
- Prepare buttons with the ammount of pressure you like (button + spring + led + microswitch)
- Insert every button where it belongs and screw the plastic nut from bellow
- Insert both cheap encoders and screw the nut from above.
- Mount the disc mounting plate on the Main mounting plate with the screws.
- Mount the disc base on top of the Disc mounting plate with screws.
- Mount th ehigh quality encoder in it's place with 3 screws.
- Turn around the main mounting plate and mount the Leonardo and Protoboard/Breadboard
- Wire every pin on the Leonardo PCB with a pin on the Breadboard using jumper wires.
- Also wire one Ground to the PCB.
- Mount the keypad plate on the Main plate with screws.
- Wire every button and LED with the breadboard using jumper wires.
- Connect the PCB to the computer using a USB cable, and using Arduino IDE load the code into the Arduino Leonardo.
- Finally mount the plate onto the mounting box and mount the disc on the high quality encoder.
Gallery
Metadata
Owner
Metadata
Arduino Leonardo code to make a Beatmania controller. Included CAD files for laser cutting materials.