JeVe_EasyOTA
 JeVe_EasyOTA copied to clipboard
Making ESP8266 OTA Updates easy to include in your project
JeVe_EasyOTA library for Arduino
Purpose
Library which makes it easy to add support for Over-The-Air (OTA) updates to your project. Works with ESP8266 and ESP32.
Features
- [x] mDNS
- [x] Add multiple networks to connect to
- [x] Allow/disallow open networks
- [x] Automatic reconnect on lost network
- [ ] HTTP update in AP mode
- [ ] Web update (requires web server)
- [ ] Stream update (e.g. MQTT or other)
- [ ] AdHoc network firmware sync - if you have ESP AdHoc network and update one device, all get updated
- [ ] Firmware sync - you can setup a bunch of devices on the same network you want to keep firmware synchronized without actual AdHoc
How it works
This library tries to connect to configured APs first. Then if those fail ,tries to scan for open networks and connect to those. If it is not possible to connect to neither configured nor open networks - it falls back to AP mode.
Installation
Install as ZIP
- Click here to download the ZIP file
- Start the Arduino IDE
- Go to Sketch > Include Library > Add .ZIP Library...
- Select the ZIP file you just downloaded
Install using Git (OSX / Linux)
- Open a terminal window
- Go to your Arduino libraries dir:
cd ~/Documents/Arduino/libraries - Execute:
git clone https://github.com/jeroenvermeulen/JeVe_EasyOTA.git - (Re)start your Arduino IDE
Usage
The included examples are the easiest way to learn how to use this library.
You will find them in the Arduino IDE under menu File > Examples > Examples from Custom Libraries (bottom) > JeVe_EasyOTA.
WARNING: Make sure you select the right board in the Arduino IDE because there is less checking when you upload using OTA.
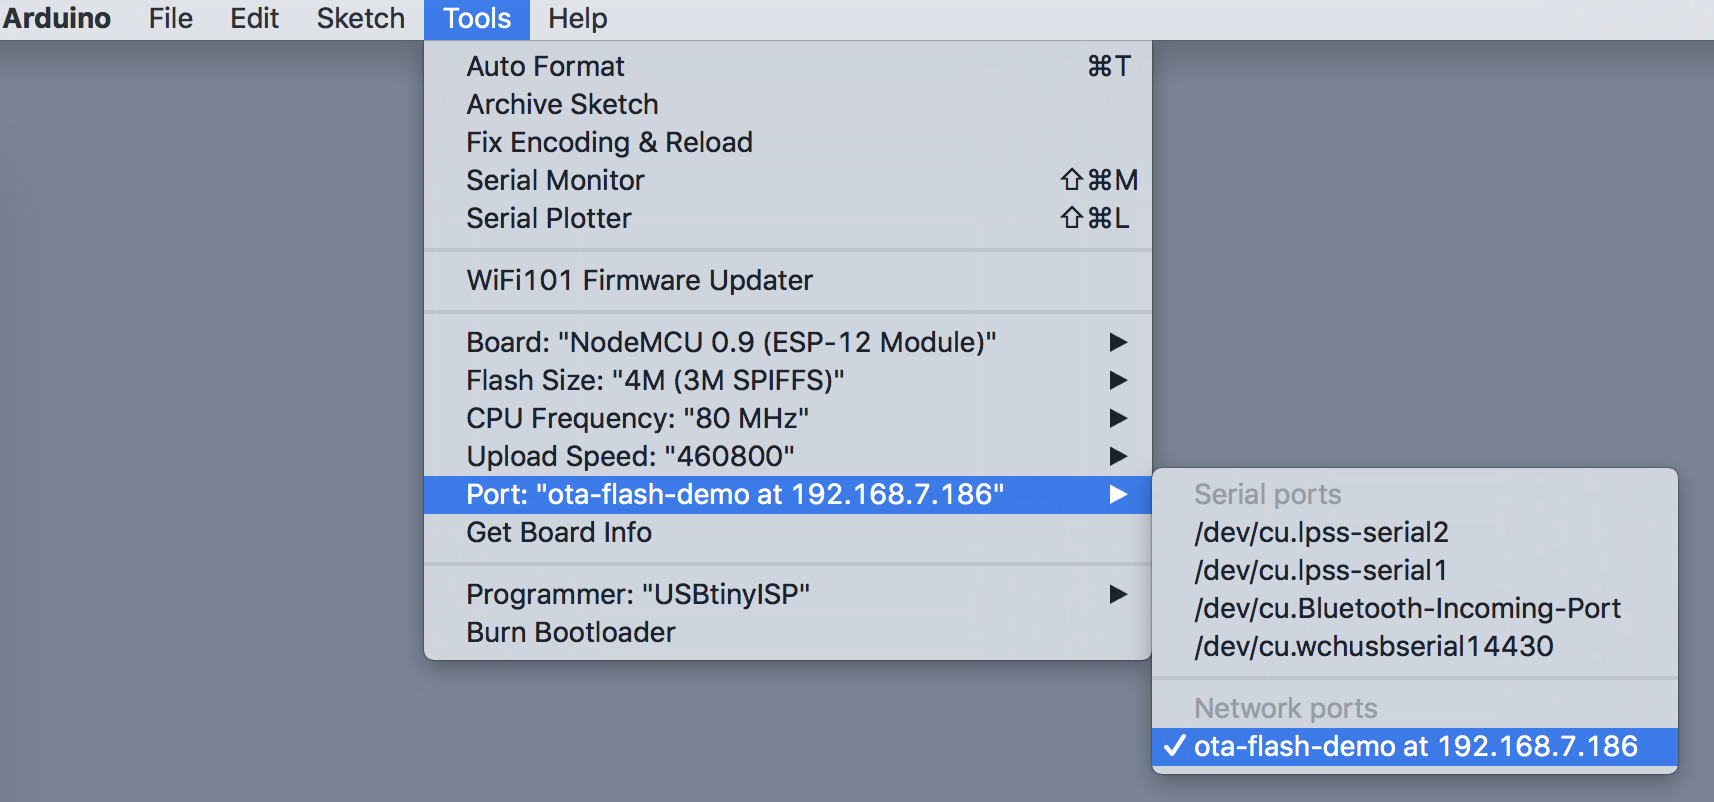
After you put the code in your Arduino, after a few minutes you should see the OTA port in the Arduino IDE under the menu Tools > Port.
If somehow the wifi connection fails, the Arduino will become an access point with the configured hostname as SSID. In the examples the default hostname is ota-flash-demo.
To include it in your own project:
Put on top of your Arduino file:
#include <JeVe_EasyOTA.h>
EasyOTA OTA("arduino_hostname");
Put this in your setup() function. This example logs debugging output to Serial:
Serial.begin(9600);
// This callback will be called when EasyOTA has anything to tell you.
OTA.onMessage([](const String& message, int line) {
  Serial.println(message);
});
// Add networks you wish to connect to
OTA.addAP("wifi_ssid", "wifi_password");
// Allow open networks.
// NOTE: gives priority to configured networks
OTA.allowOpen(true);
// Set password for OTA programming
OTA.setPassword("OTApassword");
Put this in you loop function:
OTA.loop();
Or if you need timing:
static unsigned long last_m = millis();
unsigned long now = millis();
OTA.loop(now);

if (now - last_m > 1000) {
	last_m = now;
	// do something every second
}
That's all folks.
Problem Solving
Network port is not showing in IDE
- It sometimes takes a few minutes for the port to show in the Arduino IDE
- Check if the port is found, this also seems to speed up detection in the IDE:
- In OSX on console:
dns-sd -B _arduino._tcp - In Windows use Bonjour browser
- In OSX on console:
- Try to restart the Arduino board, wait 5 minutes, check if the Network port shows up
- Try to restart your Arduino IDE, wait 5 minutes, check if the Network port shows up
- On Windows 8.1 or older, mDNS does may not work, or only when you install Bonjour Services.
- Your may need op open 'mDNS' on your firewall: UDP port 5353
Test Results
Works with:
ESP8266
Wemos® TTGO ESP8266 0.91 Inch OLED For Arduino Nodemcu
- Board selection: NodeMCU 0.9 (ESP-12 Module)
- Example: OTA_Oled_U8g2
- Banggood board
Geekcreit® NodeMcu Lua ESP8266 ESP-12E WIFI Development Board
- Board selection: NodeMCU 1.0 (ESP-12E Module)
- Example: OTA
- Banggood board
Geekcreit® LoLin V3 NodeMcu Lua WIFI Development Board
- Board selection: NodeMCU 1.0 (ESP-12E Module)
- Example: OTA
- Banggood board
Upgraded Version 1M Flash ESP8266 ESP-01 WIFI Transceiver Wireless Module
- Important: Select Tools > Flash Size > 1M (128K SPIFFS)
- Board selection: Generic ESP8266
- Example: OTA
- Banggood board
WeMos® D1 mini V2.2.0 WIFI Internet Development Board Based ESP8266 4MB FLASH ESP-12S Chip
- Board selection: WeMos D1 R2 & Mini
- Example: OTA
- Banggood board
ESP32
Geekcreit® ESP32 Development Board WiFi+Bluetooth Ultra Low Power Consumption Dual Cores ESP-32 ESP-32S Board
- Board selection: DOIT ESP32 DEVKIT V1
- Example: OTA
- Banggood board
WeMos® TTGO ESP32 WiFi + Bluetooth Board 4MB Flash UNO D1 R32
with Geekcreit® IIC / I2C 1602 Blue Backlight LCD Display Module For Arduino
- Board selection: ESP32 Dev Module
- Example: OTA_LCD_I2C
- Note: The SCL and SCA pins are the ones closest to the reset button on this board.
- Banggood board
- Banggood display
Metadata
Owner
Metadata
Making ESP8266 OTA Updates easy to include in your project