wp-api-swaggerui
 wp-api-swaggerui copied to clipboard
SwaggerUI for WordPress REST API v2
SwaggerUI for WordPress REST API

Description
SwaggerUI used to make WordPress REST API endpoint have a interactive UI, so we can check our API endpoint directly from the website it self.
Features
- Support for
GET,POST,PUT,PATCHandDELETErequest methods - Support for Auth Basic authorization method
- Choose which namespace API that will be used on the SwaggerUI

Requirements
- Your website should not block support of WordPress default REST API
- Works for WordPress REST API Version 2
- PHP Version should be greater than 5.4
Installation
Manual Installation
- Clone this repository
- Run
npm install - Run
npm run build - Copy all files into your
wp-content/plugins/wp-api-swaggeruifolder
Automatic Installation
- Log in and navigate to Plugins > Add New.
- Type “WP API SwaggerUI” into the Search and hit Enter.
- Locate the WP API SwaggerUI plugin in the list of search results and click Install Now.
- Once installed, click the Activate link.
Usage
After installing and activating the plugin, from your WordPress admin dashboard, access settings and then you will be able to see the Swagger option. Click that to access the Swagger Setting page.
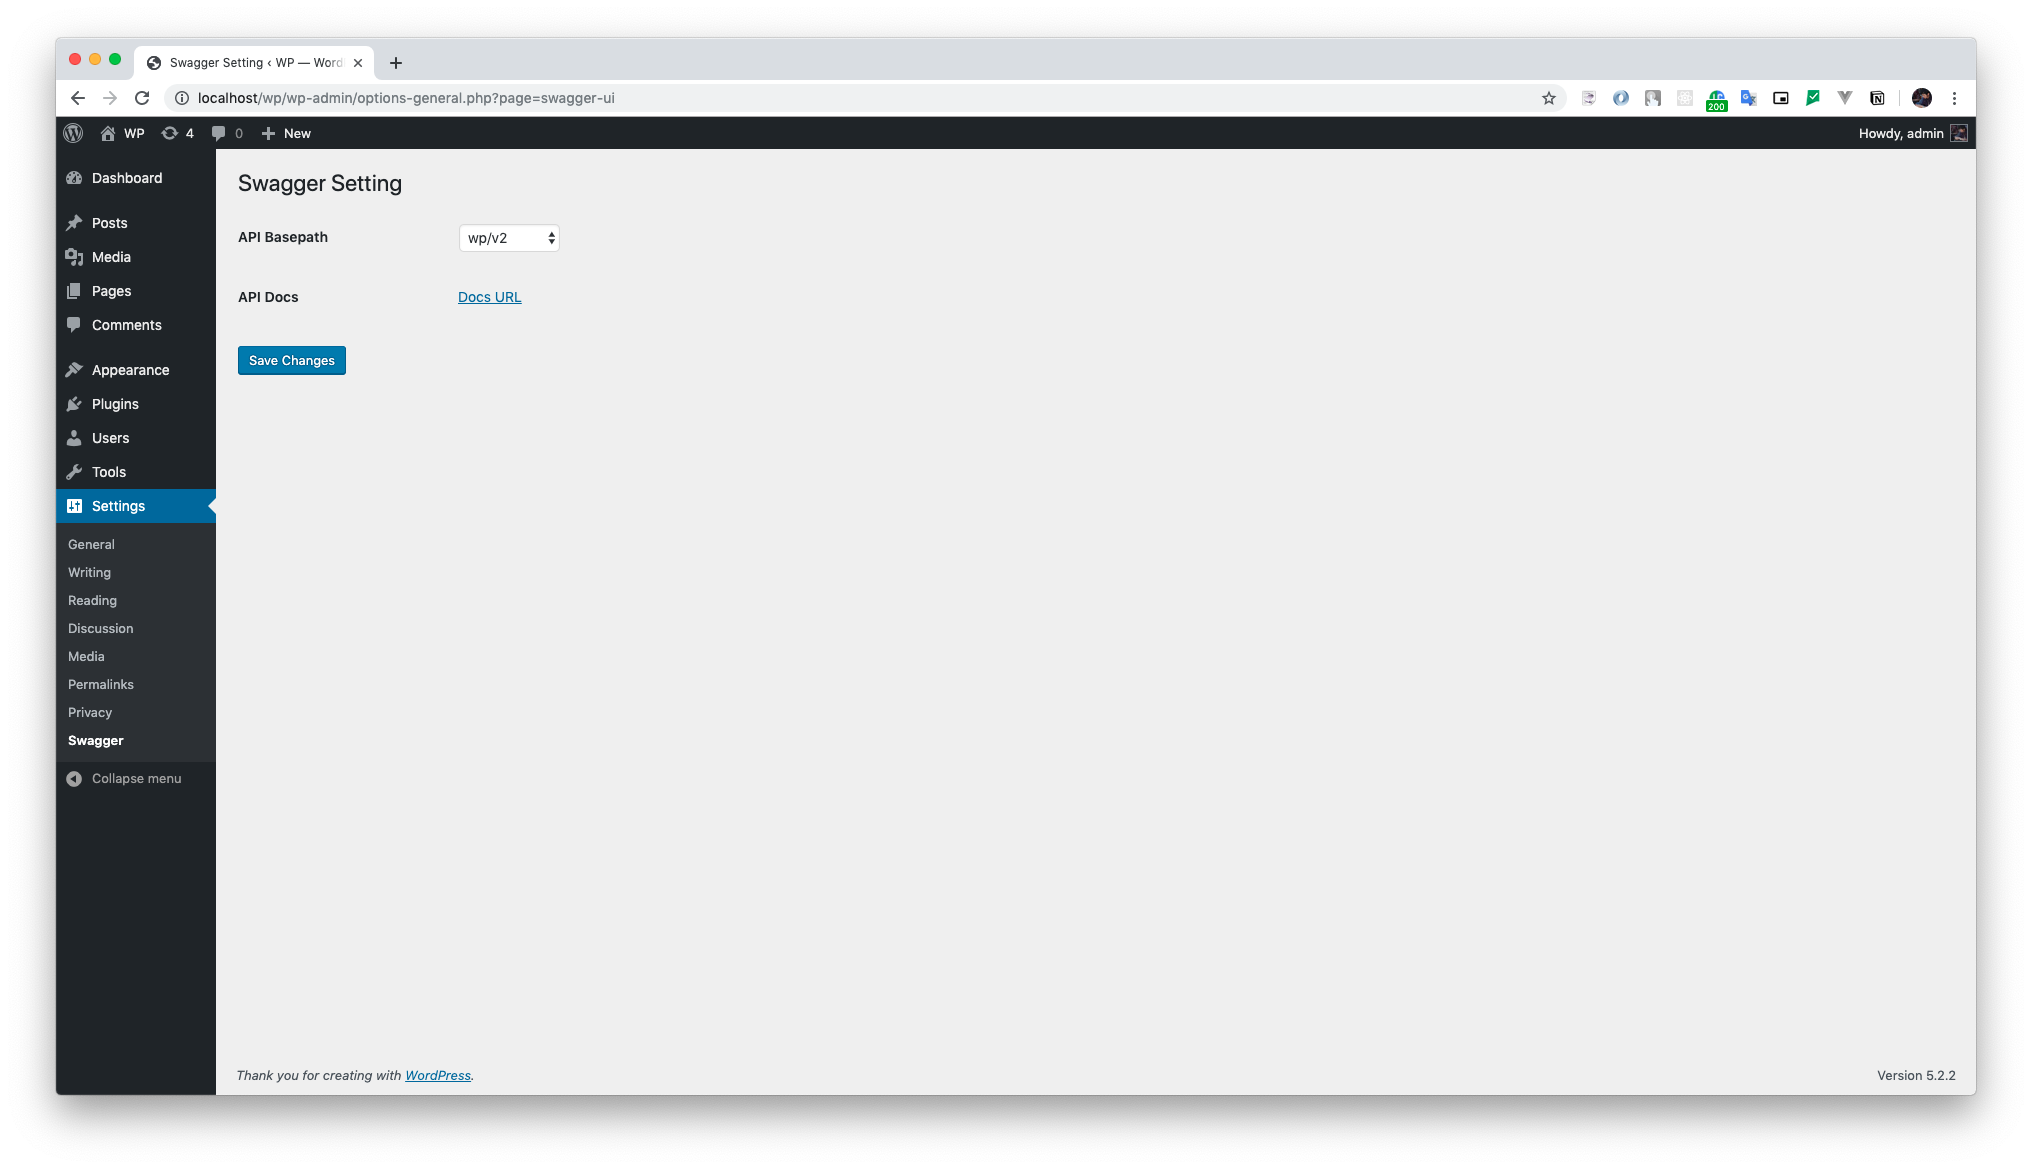
Changing API Basepath
From the Swagger Setting page, choose between the API Basepath options displayed on the select menu, then click on the Save Changes button. Accessing the Docs URL you will be able to see the Swagger UI configured for the chosen endpoint.
Access Swagger UI
You can see Swagger Docs URL accessing:
- http://example.com/rest-api/docs/
REST API Customization
To customize how your created endpoints are shown at Swagger, here is an example with all the possible arguments you can add to your route:
GET
register_rest_route(
    'pet',
    '/(?P<petId>\d+)',
    [
        'methods'              => 'GET',
        'callback'             => $service->get_callback(),
        'summary'              => 'Find pet by ID',
        'description'          => 'Returns a single pet',
        'produces'             => ['application/json', 'application/xml'],
        'responses'            => [
            '200' => [
                'description' => 'successful operation',
                'schema'      => [
                    'type'       => 'object',
                    'required'   => ['name', 'photoUrls'],
                    'properties' => [
                        'id' => [
                            'type'   => 'integer',
                            'format' => 'int64',
                        ],
                        'name' => [
                            'type'    => 'string',
                            'example' => 'doggie',
                        ],
                        'status' => [
                            'type'        => 'string',
                            'description' => 'pet status in the store',
                            'enum'        => ['available', 'pending', 'sold']
                        ]
                    ],
                    'example'    => [
                        'id'     => 1,
                        'name'   => 'doggie',
                        'status' => ' available'
                    ],
                    'xml' => [
                        'name' => 'Pet'
                    ]
                ]
            ],
            '400' => [
                'description' => 'Invalid ID supplied'
            ],
            '404' => [
                'description' => 'Pet not found'
            ]

        ],
        'args'                 => [
            'petId'   => [
                'in'          => 'path',
                'description' => 'ID of pet to return',
                'required'    => true,
                'type'        => 'integer',
                'format'      => 'int64'
            ]
        ],
        'permission_callback'  => '__return_true'
    ]
)
POST
register_rest_route(
    'user',
    '/',
[
  'methods'              => 'POST',
  'callback'             => $service->get_callback(),
  'summary'              => 'Create user',
  'description'          => 'This can only be done by the logged in user.',
  'consumes'             => ['application/json'],
  'produces'             => ['application/json', 'application/xml'],
  'responses'            => [
      'default' => [
          'description' => 'successful operation',
      ]
  ],
  'args'                 => [
      'body'   => [
          'in'          => 'body',
          'description' => 'Created user object',
          'required'    => true,
          'type'        => 'object',
          'schema'      => [
              'type'       => 'object',
              'properties' => [
                  'id' => [
                      'type'   => 'integer',
                      'format' => 'int64',
                  ],
                  'username' => [
                      'type' => 'string'
                  ],
                  'email' => [
                      'type' => 'string'
                  ],
                  'password' => [
                      'type' => 'string'
                  ],
              ],
              'example' => [
                  'id'       => 0,
                  'username' => 'string',
                  'email'    => 'string',
                  'password' => 'string',
              ]
          ]
      ]
  ],
  'permission_callback'  => '__return_true'
]
)
These examples were based on the defaults presented at Swagger Editor
Guide
If you need help undesrtadning any of of the parameters used on this documentation, please refer to Swagger Documentation.
Here is some useful links: