espSuite
 espSuite copied to clipboard
Full-featured Serial bridge for ESP8266, supports MQTT, WebSockets,Telnet, and also comes with a nice Config Page
espSuite
Full-featured Serial bridge for ESP8266 and ESP32, supports MQTT, WebSockets,Raw TCP (Telnet), Server and Client mode and also comes with a nice Configuration Page.
Now we don't have to upload code again only to switch to AP Mode or change the password. Just open the config page and you're all set.
New version: ESP32 support + EEPROM emulation for saving default data. This greatly improves stability.
Previous version moved to the legacy folder.
Flashing:
Pre-built:
Bulding from source is recommended for customizing the default options.
Prebuilt binaries available:
- Wemos Lolin32
- Go to
./bin/esp32and runflash_wemos_lolin32.bat
- Go to
- Generic ESP-01 module (not tested yet)
- Install
python 3and esptool (withpip) - Go to
./bin/esp8266and runflash_esp01_generic.bat
- Install
Edit the
.batfiles to replace COM3 with your port number if it fails to find the device.
For linux, just copy+paste the batch file contents in the terminal.
From source
Tested with:
- Arduino IDE 1.8.13
- arduinoWebSockets 2.3.4
- pubsubclient 2.8.0
- EEPROM Rotate 0.9.2
- Arduino core for ESP32 1.0.4
- Arduino core for ESP8266 3.0.1 (build succeeded, but not tested in actual device )
Steps:
- Upload the Sketch to ESP8266/ESP32
- Connect to its AP (SSID is things by default) and go to 192.168.1.1 to see the Setup Page
- Optional: open
constants.hto view or edit default settings (changeINIT_CODEto some arbitrary number of your choice after every new change)
The ESP will work as a Serial device, always when you Serial.print("something"), something will be sent using the protocol you've chosen. When you send something to its IP address and port (don't forget the '\n' in the end), it will be printed to Arduino too.
Things to make it better:
- Choose another language (currently, EN-US and PT-BR available) by opening
espSuite.inoand replacingindex_enbyindex_br - Edit
/pages/index_xx.htmlwith your custom html, then generate a newindex_xx.html.hwith the providedpage_convertertool by running it from thepagesfolder:
..\tools\page_converter.exe .\index_xx.html
Note: a linux binary for the page converter will come soon, but you should be able to build it with gcc in no time.
The Setup Page
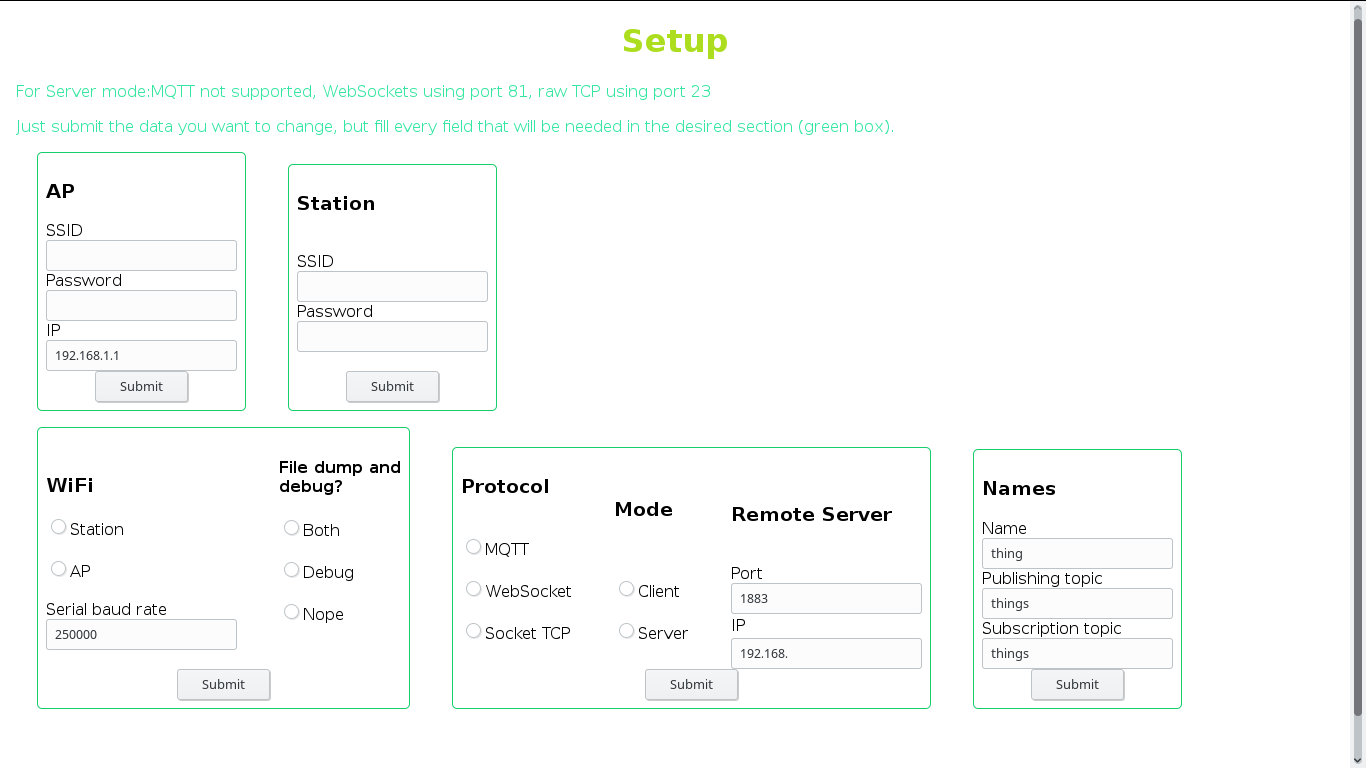
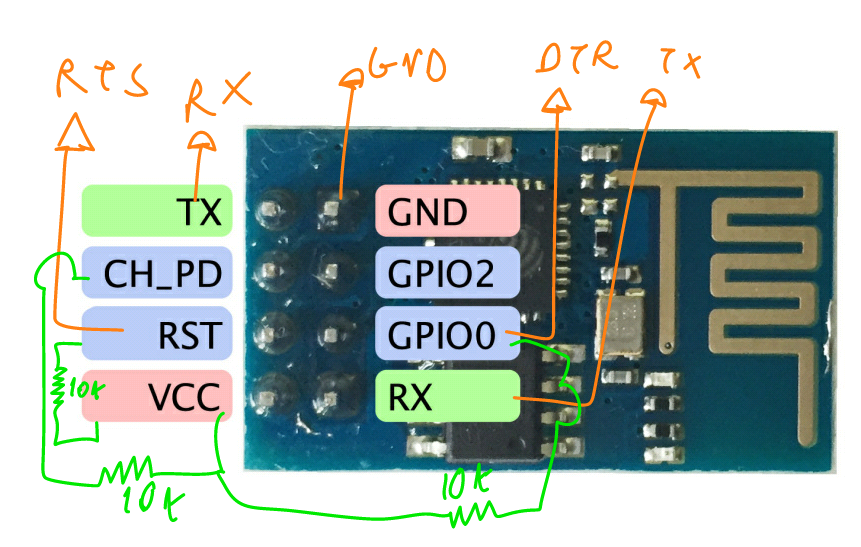
The Wiring Diagram
Just in case you forgot:
Notes
- Disconnect DTR and RTS before opening Arduino Serial Monitor
- Make sure to use Newline('\n') as line ending char, or change
dataTrailerin the sketch to use something else.