TinyWebDB-PHP
 TinyWebDB-PHP copied to clipboard
TinyWebDB System written in PHP
TinyWebDB-PHP
TinyWebDB System written in PHP, compatible with Apache & PHP
How to host your own TinyWebDB Instance
This tutorial will help you to host your own TinyWebDB Instance for FREE using an alternative PHP version This means that you can use any hosting provider or a VPS with a running Apache & PHP server
The tutorial is divided in 4 different sections:
- Signup into a hosting service
- Uploading the files
- Configuration
- Makeroid Builder setup
1. Signup into a hosting service
You can skip this step and go to "2. Uploading the files" if you already have a hosting provider or a VPS
One provider that will suit you is AwardSpace, so we'll use that one for this guide. But you can use any other if they allow API hostings (this means that websites can be accessed with JavaScript disabled basically)
-
Signup into AwardSpace by clicking on the "Give it a try" button

-
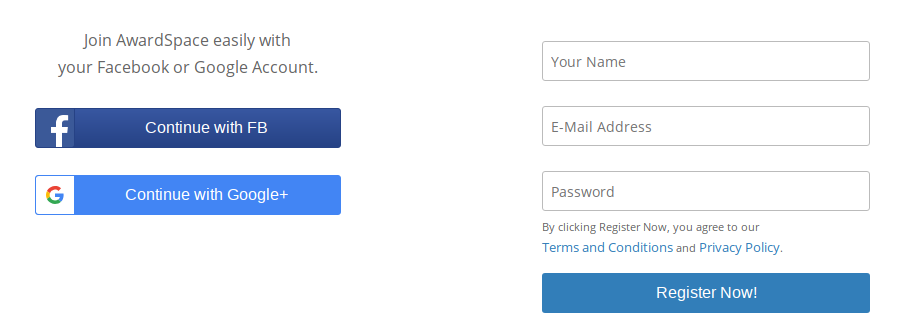
Fill the following form with your details (or use a Social Login) and click on Register Now!
-
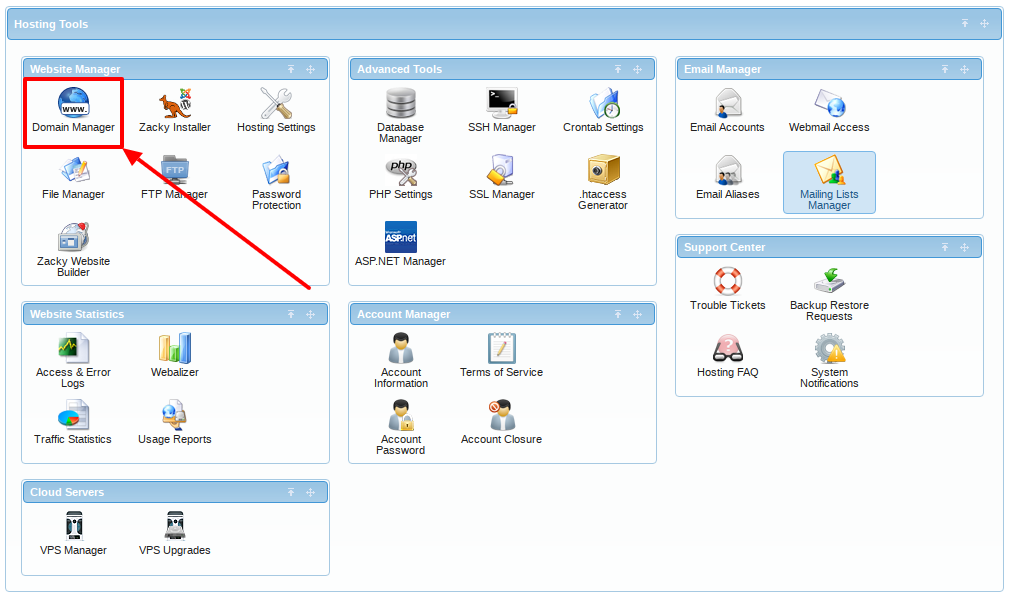
After closing all Welcome Dialogs, scroll down and click on Domain Manager:
-
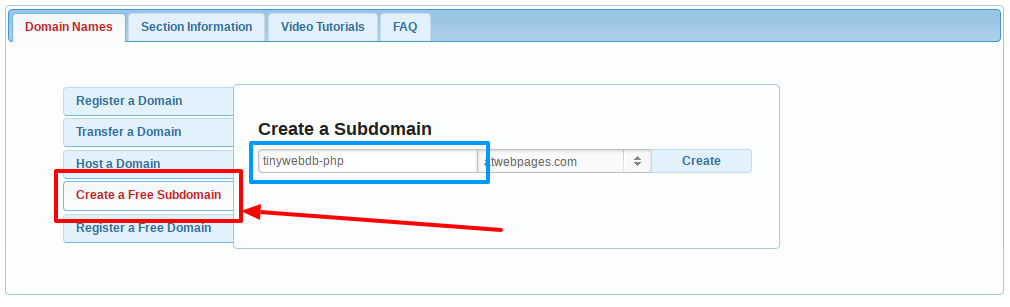
Click on "Create a Free Subdomain", input the desired name for your project and hit "Create":
-
You are done! In a few minutes your new website will be ready
2. Uploading the files
For this section, we'll use the File Transfer Protocol (FTP) to upload the files as all hosting providers allow it, and you can easily configure it for your VPS (just run sudo apt-get install vsftpd if FTP is not yet enabled)
-
First of all, we'll need to install a FTP Client on our computer to access the files. I strongly recommed FileZilla. For me, it's the best one due to its simplicity and functionalities. - For Windows users: Windows x64 or Windows x32 - For Mac OS X users: Mac OS X - For Linux users: Execute
sudo apt-get install filezilaOr just Google "FileZilla Clientyour_platform_nameInstallation" -
Now we will need the FTP Access Credentials If you use a VPS, those credentials are the ones used to login via SSH Let's go back to AwardSpace. To get those credentials, you'll need to Login to the Dashboard, and click on FTP Manager
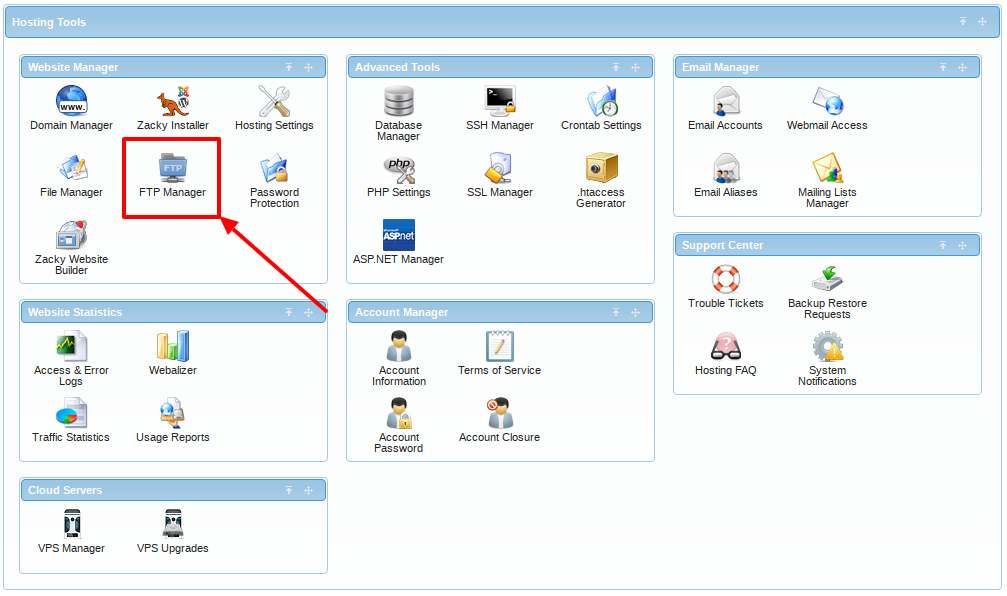 Now create a new FTP Account by filling these textboxes (leave
 FTP Pathblank):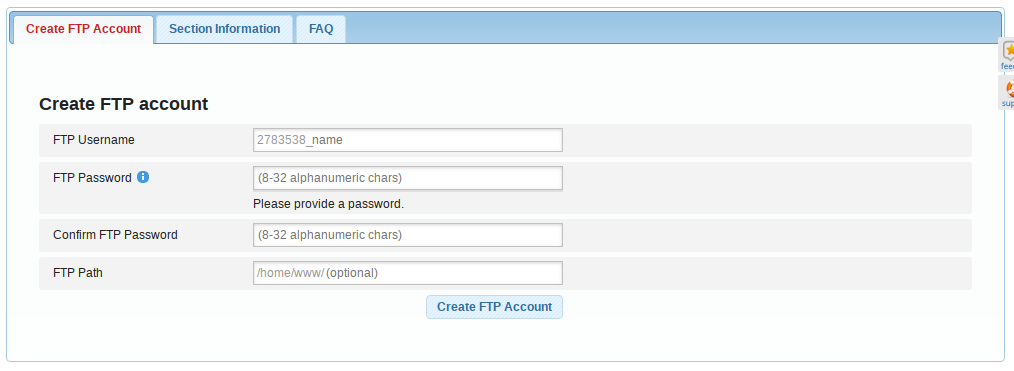 Finally, scroll down and click on "Information"
 We’ll need the
 FTP Usernameand one of theHostnames(FTP Passwordis the one you inputted before) only -
Open FileZilla, and fill the textboxes that are on the top with this data:
 Host:
Host: your_website_urlor your hosting provider FTP URL or your VPS IP Address Username:FTP Usernamefrom the last step or the FTP Username of your hosting provider or your VPS username Password:FTP Passwordfrom the last step or the FTP Password of your hosting provider or your VPS password of the username Port:21if you use a hosting provider or22if you have a VPS -
Now hit Quickconnect, and if appears check the "Always trust certificate in future sessions" and hit "OK":

-
You'll see these new folders:
 Access to
 your_website_url(if you are using a VPS go to/var/www/html) folder (it can sometimes bepublic_htmlorpublic) and delete ALL its files (except the..folder) -
Now download this ZIP file Extract the ZIP, navigate to
TinyWebDB-PHP-masterand you'll see the following files: You need to upload the following files:
 .htaccess,database.txt,getvalue.phpandstoreavalue.php. Select them and drag to the FTP Client to upload It should look like this:

3. Configuration
- In FileZilla, make right click to
database.txtand click on "File permissions...": You need to make the new dialog like this: What is important is the Numeric value, which should be 666
Hit "OK" and configuration will be done for hosting providers
What is important is the Numeric value, which should be 666
Hit "OK" and configuration will be done for hosting providers
- If you are using a VPS, you will need to allow HTAccess Override and Mod Rewrite Module manuall
Login via SSH and:
- Execute
sudo nano /etc/apache2/apache.confand browse to a block of code like this: You need to change the
 AllowOverride NonetoAllowOverride AllAfter this, hit Ctrl+X, Y and Enter - Execute
sudo a2enmod rewrite - Execute
sudo systemctl restart apache2
- Execute
4. Makeroid Builder setup
-
In all TinyWebDB Components, you need to change in Properties the Service URL to the URL of your service or the IP of your VPS. In my case, it is
http://tinywebdb-php.epizy.com
-
Enjoy your own TinyWebDB Service! :tada: