gold-right
 gold-right copied to clipboard
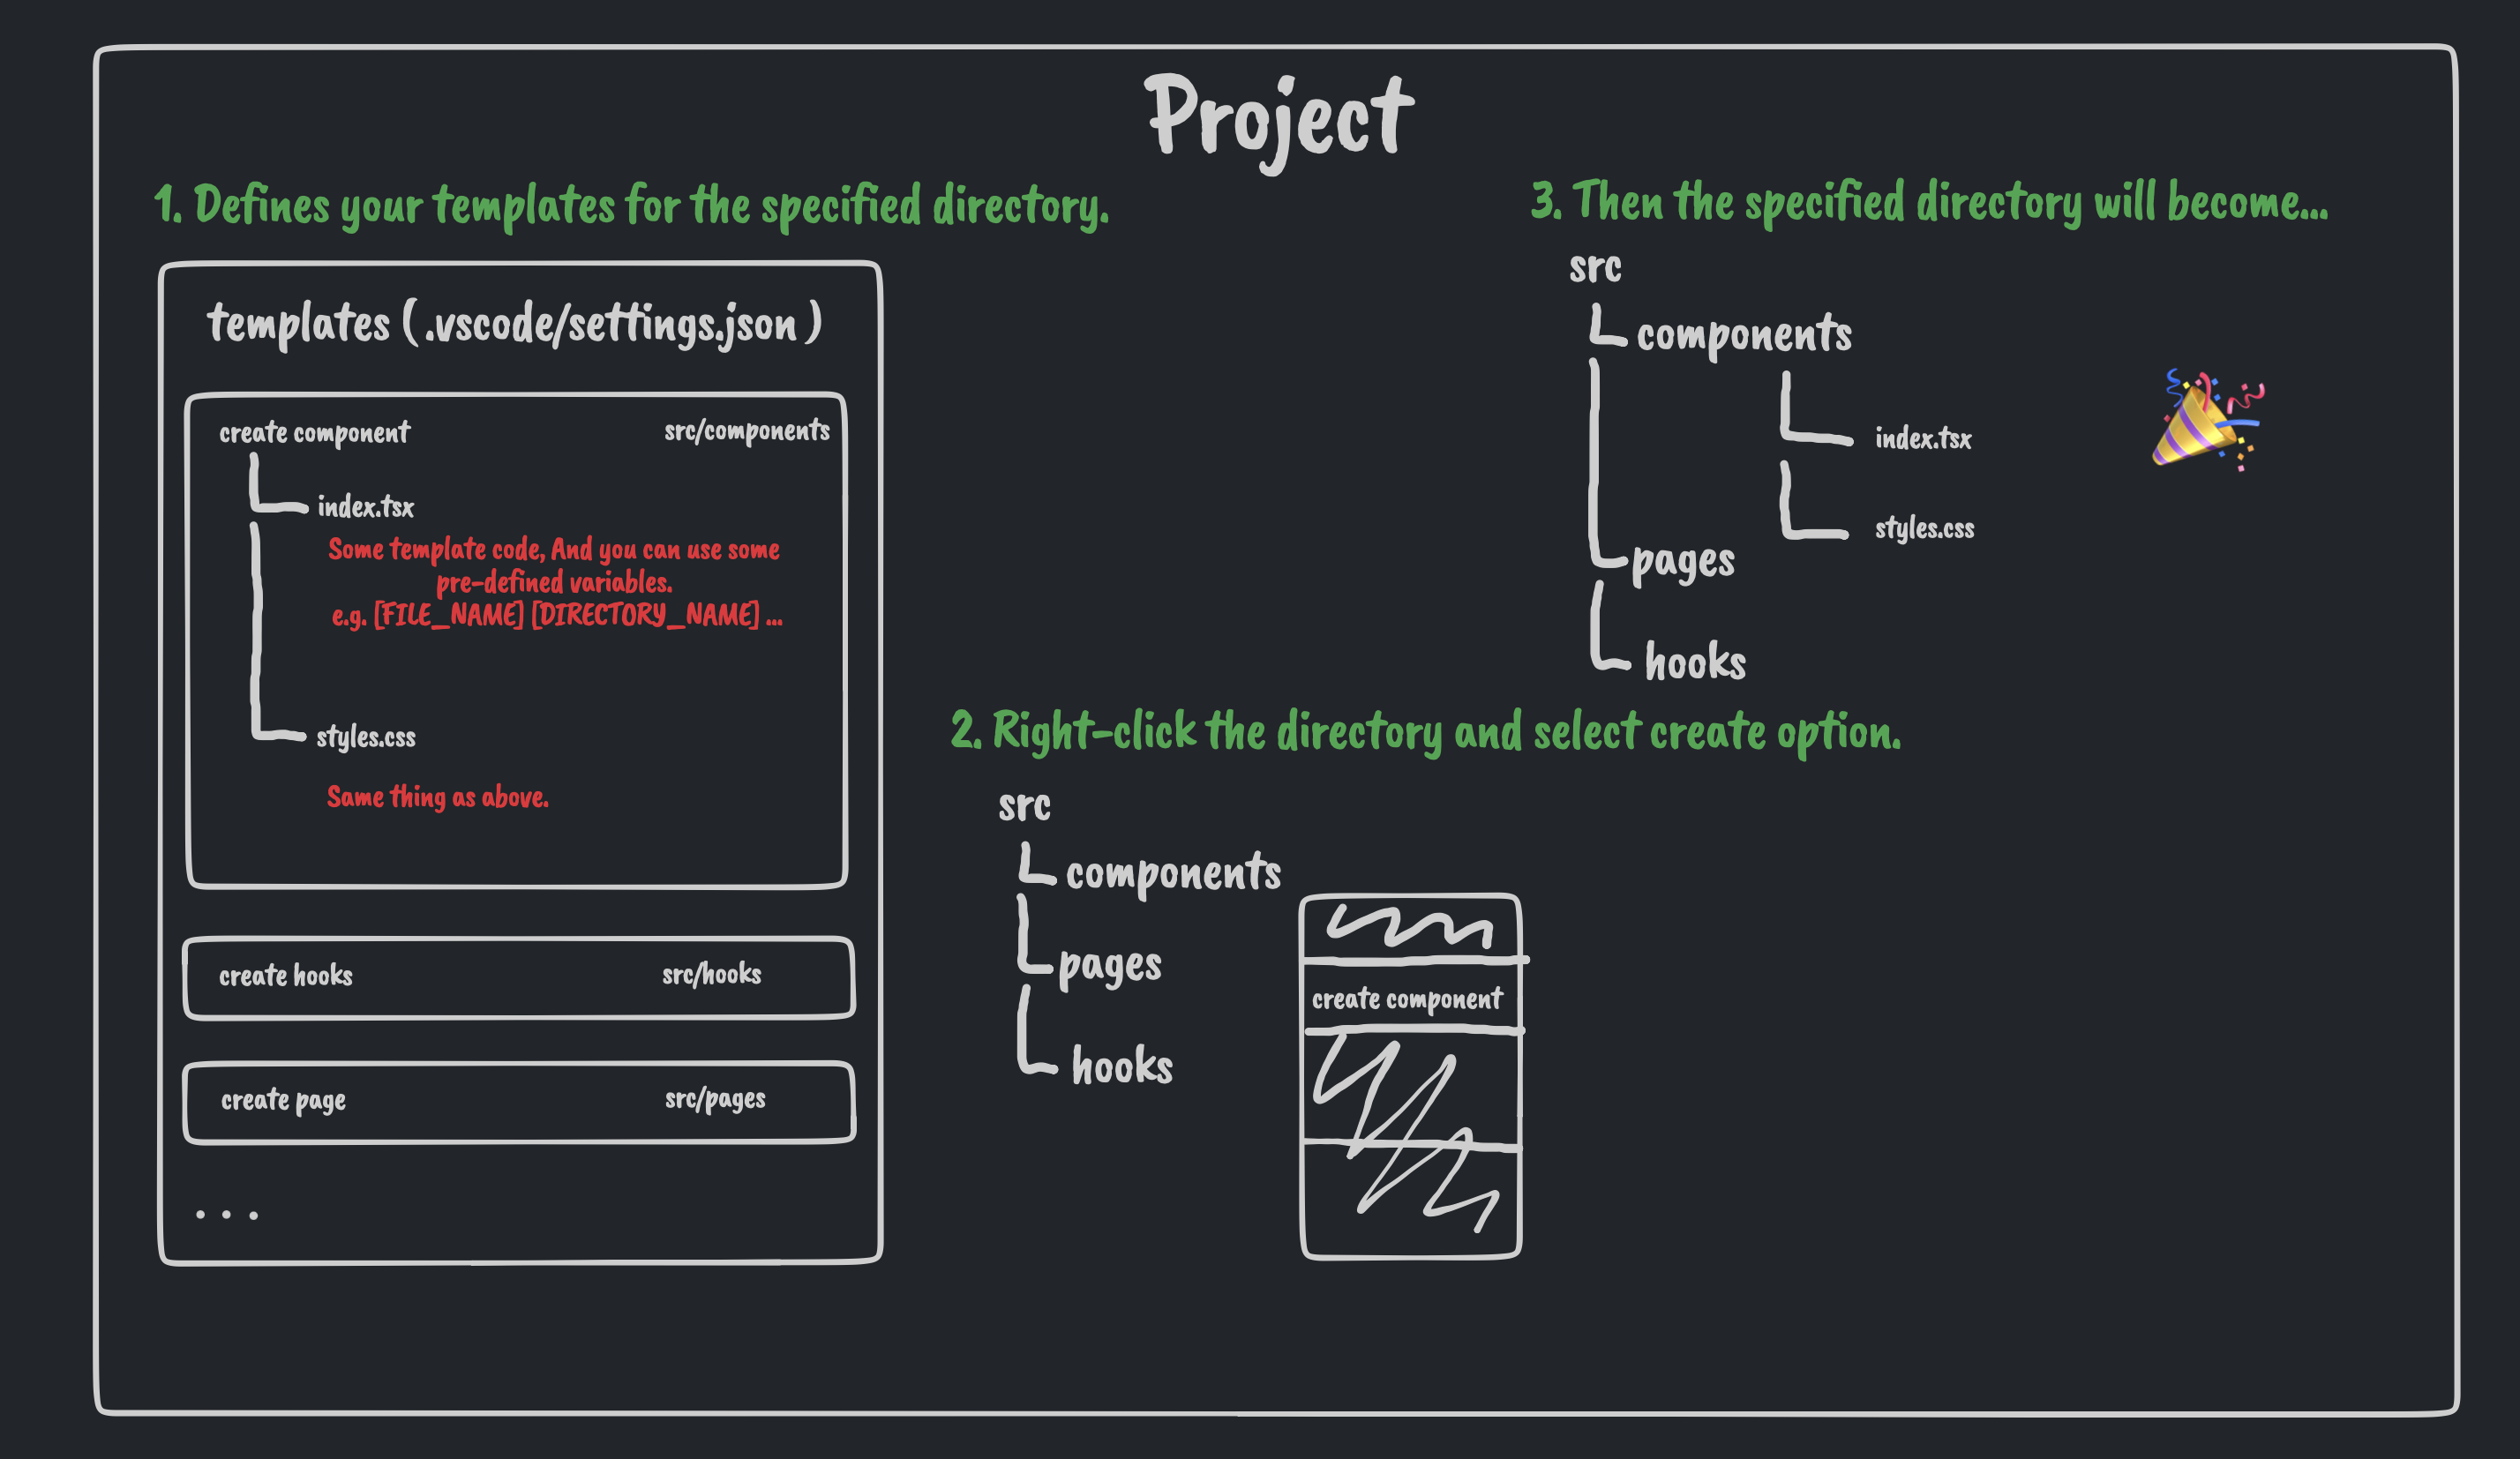
🤩 Specify various templates for different directories and create them with one click.
![]()
English | 简体中文
Gold Right
Specify various templates for different directories and create them with one click.
Reason
Usually there is something in the project directory in a particular format, code snippet, configuration, directory structure, etc... Copying or right-clicking a new file frequently doesn't make us any more productive, so maybe we can make right-clicking easier.
Demo
https://user-images.githubusercontent.com/32405058/173213637-e1d0ea89-ad7b-434f-8d6b-a7035282838c.mp4
installation
After Gold-Right is installed and reload VS Code, Gold-Right is automatically enabled
Usage
- Specifies the template directory location, which can be specified under workspace configuration or user configuration
# Specify the templates folder in the root directory
{
    # Relative to the current workspace path
    "goldRight.templateDirectoryPath": "./templates"
    "goldRight.templateDirectoryPath": "templates"
    # An absolute path
    "goldRight.templateDirectoryPath": "/Users/user-name/Gold-Right-example/templates"
}
- Create the configuration (config.json) file in the template directory
{
  "paths": [
    {
      "directory": "src/pages",
      # Use the components/hooks templates for ”src/pages“
      "templates": ["components", "hooks"]
    },
    {
      "directory": "src/hooks",
      # Use the hooks template for ”src/hooks“
      "templates": ["hooks"]
    }
  ],
  "templatesConfig": [
    {
      # Define the configuration for the Components template
      "templateName": "components",
      "inputsVariables": [
        {
          # Define the "[COMPONENT_NAME]" variable, and open the prompt box to enter the variable content
          "key": "[COMPONENT_NAME]",
          # The title of prompt box.
          "title": "Please input component name.",
          # If the this field is empty, creation will stop.
          "required": true
        }
      ]
    },
    {
      # Define the configuration for the hooks template
      "templateName": "hooks",
      "inputsVariables": [
        {
          # Define the "[HOOKS_NAME]" variable, and open the prompt box to enter the variable content
          "key": "[HOOKS_NAME]",
          # The title of prompt box.
          "title": "Please input hooks name."
        }
      ]
    }
  ]
}
- Create templates
The directory structure
./templates
├── components
|   |   # The directory name "[COMPONENT_NAME]" will be replaced with the input.
│   └── [COMPONENT_NAME]
│       ├── index.tsx
│       └── styles.css
├── config.json
└── hooks
|___|   # The directory name "[HOOKS_NAME]" will be replaced with the input.
    └── [HOOKS_NAME]
        └── index.ts
./templates/components/[COMPONENT_NAME]/index.tsx
import React from 'react';
import './styles.css';

export interface [COMPONENT_NAME]Props {

}

export const [COMPONENT_NAME]: React.FC<[COMPONENT_NAME]Props> = props => {
    return <div></div>
}
./templates/hooks/[HOOKS_NAME]/index.ts
import React from 'react'

export const [HOOKS_NAME] = () => {
  return React.useState()
}
Sponsors

License
MIT