blog
 blog copied to clipboard
canvas 基本用法
栅格与坐标
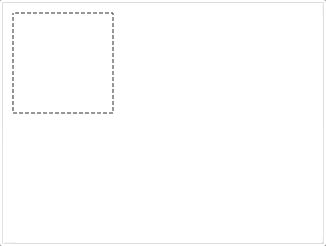
Canvas 的画面栅格以及坐标空间跟 css 的不一样,它是以左上角为原点,横向为 X 轴,纵向为 Y 轴,如图。所有元素的位置都相对于原点定位。

图形
首先实例化个 canvas 和 ctx:
var canvas = document.createElement('canvas');
// canvas.width = 320;
// canvas.height = 240;
var ctx = canvas.getContext('2d');
画矩形
- ctx.rect() :创建矩形
- ctx.fillRect():绘制实心矩形
- ctx.strokeRect():绘制空心矩形
- ctx.clearRect():在给定的矩形内清除指定的像素
画实心矩形
ctx.fillStyle = 'rgba(255, 0, 0, .6)'; // 设置填充颜色(默认为黑色)

ctx.fillRect(10, 10, 200, 100); // 填充颜色
// 也可以这样
// ctx.rect(10, 10, 200, 100);
// ctx.fill();

ctx.clearRect(20, 20, 80, 50); // 清空一个矩形区域

画空心矩形
ctx.strokeStyle = 'rgba(255, 0, 0, .6)'; // 设置绘制线条的颜色

ctx.strokeRect(10, 10, 200, 100);
// 也可以这样
// ctx.rect(10, 10, 200, 100);
// ctx.stroke();

画圆 ctx.arc()

画实心圆
ctx.fillStyle = 'rgba(255, 0, 0, .6)'; // 设置填充颜色

ctx.arc(200, 80, 50, 0, 2 * Math.PI); // 绘制圆
ctx.fill(); // 填充颜色

ctx.arc(80, 80, 50, 0, Math.PI); // 半圆
ctx.fill(); // 填充颜色

画空心圆
ctx.arc(200, 100, 50, 0, 2 * Math.PI); // 绘制圆

ctx.strokeStyle = 'rgba(255, 0, 0, .6)'; // 设置绘制线条的颜色
ctx.lineWidth = 1; // 设置绘制线条的宽度(默认为 1)
ctx.stroke(); // 绘制线条

画线
ctx.moveTo(100, 50); // 设置线的起始位置
ctx.lineTo(200, 100); // 设置线的结束位置

ctx.strokeStyle = 'rgba(255, 0, 0, .6)'; // 设置绘制线条的颜色
ctx.lineWidth = 5; // 设置绘制线条的宽度
ctx.stroke(); // 绘制

画虚线
ctx. setLineDash() 方法可以支持绘制虚线。
ctx.setLineDash([5, 10, 15]);
console.log(ctx.getLineDash()); // [5, 10, 15]

ctx.strokeStyle = 'rgba(255, 0, 0, .6)'; // 设置绘制线条的颜色
ctx.lineWidth = 2; // 设置绘制线条的宽度

ctx.arc(100, 150, 50, 0, 2 * Math.PI);

ctx.moveTo(100, 50); // 设置线的起始位置
ctx.lineTo(200, 100); // 设置线的结束位置

ctx.stroke(); // 绘制

跑马灯效果
ctx.lineDashOffset 属性设置虚线的偏移量,可以利用它来非常简单的实现跑马灯效果。
var offset = 0;

function draw() {
  ctx.clearRect(0, 0, canvas.width, canvas.height);
  ctx.setLineDash([4, 2]);
  ctx.lineDashOffset = -offset;
  ctx.strokeRect(10, 10, 100, 100);
}

function march() {
  offset++;
  if (offset > 16) {
    offset = 0;
  }
  draw();
  setTimeout(march, 20);
}

march();
渐变效果 Gradients
就好像一般的绘图软件一样,我们可以用线性或者径向的渐变来填充或描边。
我们用下面的方法新建一个 canvasGradient 对象,并且赋给图形的 fillStyle 或 strokeStyle 属性。
- createLinearGradient(x1, y1, x2, y2): 接受 4 个参数,表示渐变的起点 (x1,y1) 与终点 (x2,y2)
- createRadialGradient(x1, y1, r1, x2, y2, r2): 接受 6 个参数,前三个定义一个以 (x1,y1) 为原点,半径为 r1 的圆,后三个参数则定义另一个以 (x2,y2) 为原点,半径为 r2 的圆
var lineargradient = ctx.createLinearGradient(0, 0, 150, 150);
var radialgradient = ctx.createRadialGradient(75, 75, 0, 75, 75, 100);
创建出 canvasGradient 对象后,我们就可以用 addColorStop 方法给它上色了。
gradient.addColorStop(position, color),接受 2 个参数,position 参数必须是一个 0.0 与 1.0 之间的数值,表示渐变中颜色所在的相对位置。例如,0.5 表示颜色会出现在正中间。color 参数必须是一个有效的 CSS 颜色值(如 #FFF, rgba(0, 0, 0, 1),等等)。
你可以根据需要添加任意多个色标(color stops)。下面是最简单的线性黑白渐变的例子。
var lineargradient = ctx.createLinearGradient(0, 0, 150, 150);
lineargradient.addColorStop(0, 'white');
lineargradient.addColorStop(1, 'black');
举个栗子
var lineargradient = ctx.createLinearGradient(0, 0, 150, 150);
lineargradient.addColorStop(0, '#ff0000');
lineargradient.addColorStop(0.5, '#0000ff');
lineargradient.addColorStop(0.5, '#ffffff');
lineargradient.addColorStop(1, '#00ff00');
ctx.fillStyle = lineargradient;
ctx.fillRect(10,10,130,130);

var radialgradient = ctx.createRadialGradient(45, 45, 10, 52, 50, 30);
radialgradient.addColorStop(0, '#A7D30C');
radialgradient.addColorStop(0.9, '#019F62');
radialgradient.addColorStop(1, 'rgba(1, 159, 98, 0)');
ctx.fillStyle = radialgradient;
ctx.fillRect(20, 20, 150, 150);

画三角形
ctx.beginPath();
ctx.fillStyle = 'rgba(255, 0, 0, .6)';
ctx.moveTo(75,50);
ctx.lineTo(100,75);
ctx.lineTo(100,25);
ctx.fill();

绘制文本
-
fillText(text, x, y [, maxWidth]): 在指定的(x,y)位置填充指定的文本,绘制的最大宽度是可选的 -
strokeText(text, x, y [, maxWidth]): 在指定的(x,y)位置绘制文本边框,绘制的最大宽度是可选的
ctx.strokeStyle = 'rgba(255, 0, 0, .6)';
ctx.fillStyle = 'rgba(255, 0, 0, .6)';

ctx.font = "48px 微软雅黑"; // 文本字体样式
ctx.fillText("Hello world", 10, 50);
ctx.strokeText("Hello world", 10, 150);

阴影
ctx.strokeStyle = 'rgba(255, 0, 0, .6)';
ctx.fillStyle = 'rgba(255, 0, 0, .6)';

ctx.font = "48px 微软雅黑"; // 文本字体样式

ctx.shadowOffsetX = 2;
ctx.shadowOffsetY = 2;
ctx.shadowBlur = 2;
ctx.shadowColor = 'rgba(0, 0, 0, 0.5)';

ctx.fillText('Hello world', 10, 50);
ctx.strokeText('Hello world', 10, 150);

文本支持的样式
| 字段 | 注释 | 可选值 | 默认 |
|---|---|---|---|
| ctx.font | 文本字体的样式 | 和 CSS font 属性相同的语法 | 10px sans-serif |
| ctx.textAlign | 文本对齐 | start, end, left, right or center |
start |
| ctx.textBaseline | 基线对齐 | top, hanging, middle, alphabetic, ideographic, bottom |
alphabetic |
| ctx.direction | 基线方向 | ltr, rtl, inherit |
inherit |
| ctx.shadowOffsetX | 阴影在 X 轴的延伸距离,它们是不受变换矩阵所影响的。负值表示阴影会往左延伸,正值则表示会往右延伸 | 0.0 | |
| ctx.shadowOffsetY | 阴影在 Y 轴的延伸距离,它们是不受变换矩阵所影响的。负值表示阴影会往上延伸,正值则表示会往下延伸 | 0.0 | |
| ctx.shadowBlur | 阴影的模糊程度,其数值并不跟像素数量挂钩,也不受变换矩阵的影响 | 0.0 | |
| ctx.shadowColor | shadowColor 是标准的 CSS 颜色值,用于设定阴影颜色效果 | 全透明的黑色 |
获取文本更多细节
绘制文本之前,如果想提前计算出更多的文本细节(比如宽度),下面的方法可以给你测量文件的方法。
ctx.measureText(),返回一个 TextMetrics 对象的宽度、所在像素,这些体现文本特性的属性。
ctx.font = "28px 微软雅黑";
var text = ctx.measureText("foo"); // TextMetrics object
console.log(text.width); // 43.259979....
绘制图片
canvas 更有意思的一项特性就是图像操作能力。
1. 图片源
canvas 支持的图片源有:
-
HTMLImageElement: 由 Image() 函数构造出来的,或者任何的
元素
- HTMLVideoElement: 用一个 HTML 的
- HTMLCanvasElement: 可以使用另一个
- ImageBitmap: 这是一个高性能的位图,可以低延迟地绘制,它可以从上述的所有源以及其它几种源中生成
SVG 图像必须在
<svg>根指定元素的宽度和高度。
这些源统一由 CanvasImageSource 类型来引用。
2. 绘制图片
普通绘制
drawImage(image, x, y)
-
image: image 或者 canvas 对象 -
x和y: 绘制原点
var img = new Image();
img.onload = function() {
  ctx.drawImage(img, 20, 10);
  ctx.beginPath();
  ctx.fillStyle = 'rgba(255, 0, 0, .6)';
  ctx.arc(220, 60, 30, 0, 2 * Math.PI);
  ctx.fill();
}
img.src = 'https://p1.ssl.qhmsg.com/dr/270_500_/t0154d7996fa9a99e93.jpg';

缩放图片
drawImage(image, x, y, width, height),这个方法比前面的加多了两个参数:
-
width: 写入画布时图片的宽度 -
height: 写入画布时图片的高度
var img = new Image();
img.onload = function() {
  ctx.drawImage(img, 20, 10, this.width/2, this.height/2);
  ctx.beginPath();
  ctx.fillStyle = 'rgba(255, 0, 0, .6)';
  ctx.arc(220, 60, 30, 0, 2 * Math.PI);
  ctx.fill();
}
img.src = 'https://p1.ssl.qhmsg.com/dr/270_500_/t0154d7996fa9a99e93.jpg';

图片切片绘制
drawImage(image, sx, sy, sWidth, sHeight, dx, dy, dWidth, dHeight),方法名一样,但是参数多了。

var img = new Image();
img.onload = function() {
  ctx.drawImage(img, 20, 10, this.width/2, this.height/2); // 缩放一半
  ctx.drawImage(img, 40, 10, 200, 200, 160, 120, 100, 100); // 切片绘制
  ctx.beginPath();
  ctx.fillStyle = 'rgba(255, 0, 0, .6)';
  ctx.arc(220, 60, 30, 0, 2 * Math.PI);
  ctx.fill();
}
img.src = 'https://p1.ssl.qhmsg.com/dr/270_500_/t0154d7996fa9a99e93.jpg';

3. 图案模式
跟 CSS 的 background 有点像,也跟上面的渐变有点类似,canvas 提供了 createPattern(image, type) 方法来支持通过图片来建立图案模式。
type 取值跟 background-repeat 类似:
-
repeat -
repeat-x -
repeat-y -
no-repeat
图案的应用跟渐变很类似的,创建出一个 pattern 之后,赋给 fillStyle 或 strokeStyle 属性即可。
var img = new Image();
img.src = 'https://ss0.bdstatic.com/70cFvHSh_Q1YnxGkpoWK1HF6hhy/it/u=4038478576,3629790264&fm=27&gp=0.jpg';
img.onload = function(){
  var ptrn = ctx.createPattern(img, 'repeat');
  ctx.fillStyle = ptrn;
  ctx.fillRect(10, 10, 300, 220);
}

4. 被「污染」的 canvas
HTML 规范中图片有一个 crossorigin 属性,结合合适的 CORS 响应头,就可以实现在画布中使用跨域 元素的图像。
尽管不通过 CORS 就可以在画布中使用图片,但是这会污染画布。一旦画布被污染,你就无法读取其数据。例如,你不能再使用画布的 toBlob(), toDataURL() 或 getImageData() 方法,调用它们会抛出安全错误。
这种机制可以避免未经许可拉取远程网站信息而导致的用户隐私泄露。
Canvas 的填充规则
当我们用到 fill(或者 clip 和 isPointinPath)你可以选择一个填充规则,该填充规则根据某处在路径的外面或者里面来决定该处是否被填充,这对于自己或者自己路径相交或者路径被嵌套的时候是有用的。
- nonzero(默认)
- evenodd
比如 ctx.fill('evenodd')。
ctx.beginPath();
ctx.fillStyle = 'rgba(255, 0, 0, .6)';
ctx.arc(50, 50, 30, 0, Math.PI*2, true);
ctx.arc(50, 50, 15, 0, Math.PI*2, true);
ctx.fill('nonzero');

ctx.beginPath();
ctx.fillStyle = 'rgba(0, 255, 0, .6)';
ctx.arc(150, 50, 30, 0, Math.PI*2, true);
ctx.arc(150, 50, 15, 0, Math.PI*2, true);
ctx.fill('evenodd');

canvas 支持的属性补充
类似 ctx.fillStyle,canvas 还有支持其他的属性,如下表。
| 字段 | 注释 | 默认 |
|---|---|---|
| ctx.fillStyle = color | 设置图形的填充颜色(支持RGBA) | #000 |
| ctx.strokeStyle = color | 设置图形轮廓的颜色(支持RGBA) | #000 |
| ctx.globalAlpha | 透明度(0.0 ~ 1.0) | 1.0 |
| ctx.lineWidth | 设置线条宽度 | 1 |
| ctx.lineCap | 设置线条末端样式(butt, round, square) |
butt |
| ctx.lineJoin | 设定线条与线条间接合处的样式(round: ), bevel: ], miter: >) |
miter |
| ctx.miterLimit | 限制当两条线相交时交接处最大长度;所谓交接处长度(斜接长度)是指线条交接处内角顶点到外角顶点的长度) |