chat-sdk-javascript
 chat-sdk-javascript copied to clipboard
Voice & Video Calling and Text Chat SDK for JavaScript/Web

CometChat Javascript SDK
CometChat enables you to add voice, video & text chat for your website & app. This guide demonstrates how to add chat to a WebSite using CometChat.
Prerequisites :star:
Before you begin, ensure you have met the following requirements:
✅ You have Visual Studio Code or any other code editor installed in your machine.
✅ You have npm installed in your machine.
✅ You have read CometChat Key Concepts.
Installing CometChat Javascript SDK
Setup :wrench:
To setup Javascript SDK, you need to first register on CometChat Dashboard. Click here to sign up.
i. Get your Application Keys :key:
Signup for CometChat and then:
- Create a new app: Click Add App option available → Enter App Name & other information → Create App
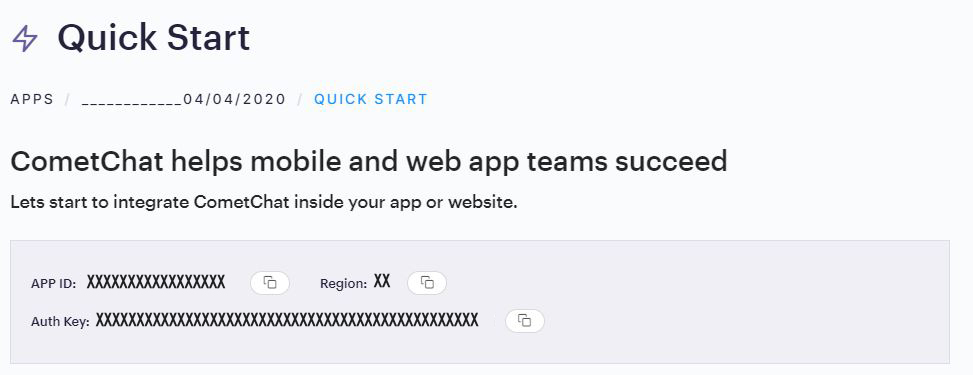
- At the Top in QuickStart section you will find Auth Key & App ID or else you can head over to the API & Auth Keys section and note the Auth Key and App ID
ii. Add the CometChat Dependency
-
Install via NPM
1. Run the following command to install the CometChat Javascript SDK
npm install @cometchat/chat-sdk-javascript@latest --save -
Import via CDN
1. Include the CometChat Javascript library in your HTML code.
<script type="text/javascript" src="https://unpkg.com/@cometchat/chat-sdk-javascript@latest/CometChat.js"></script>You can refer to the below link for instructions on how to do so:
📝 Add CometChat Dependency
Configure CometChat Javascript SDK
i. Initialize CometChat 🌟
We suggest you call the init() method on app startup, preferably in the index.js file.
var appID = "APP_ID";
var region = "REGION";
var appSetting = new CometChat.AppSettingsBuilder().subscribePresenceForAllUsers().setRegion(region).build();
CometChat.init(appID, appSetting).then(
  () => {
    console.log("Initialization completed successfully");
  },
  error => {
    console.log("Initialization failed with error:", error);
  }
);
:information_source: Note: Make sure to replace region and appID with your credentials. |
|---|
ii. Create User 👤
Once initialisation is successful, you will need to create a user. You need to use createUser() method to create user on the fly.
let authKey = "AUTH_KEY";
var uid = "user1";
var name = "Kevin";

var user = new CometChat.User(uid);

user.setName(name);

CometChat.createUser(user, authKey).then(
  user => {
    console.log("user created", user);
  },error => {
    console.log("error", error);
  }
);
:information_source: Note: Make sure that UID and name are specified as these are mandatory fields to create a user.
iii. Login User 👤
Once you have created the user successfully, you will need to log the user into CometChat using the login() method.
var UID = "SUPERHERO1";
var authKey = "AUTH_KEY";

CometChat.getLoggedinUser().then(
  user => {
    if(!user){
      CometChat.login(UID, authKey).then(
        user => {
          console.log("Login Successful:", { user });
        },
        error => {
          console.log("Login failed with exception:", { error });
        }
      );
    }else{
      // User already logged in
    }
  }, error => {
    console.log("getLoggedinUser failed with exception:", { error });
  }
);
:information_source: Note - The login() method needs to be called only once. Also replace AUTH_KEY with Auth Key from your app. |
|---|
Help and Support
For issues running the project or integrating with our UI Kits, consult our documentation or create a support ticket or seek real-time support via the CometChat Dashboard.