git-twitch
 git-twitch copied to clipboard
This is a service for GitHub and twitch interaction

This is a service for github and twitch to interact with each other. The use case for this git-twitch interaction between Twitch and GitHub through webhooks. If you are new to Twitch Chat interactions, you can check out my original chatbot, the beybot. In the README you will find further explanation on how Twitch interactions work.
🍴Setup for local development
1. Fork this repo (optional, open a Codespace)
The fastest way to get started is by forking this repo. PRs are welcomed if you find anything missing or unclear.
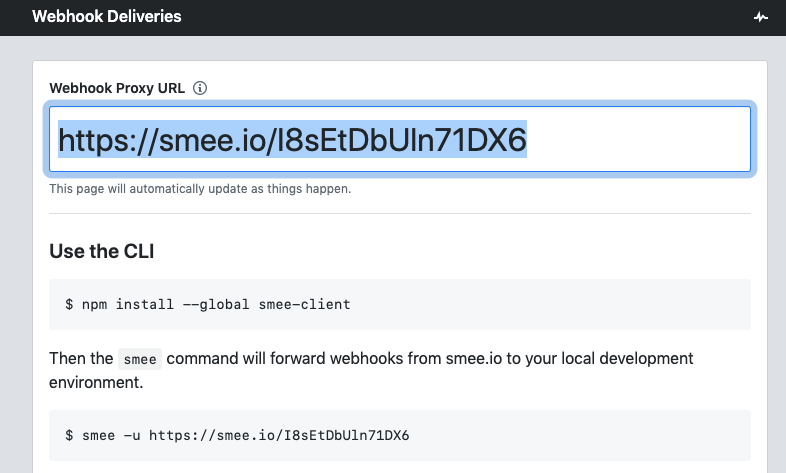
2. Start a new smee channel - https://smee.io/
smee.io is a Webhook payload delivery service. It receives payloads then sends them to your locally (development) running application. Smee is not meant to be used in production.
3. Create a webhook
In your newly forked repo, create a webhook from the repo settings that points it to the new smee channel.
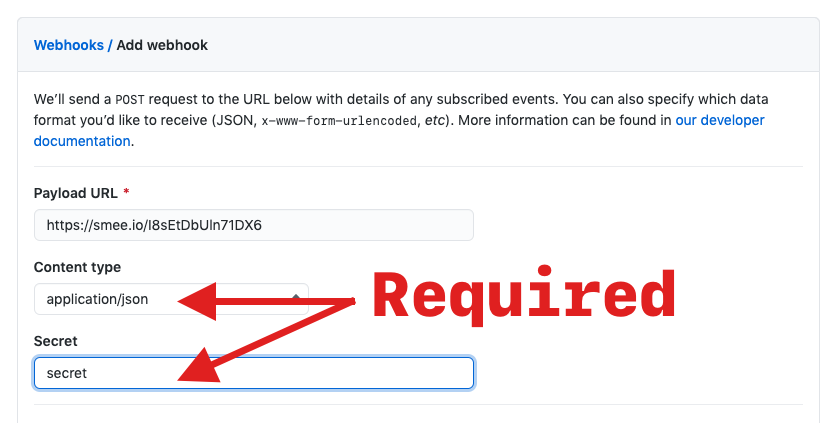
note: your webhook will need to send json. You will also need to set a secret.
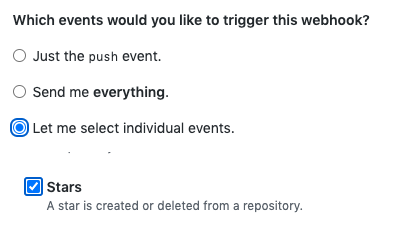
Choose to send selected events and deselect Push events and select Stars. Push events are a bit noisy for testing, Starring the repo is the preferred way to to test that this project is working.
4. Run npm install smee-client -g in the terminal
The smee client is needed to run this webhook receiver (above). You will need to clone your repo locally (or open a codespace environment) to run the smee client.
npm install smee-client -g
smee -u https://[your create smee channel url from step 2]
5. Start the server
Prior to starting the server you will need to create a new .env file. You can copy the .env.example file. Please make sure to use the secret you set in step 3, this is required for the server to run.
In a different new terminal tab (different from the smee receiver), start the web server with the below commands.
npm install
npm start
If you wish to run the server in development mode you can also run the following command.
npm run start:watch
6. Add browser source plugin
OBS Studio
OBS Studio is a free and open-source software for live-streaming and screen recording. This walk-through will show OBS Studio and consult your platform's documentation or community on how to add browser source plugins.
Browser Source plugins When you set up an out of the box alert or chat system, like Streamlabs, they require you to add something called a Browser Source plugin. To do this, you add the URL pointing to the plugin, provided in the Streamlabs dashboard. This is the backbone of most streaming interactions on Twitch. Browser source plugins are HTML, CSS, and some JavaScript—so basically webpages.
In OBS add a new source to the Scene of your choosing. OBS Studio has a few different source options, but choose Browser and proceed with adding browser source, using your deployed localhost URL (http://localhost:3000). Keep in this is setup for development purposes. You will want to deploy this to a production ready server to use.

You will most likely want to point this to your GitHub repos and Twitch
account. You can do this by adding URLSearchParams to the end of the URL, i.e. ?twitch=bdougieyo&owner=bdougie&repo=bdougie/git-twitch.
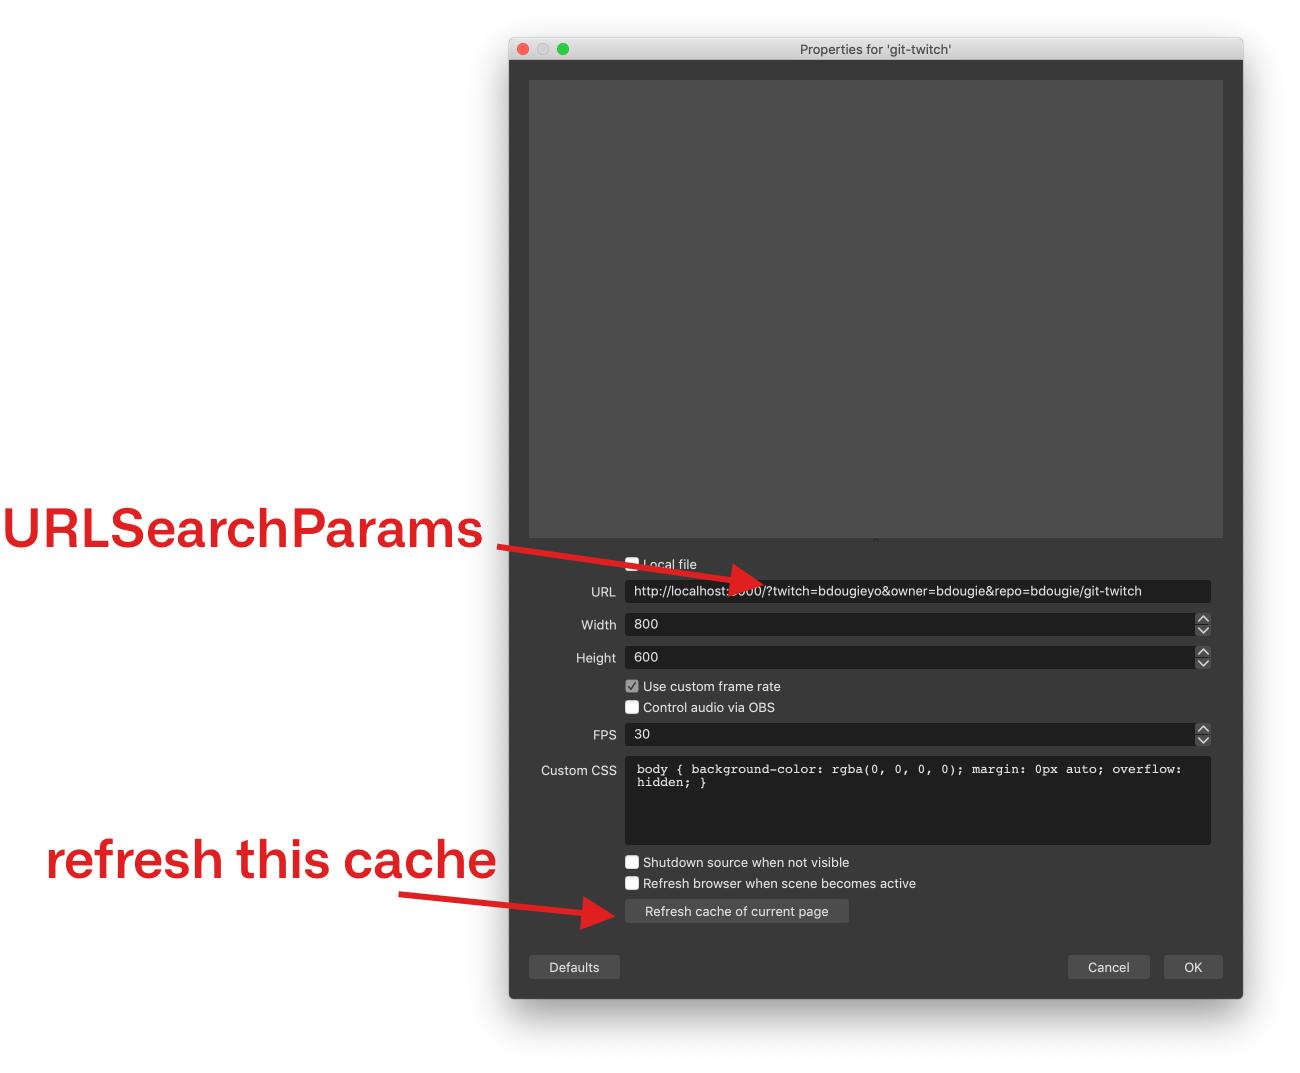
One thing to keep in mind, OBS will be using a cached version of the site at the moment you add the browser plugin. If you make updates, you will need to clear the "Refresh cache of current page" button (I spent a lot of time not knowing that existed).

🚀 Deploy this
There are a few places you can deploy this applications, keep in mind, you will need a running noode server in production. Because of this, we cannoot deploy this to GitHub Pages or any other static hosting provider. The following is a list of hosting providers you can deploy this to.
If you are interested in making a contribution to this project, consider linking to instructions or a blog on how to deploy this below. see this issue for more details.
- AWS
- Azure
- Digital Ocean
- Glitch
- Heroku
- render.com
- repl.it
- Vercel