webmail-lite-8
 webmail-lite-8 copied to clipboard
Open-source webmail script for existing IMAP server

Afterlogic WebMail Lite
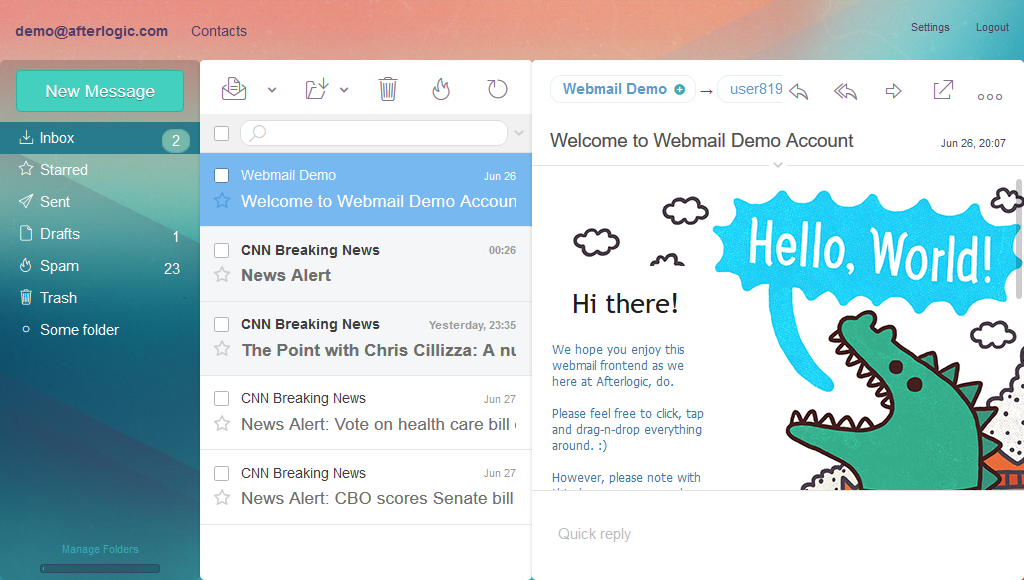
Open-source webmail script for your existing IMAP server.
- For more information, please visit WebMail Lite home page.
- You can check WebMail Lite live demo.
- Github repository
- Issue tracker
You can download WebMail Lite from our website, unzip the package and configure the installation as described at this documentation page. This is a simple approach convenient for those who simply wish to install the product. But if you're looking for building and adding custom modules or skins, installing from Git repository is recommended per the instructions below.
Installation instructions
During installation process you will need:
-
Note! npm 3.0 or later is required.
- Download and unpack the latest version of WebMail Lite into your installation root directory
https://github.com/afterlogic/webmail-lite-8/archive/latest.zip
We're assuming that you wish to install the latest stable version of the product. If you're looking for the latest code (e.g., to contribute changes), the following steps needs to be taken:
- Instead of unpacking the archive, clone the repository into the installation directory:
git clone https://github.com/afterlogic/webmail-lite-8.git INSTALL_FOLDER_PATH
- change modules' versions in
composer.jsonfile to "dev-master" - adjust
composer.jsonconfiguration file so that sources are preferred:
{
	"config": {
		"minimum-stability": "dev",
		"preferred-install": {
			"afterlogic/*": "source"
		}
	}.......
-
composer.pharfile is available in repository, but you can download its latest version 2 fromhttps://getcomposer.org/composer.phar -
Start the composer installation process by running the following from the command line:
php composer.phar installNB: It is strongly advised to run composer as non-root user. Otherwise, third-party scripts will be run with root permissions and composer issues a warning that it's not safe. We recommend running the script under the same user web server runs under.
-
Next, you need to build static files for the current module set.
First of all, install all npm modules via
npm installand install gulp-cli module globaly
npm install --global gulp-clithen install the modules required for adminpanel to work
cd modules/AdminPanelWebclient/vue npm install npm install -g @quasar/cli -
Now you can build static files. Run the following commands in main directory
gulp styles --themes Default,DefaultDark,DeepForest,Funny,Sandgulp js:minand build adminpanel
cd modules/AdminPanelWebclient/vue npm run build-production -
Now you are ready to open a URL pointing to the installation directory in your favorite web browser. Be sure to add
/adminpanel/to main URL to access admin interface. -
Upon installing the product, you'll need to configure your installation.
IMPORTANT:
- Make sure data directory is writable by the web server. For example:
chown -R www-data:www-data /var/www/webmail/data
- It is strongly recommended to runs the product via https. If you run it via http, the majority of features will still be available, but some functionality aspects, such as authentication with Google account, won't work.
To enable automatic redirect from http to https, set RedirectToHttps to true in data/settings/config.json file.
Protecting data directory:
All configuration files of the application and user data are stored in data directory, so it's important to protect data directory to make sure that nobody can access that directory over the Internet directly.
Licensing
This product is licensed under AGPLv3. The modules and other packages included in this product as dependencies are licensed under their own licenses.
NB: Afterlogic Aurora modules which have dual licensing are licensed under AGPLv3 within this product.
Metadata
Owner
Metadata
Open-source webmail script for existing IMAP server