blog
 blog copied to clipboard
Nexus
Nexus
https://www.sonatype.com/nexus-repository-oss https://github.com/sonatype/docker-nexus3
Nexus3 搭建 npm 仓库
https://hub.docker.com/r/sonatype/nexus3
安装 Nexus3 docker
docker pull sonatype/nexus3
https
docker pull bradbeck/nexus-https

docker volume create --name nexus-data

docker run -d -p 8081:8081 -p 8443:8443 -v nexus-data:/nexus-data -v ~/nexus/ssl:/opt/sonatype/nexus/etc/ssl --name nexus bradbeck/nexus-https
启动
$ docker volume create --name nexus-data
$ docker run -d -p 8081:8081 --name nexus -v nexus-data:/nexus-data sonatype/nexus3
待验证
mkdir ~/nexus/nexus-data && chown -R 757 ~/nexus/nexus-data
docker run -d -p 8081:8081 -v ~/nexus/nexus-data:/nexus-data --name nexus sonatype/nexus3
等待服务器准备完毕后 测试服务器
curl -u admin:admin123 http://localhost:8081/service/metrics/ping
Repository 类型
Repository -> Repositories
第一种:代理 npm 仓库
将公共 npm 服务器的资源代理缓存,减少重复下载,加快开发人员和CI服务器的下载速度。
创建时选择 npm(proxy) ,只需填写 Name 和 Remote storage (公有库域名)即可。 https://registry.npmjs.org
第二种:私有 npm 仓库
用于 上传自己的npm包 以及第三方npm包。
同样的创建步骤,只不过选择的 仓库类型为 npm(hosted)。 只填写 Name 即可。
第三种:npm 仓库组
用于将多个内部或外部 npm 仓库统一为一个 npm仓库。被添加到 npm仓库组 中的 其他仓库内的包都能够通过该 npm仓库组 访问到。
例如:可以新建一个npm仓库组将 上面两个刚刚创建的 npm 仓库都添加进去。这样可以通过这个 npm仓库组,既可以访问 公有npm仓库 又可以访问自己的 私有npm仓库。
仓库类型为 npm(group),起一个名字 Name,然后选择需要添加到组里的 其他 npm 仓库。
使用私有仓库
在 Repositories 中点击创建的 仓库。可以查看该仓库的 URL。
在项目目录下创建 .npmrc 文件
registry=http://127.0.0.1:8081/repository/xxx/
登陆到私有仓库
npm login
然后随便安装一个 包 试试(日志级别设置为 info)
npm --loglevel info install react
权限配置
Security -> Realms
激活 npm Bearer Token Realm
设置一下 Nexus Repository Manager 的权限 这样才能使用 npm login 认证登录到我们的私服。
在 Realms 下。将 npm Bearer Token Realm 添加到 Active 列表内保存即可。
然后可以执行(登录 私有npm仓库):
npm login --registry=http://xxxx:8090/repository/npm-internal/
执行命令,提示填写账号密码和邮箱,验证通过后将会在 用户主目录下的 .npmrc 文件中插入一条 此仓库 url 和对应的 token。
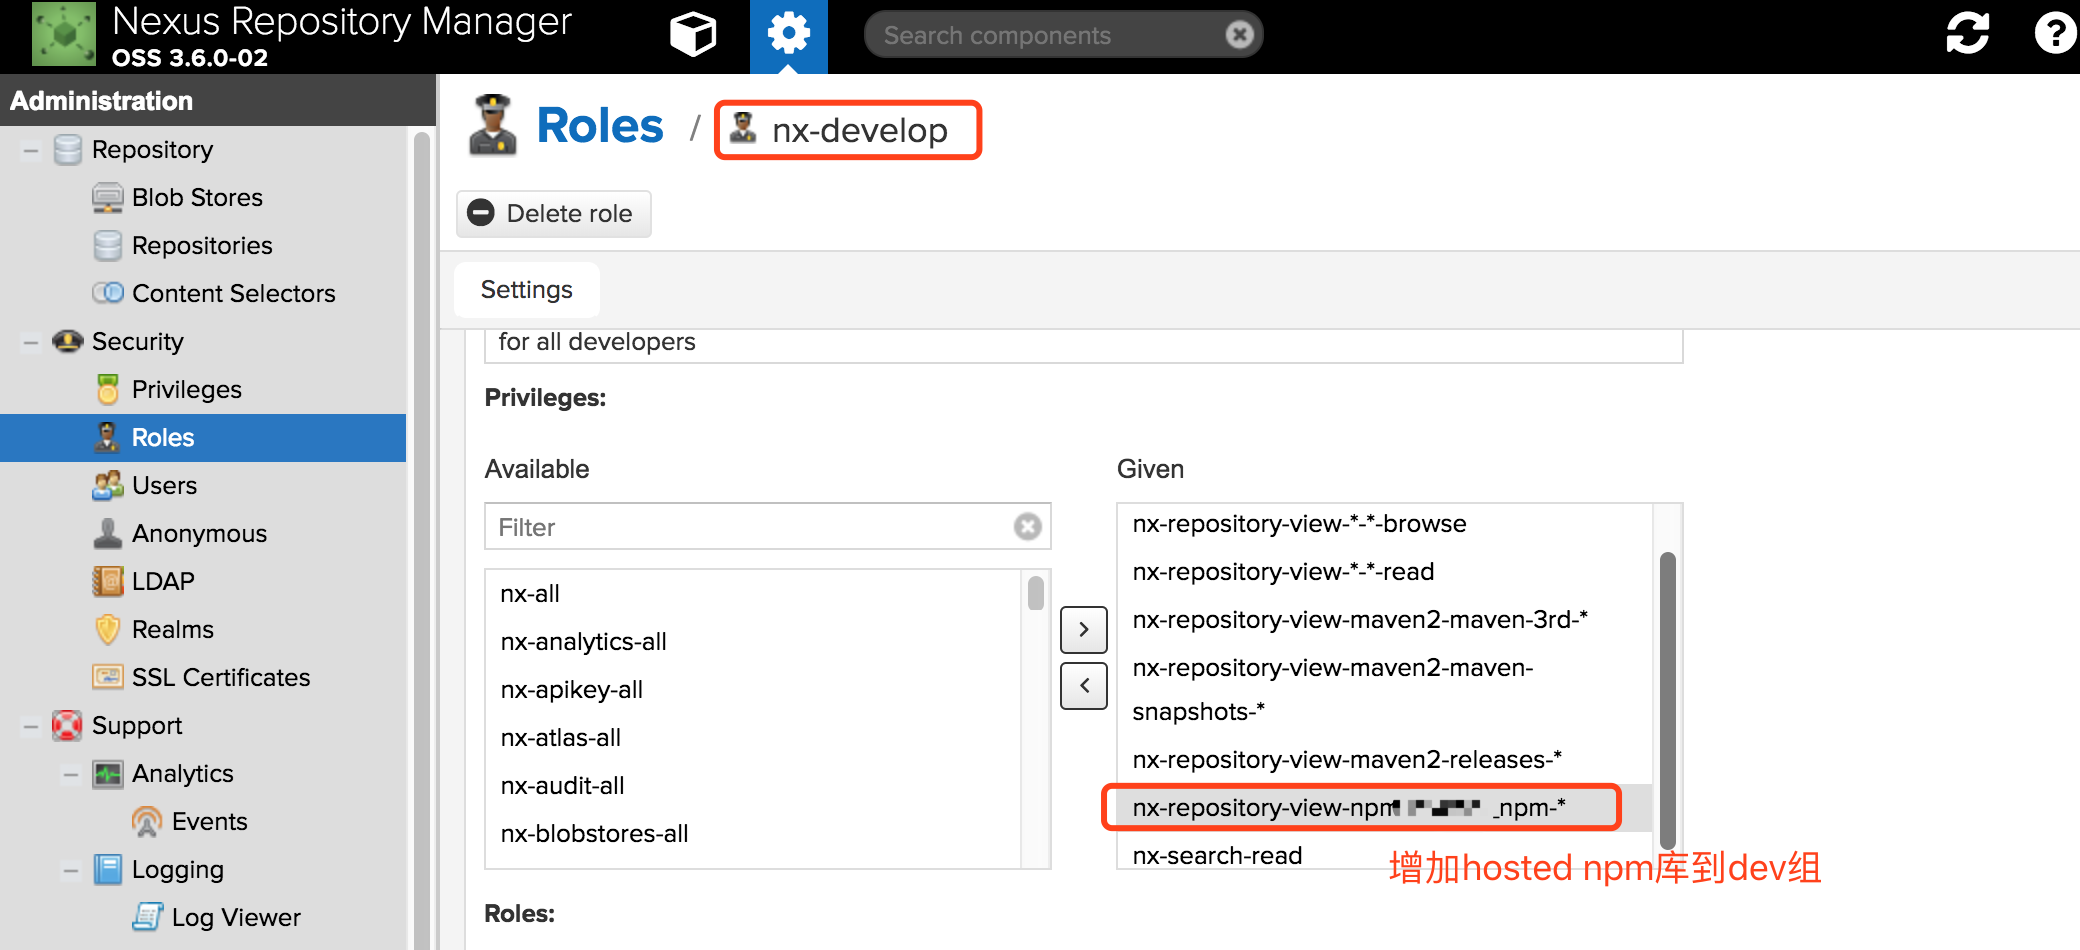
创建开发权限组对hosted npm私服库读写权限
->Security -> Roles
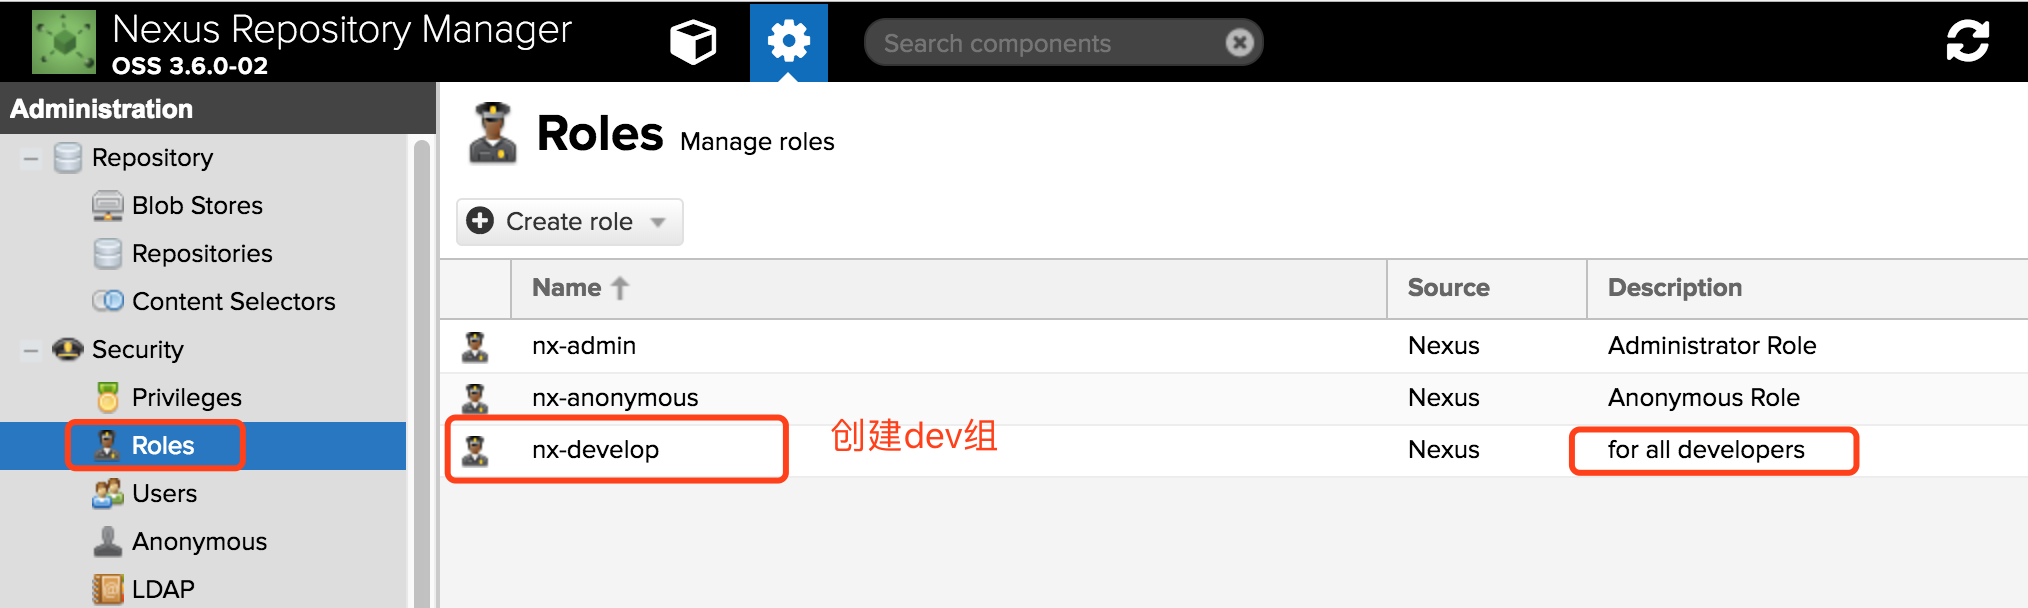
增加hosted npm 库到 dev组
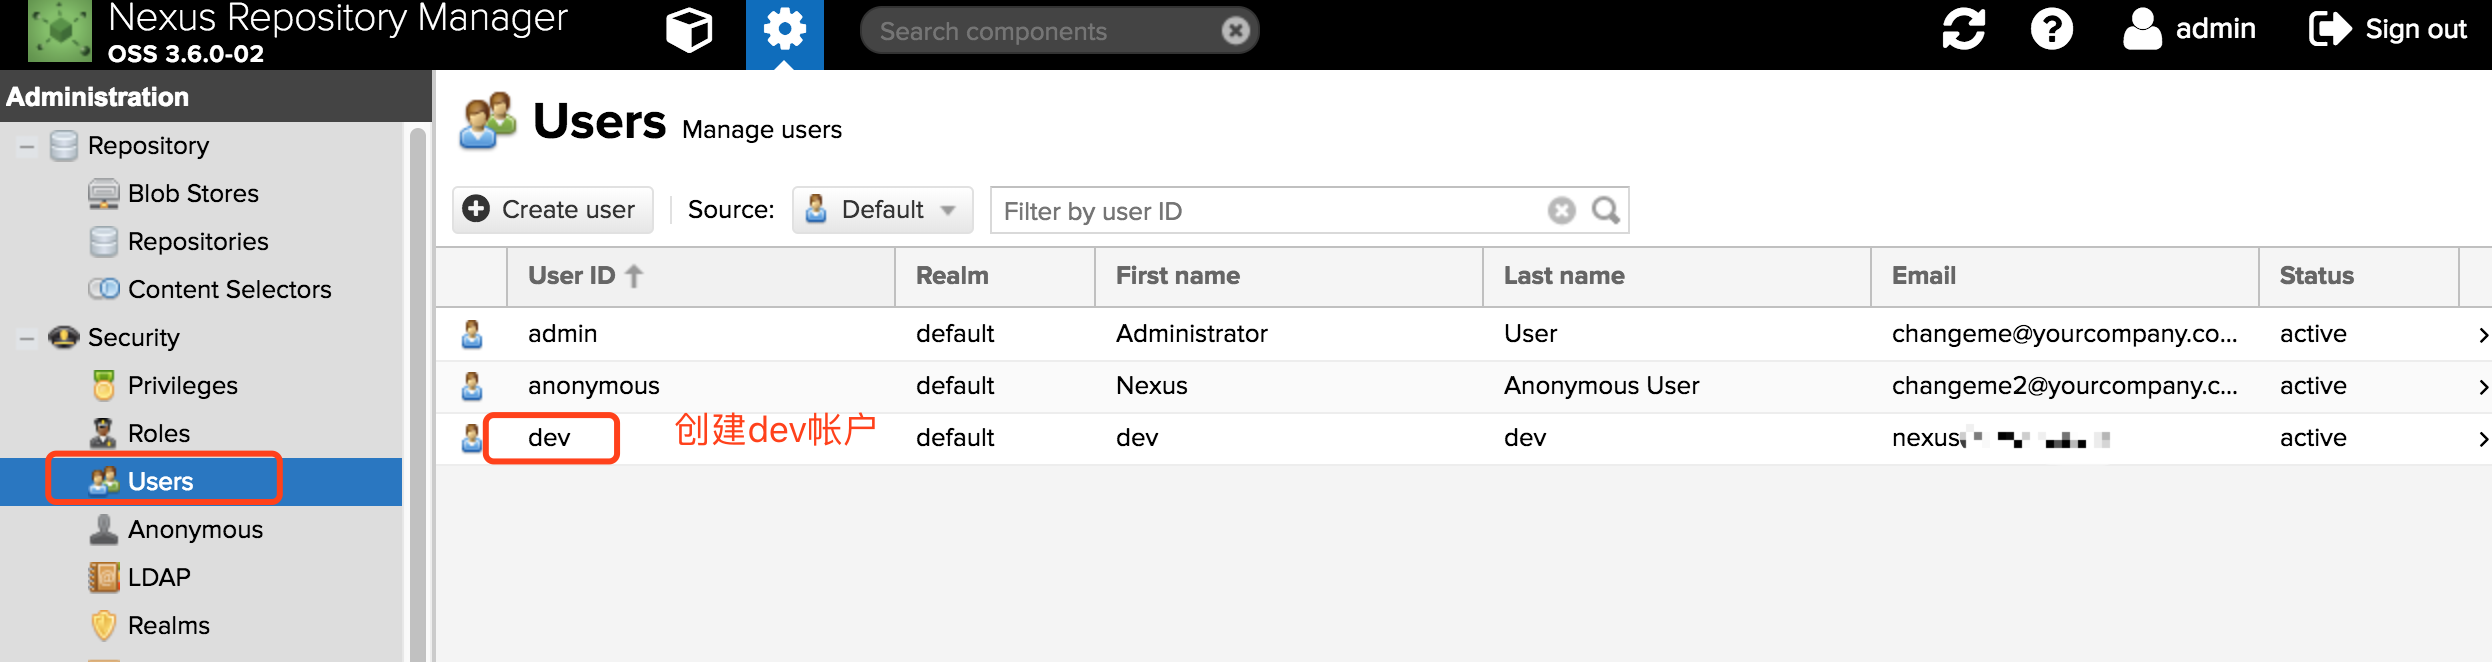
创建dev帐户并加入到开发权限组
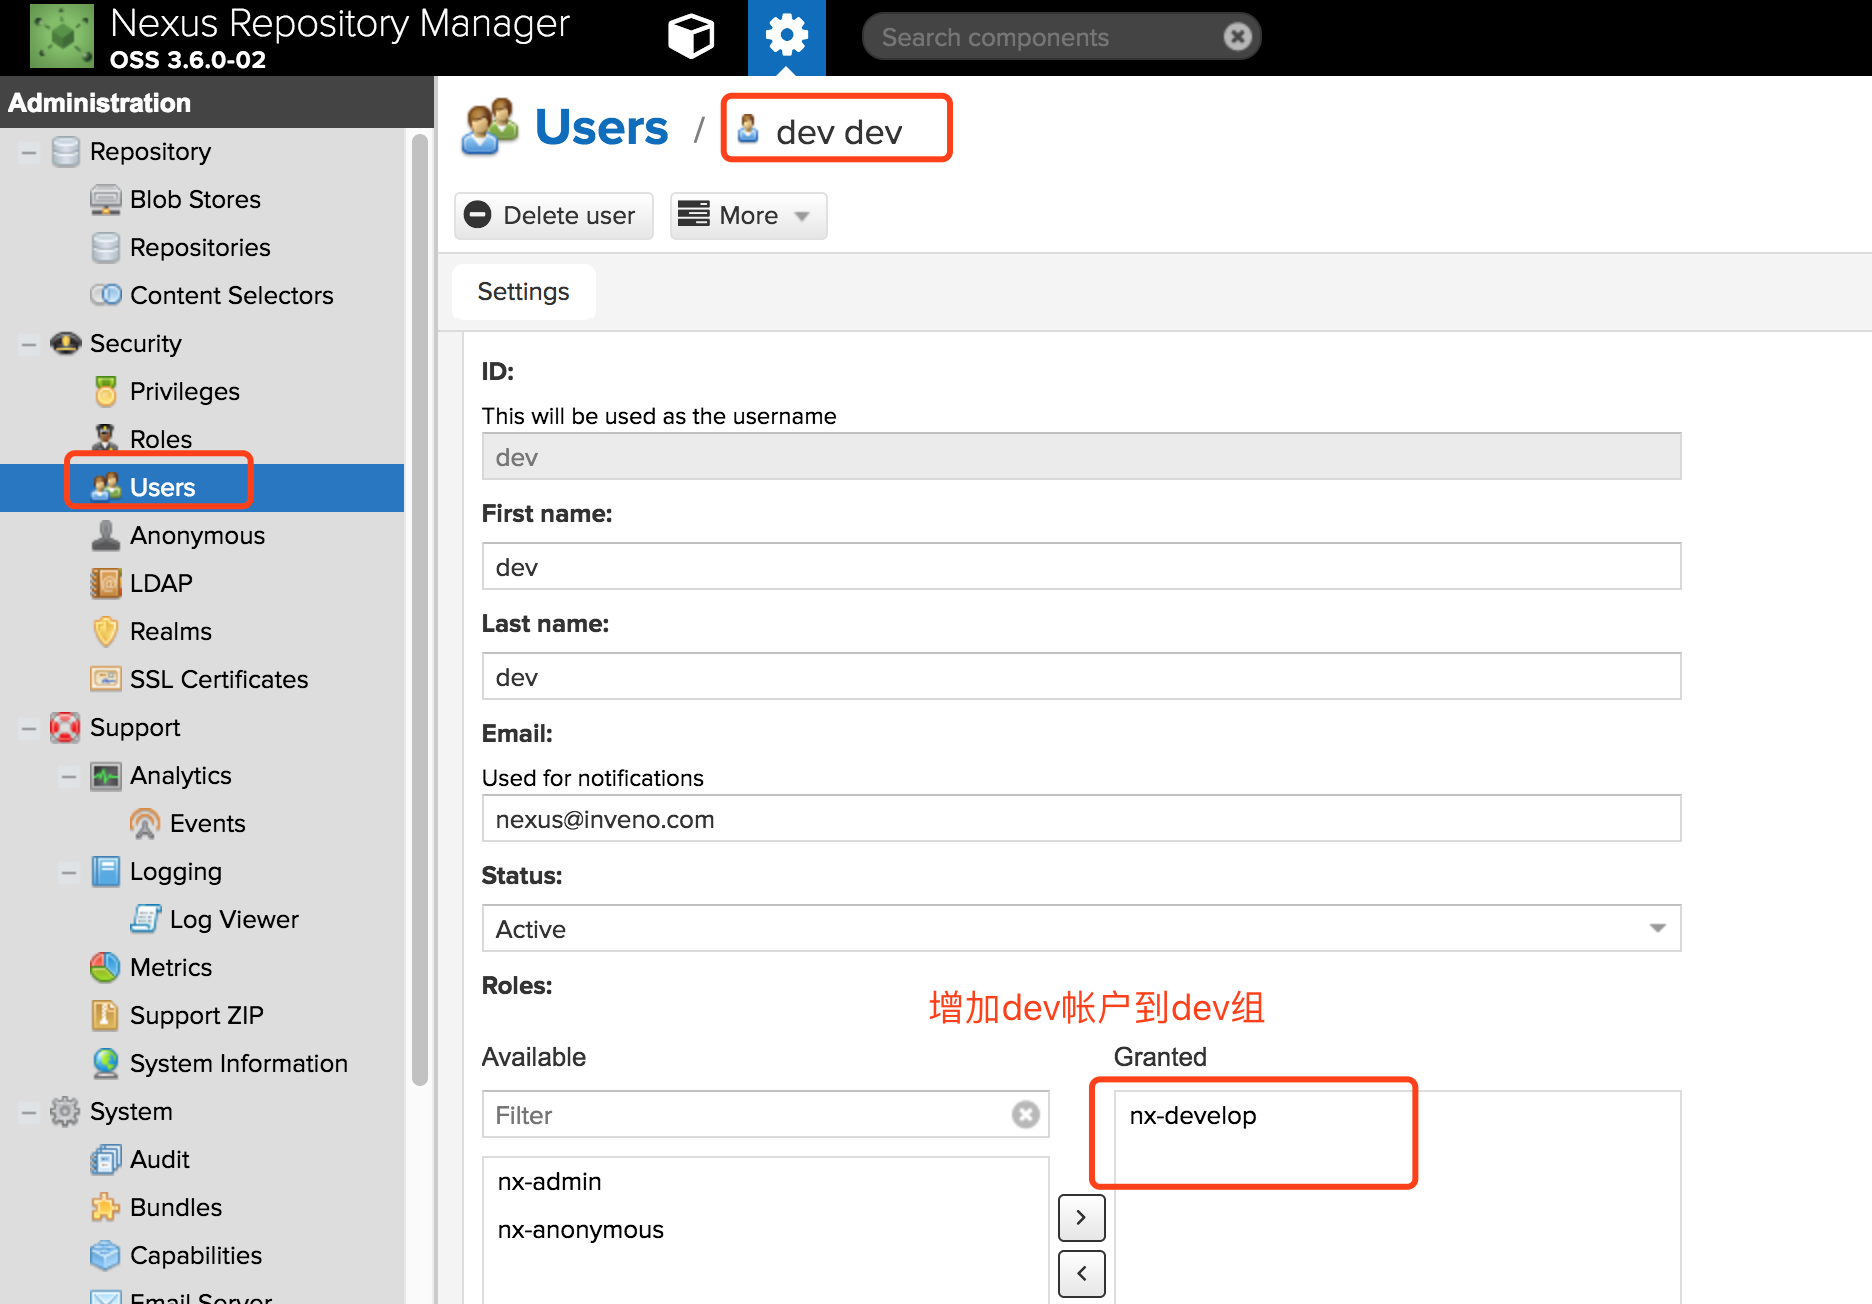
匿名用户可以下载私服npm包,只有dev组内的帐户才能publish包到hosted私服
配置publish帐户
加密用户名+密码获取auth
echo -n 'admin:admin123' | openssl base64
编辑.npmrc
registry=http://127.0.0.1:8081/repository/midoci-g/   // npm组
[email protected] // 配置的邮箱,必填
always-auth=true
_auth="ZGV2OmJsYWNr" // base64加密的用户名+密码
Authentication Using Realm and Login
npm login --registry=http://${ip}:8081/repository/${npm_hosted}/

Username: dev (各位根据上面创建的帐户自行替换)
Password: ${dev_pass} (各位根据上面创建的密码自行替换)
Email: (this IS public) [email protected] (各位根据上面创建的邮箱自行替换)

Logged in as dev on http://${ip}:8081/repository/${npm_hosted}/.
        (写入到本机.npmrc文件)
Authentication Using Basic Auth
$ echo -n 'dev:${dev_pass}' | openssl base64  (dev帐户密码base64编码)

// 本机.npmrc文件里面增加👇行

[email protected]
always-auth=true
_auth=${base64编码后的值}
推送npm包到nexus
1 命令行 + 发布路径
npm publish –registry http://${ip}:8081/repository/${npm_hosted}
2 package.json配置发布路径(推荐)
"publishConfig" : {
  "registry" : "http://${ip}:8081/repository/${npm_hosted}/"
},
npm publish
完整版
{
  "name": "local-npm-test",
  "version": "1.0.1",
  "publishConfig" : {
    "registry" : "http://127.0.0.1:8081/repository/xxx/"
  },
  "description": "",
  "main": "index.js",
  "scripts": {
    "test": "echo \"Error: no test specified\" && exit 1"
  },
  "author": "",
  "license": "ISC"
}