react-drum-machine
 react-drum-machine copied to clipboard
This is a small project created with the purpose of learning the fundamentals of React.js starting from a simple Create React App.

🥁 React Drum Machine
This is a small project created with the purpose of learning the fundamentals of React.js starting from a simple Create React App.
🎯 About
I've started this project with the idea of reworking one of the ending projects of the Front End Libraries Certification (300 hours) of FreeCodeCamp starting from a really basic Create React App.
I have structured the project with three React components and I have used some React hooks in order to handle some project features. I have also used the Context API in order to be able to dispatch some actions and in order to avoid prop-drilling (or threading).
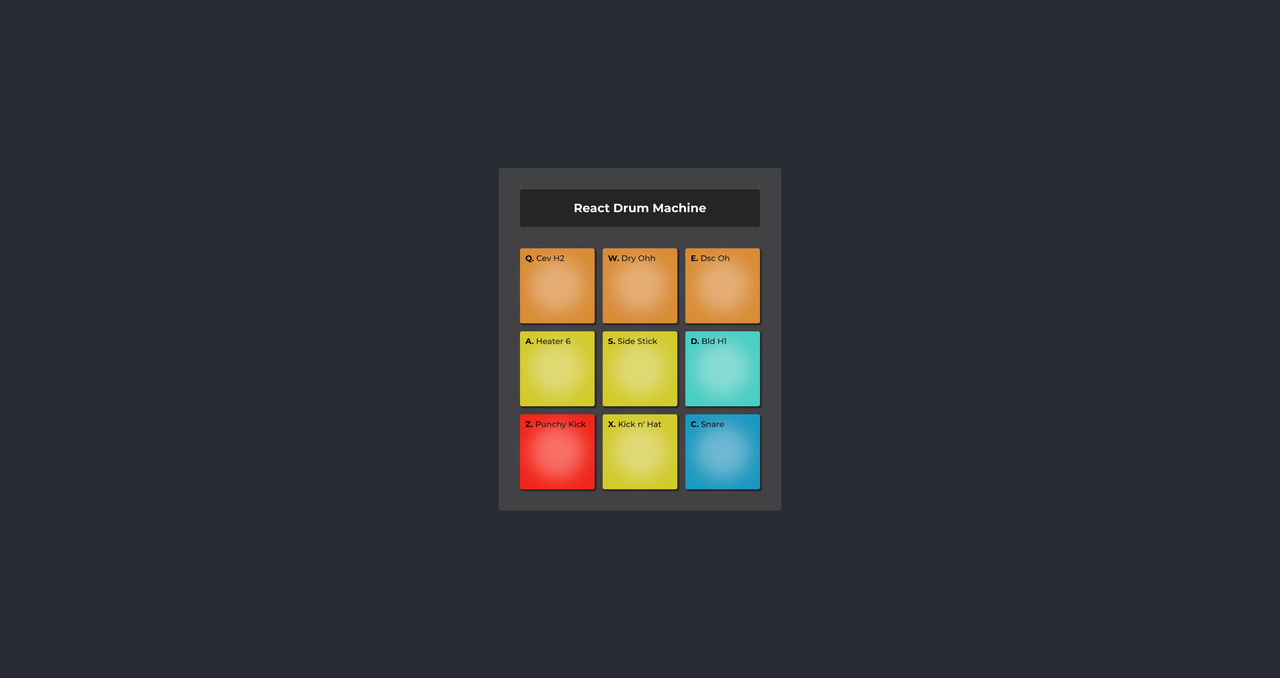
I finally ended up with a little bit of styling: the UI is inspired by the 'Maschine Mikro M3' drumpad controller from Native Instruments.
▶️ Demo
Here you can find the demo link:
:sparkles: Features
:heavy_check_mark: Use of React Hooks
:heavy_check_mark: Use of React Context API
:heavy_check_mark: Audio stems playable by keyboard input
:heavy_check_mark: Look & Feel inspired by 'Maschine Mikro M3' from Native Instruments.
:rocket: Technologies
Netlify deploy & configuration
The site is developed with some specific https://netlify.com apis.
Deploy configuration steps
- Connect your GitHub account to Netlify
- Select the project
- In Settings → Build & Deploy → Set Build command to : npm run build
- In Settings → Build & Deploy → Set Publish directory to : build
:white_check_mark: Requirements
Before starting :checkered_flag:, you need to have Git and Node installed.
Available Scripts
In the project directory, you can run:
npm start
Runs the app in the development mode.
Open http://localhost:3000 to view it in the browser.
The page will reload if you make edits.
You will also see any lint errors in the console.
npm test
Launches the test runner in the interactive watch mode.
See the section about running tests for more information.
npm run build
Builds the app for production to the build folder.
It correctly bundles React in production mode and optimizes the build for the best performance.
The build is minified and the filenames include the hashes.
Your app is ready to be deployed!
See the section about deployment for more information.
npm run eject
Note: this is a one-way operation. Once you eject, you can’t go back!
If you aren’t satisfied with the build tool and configuration choices, you can eject at any time. This command will remove the single build dependency from your project.
Instead, it will copy all the configuration files and the transitive dependencies (webpack, Babel, ESLint, etc) right into your project so you have full control over them. All of the commands except eject will still work, but they will point to the copied scripts so you can tweak them. At this point you’re on your own.
You don’t have to ever use eject. The curated feature set is suitable for small and middle deployments, and you shouldn’t feel obligated to use this feature. However we understand that this tool wouldn’t be useful if you couldn’t customize it when you are ready for it.
Learn More
You can learn more in the Create React App documentation.
To learn React, check out the React documentation.
Code Splitting
This section has moved here: https://facebook.github.io/create-react-app/docs/code-splitting
Analyzing the Bundle Size
This section has moved here: https://facebook.github.io/create-react-app/docs/analyzing-the-bundle-size
Making a Progressive Web App
This section has moved here: https://facebook.github.io/create-react-app/docs/making-a-progressive-web-app
Advanced Configuration
This section has moved here: https://facebook.github.io/create-react-app/docs/advanced-configuration
Deployment
This section has moved here: https://facebook.github.io/create-react-app/docs/deployment
npm run build fails to minify
This section has moved here: https://facebook.github.io/create-react-app/docs/troubleshooting#npm-run-build-fails-to-minify