Hypersomnia
 Hypersomnia copied to clipboard
Multiplayer top-down shooter made from scratch in C++. Play in your Browser! https://hypersomnia.io Made in 🇵🇱
![]()
![]()
![]()

An online shooter with ridiculously fast dynamics.
Challenge your friend to an intense duel, or gather two clans to hold a spectacular skirmish.
Written in modern C++, without a game engine! Forever free and open-source :heart:
Download binaries for:
![]()
![]()
![]()
(for older versions click here)
- Introduction
- Gallery
- Quick gameplay instructions
- Controls
- How to build
- Windows instructions
- Linux instructions
- Distribution-specific dependencies
- One-shot launch
- Detailed instructions
- Editor integration
- Opening and saving files
- MacOS instructions
- Contributing
Introduction
Hypersomnia is a fast-paced top-down arena released as free software, with an aspiration to one day become an MMO with elements of RPG.
Set in a hypothetical afterlife reality, it shall provide joy through altruistic behaviours, fierce fights, exploration, fulfillment of elaborate social roles or sowing panic as a traitor to benevolent ones.
Declare allegiance to one of the three factions whose apple of discord is a disparity between prevailing notions of moral excellence. Metropolis. Atlantis. Resistance.
See the game's wiki to get familiar with the universe.
To understand the repository's folder structure, make sure to read the documentation.
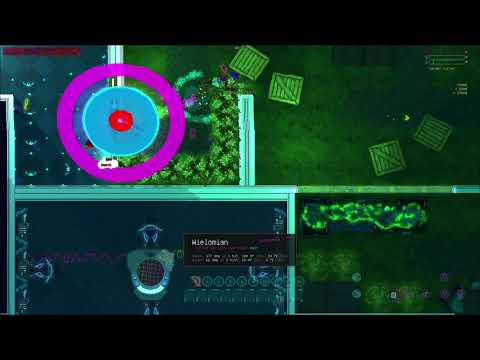
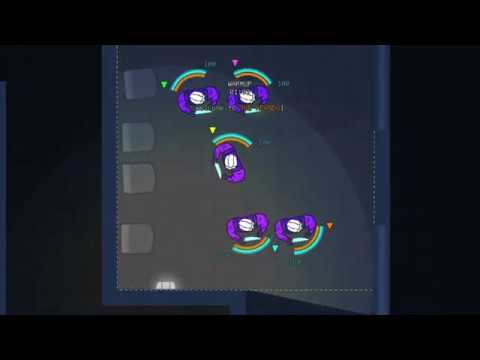
Gallery
Watch gameplays on YouTube:

Quick gameplay instructions
Controls
You can reconfigure all bindings by going to Settings->Controls tab.
- WSAD: move around
- Shift - sprint, it drains stamina.
- Space - dash, it drains quite a lot of stamina.
- Left control - move quietly and pick up items. You have to hold the left control, and your character needs to touch the item you want to pick, simultaneously.
- T - open the shop. Usually, the shop is off during warmup.
- O - change team. You should just pick Auto-assign to preserve balance.
- G - drop the most recently wielded item.
- H - hide the most recently wielded item. Can fail if you have no space in your inventory!
- E - defuse the bomb. If you move when defusing, the timer is reset, so stay still. You can shoot, though. Just remember to keep the trigger in the bomb's range, they have to touch.
- C - pull out the bomb (as a terrorist)
- Wheel Down - quickly throw a knife (or another melee weapon you happen to have).
- Wheel Up - quickly throw two knives (or other melee weapons you happen to have).
- Middle mouse button - quickly throw a Force grenade.
- Mouse4 - quickly throw a Flashbang.
- Mouse5 - quickly throw a PED grenade (destroys Personal Electricity).
- Q - quickly switch to the most recently drawn weapon - or any other at your disposal. Can fail if you have no space in your inventory for the currently held weapon!
- 0, 1, 2, ..., 9 - choose weapons from the hotbar.
- TAB - match statistics, e.g. the players and their scores.
- F8 - admininistration panel for your server where you can change maps or restart the match.
- Tilde (~) - release the mouse cursor to let you interact with GUI. You probably won't use it often, but it's useful if you want to drop a specific item from your inventory - simply press the right mouse button whilst dragging it. Pressing the tilde again puts you back into the game and lets you regain control over the crosshair.
- LMB:
- Use the item in your right hand, so:
- for the bomb: plant it
- for a nade: unpin it
- for a firearm: shoot it
- for a melee weapon: a wide swing
- RMB - Use the item in your left hand, or a secondary function of the item in your right hand (only if your left hand is unoccupied), for example - burst fire for the AO44 revolver. Also: a narrow, powerful swing for a melee weapon. Unpins the nade to throw it under your feet, instead of throwing it far.
How to build
Currently, Hypersomnia is only buildable using clang.
Your operating system must be 64-bit.
Irrespectively of the OS, you will need the following software in order to build Hypersomnia:
- The newest CMake.
- git to clone the respository and later generate version information.
- ninja to carry out the build.
- LLVM toolchain version 13 or newer.
- For Windows, you can use this installer, or a newer one.
- For Linux, use your distro-specific package. Make sure to install
libc++,libc++abiandlldas well. - For MacOS, the version that comes pre-installed with Xcode is good enough.
- OpenSSL needed by the auto-updater to download latest game binaries over HTTPS.
- On Windows, you can get the appropriate installer here: https://slproweb.com/download/Win64OpenSSL-1_1_1d.exe
Once dependencies are installed, go to the directory where you wish to have your Hypersomnia project downloaded, open git bash and paste:
git clone --recurse-submodules https://github.com/TeamHypersomnia/Hypersomnia
The --recurse-submodules is necessary to clone the submodules as well.
Wait for the download to complete. Next steps depend on the platform you are on.
On all platforms, you can choose among three building configurations:
Debug- the fastest to build and provides debug information.
Recommended for day-to-day development.Release- No debug information. Use only for production builds. SpecifiesIS_PRODUCTION_BUILD=1C++ preprocessor define that disables assertions in performance-critical areas.RelWithDebInfo- Same asReleasebut with debug info and with many assertions ("ensures") compiled-in. Preferred choice for testing the developed game while full speed is required.
Windows instructions
Refer to appveyor.yml file for up-to-date building procedure. A short overview of the process now follows.
Prerequisites:
- Visual Studio 2022 Community or newer.
Open up the terminal. Setup the environment:
call "C:\Program Files\Microsoft Visual Studio\2022\Community\VC\Auxiliary\Build\vcvarsall.bat" x64
(If the file cannot be found, it means you are not using Visual Studio 2022 Community. You will have to look for a corresponding vcvarsall.bat location on your own.)
Next, run these commands:
cd Hypersomnia
mkdir build
cd build
set CONFIGURATION=Release
cmake -G Ninja -DCMAKE_C_COMPILER=clang-cl -DCMAKE_CXX_COMPILER=clang-cl -DCMAKE_LINKER=lld-link -DARCHITECTURE="x64" -DCMAKE_BUILD_TYPE=%CONFIGURATION% -DGENERATE_DEBUG_INFORMATION=0 ..
ninja
Note: your computer might start lagging heavily for the duration of the build as ninja will use all available cores for compilation.
If you intend to develop the game, it is best to use "Debug" configuration for the fastest builds.
If you want to somehow customize your build, e.g. disable certain game features, refer to the beginning of CMakeLists.txt to see which options you can pass to the cmake command.
If the game builds successfully, issue this command to launch it:
ninja run
If, for some reason, some step fails, refer to the latest working Appveyor build and the relevant appveyor.yml file.
Linux instructions
Refer to .travis.yml file for up-to-date building procedure - it is constantly in flux. A short overview of the process now follows.
Current platforms are actively tested and supported:
- Arch Linux with i3 window manager - the developer's machine.
- Ubuntu, as this is where the dedicated server is deployed.
Distribution-specific dependencies
Arch Linux:
pkg-configlibx11libxcbxcb-util-keysymslibsodium- Might need more - you are on your own here (like very Arch user).
Ubuntu:
sudo apt-get install cmake ninja-build libxcb-keysyms1 libxcb-keysyms1-dev libxi6 libxi-dev alsa-oss osspd-alsa osspd libasound2 libasound2-dev p7zip p7zip-full libgl1-mesa-dev libxcb-glx0-dev libx11-xcb-dev
One-shot launch
Once the dependencies are all set, this is the complete script for building and launching the game from scratch, with RelWithDebInfo configuration:
git clone --depth 1 --recurse-submodules https://github.com/TeamHypersomnia/Hypersomnia
cd Hypersomnia
export CXX=clang++; export CC=clang;
cmake/build.sh RelWithDebInfo x64
ninja run -C build/current
Detailed instructions
Use your favorite shell to enter the repository's directory. Then run:
cmake/build.sh [Debug|Release|RelWithDebInfo] [x86|x64] ["ADDITIONAL CMAKE FLAGS"]
For example:
export CXX=clang++; export CC=clang;
cmake/build.sh Debug x64
After which, the resultant build.ninja should appear in the build/Debug-x64-clang directory.
Example for gcc:
export CXX=g++; export CC=gcc;
cmake/build.sh Debug x64
After which, the resultant build.ninja should appear in the build/Debug-x64-gcc directory.
Invoking ninja
There are several additional ninja targets defined:
ninja run
Launches the game normally.
ninja tests
Launches unit tests only and exits cleanly.
The above targets set the working directory automatically to ${PROJECT_SOURCE_DIR}/hypersomnia.
If, for some reason, some step fails, refer to the latest working Travis build and the relevant travis.yml file.
If the game fails to launch, it should automatically open a log file with the relevant message using $VISUAL executable.
Editor integration
If you plan to use the Hypersomnia editor on Linux, you might want to follow some additional configuration to make the experience better.
Opening and saving files
The Hypersomnia editor can choose directories for opening projects and saving them.
On Windows, this is accomplished through an IFileDialog.
Needless to say, such a class does not exist on Linux.
Hypersomnia provides shell scripts for common file managers in hypersomnia/detail/unix/managers.
You'll need one for choosing a directory and one for revealing files in explorer.
cd to hypersomnia/detail/unix and, assuming you want to use ranger as your file manager, create symlinks as such:
ln -s managers/choose_directory_ranger.zsh choose_directory.local
ln -s managers/reveal_file_ranger.zsh reveal_file.local
The framework also supports calling scripts for opening and saving files,
though the project does not use this functionality yet:
ln -s managers/save_file_ranger.zsh save_file.local
ln -s managers/open_file_ranger.zsh open_file.local
None of the symlinks will be tracked by git.
Currently, the following file managers are supported:
- ranger through
--choosedir,--choosefileand--selectfileoptions
To implement your own script for choosing a directory:
- Use a
$TERMINALvariable for file managers that need a terminal to run on.
Ensure your terminal supports-eflag that passes the commands to launch on startup. - Output a
$PWD/cache/last_file_path.txtfile containg the result - which is the chosen path, e.g./home/pbc/projects/my_map.
MacOS instructions
Refer to macos_build.yml file for up-to-date instructions.
Contributing
Pull requests are welcomed, should they even be typo fixes, missing const guarantees or changes in nomenclature. If you however plan to add a completely new feature, create a relevant issue so that everybody knows about it, because the project is continuously in a very, very active development and may undergo a revolution when it is the least expected.
A WIP documentation can be found at wiki.
Make sure to check out TeamHypersomnia for other repositories that are useful when setting up your own custom servers.
If you have questions or you fail to build Hypersomnia, create an issue. Or if you just can't wait to utter some brilliant ideas with regard to the game, please do so, too!
Metadata
Owner
Metadata
Multiplayer top-down shooter made from scratch in C++. Play in your Browser! https://hypersomnia.io Made in 🇵🇱