Lightsabers-Tutorial
 Lightsabers-Tutorial copied to clipboard
Tutorial about how one can make lightsaber like weapons in Unity
How to create a Lightsaber like Weapon in Unity
Foreword
This is an educational tutorial, this free asset is for training purposes only.
This repository covers the HDRP, there's an additional repository for the Standard Render Pipeline.
Introduction
Two years ago, when I started with Unity, I created lightsaber (see Addendum #1) like weapons to toy around in VR. Those have always been free for personal usage. Today I thought I'd try lightsaber like weapons in HDRP and share them as well. You can find the source code on github.
Preview
Here's a preview video of what this is about. Click on the picture to open the accompanying youtube video.
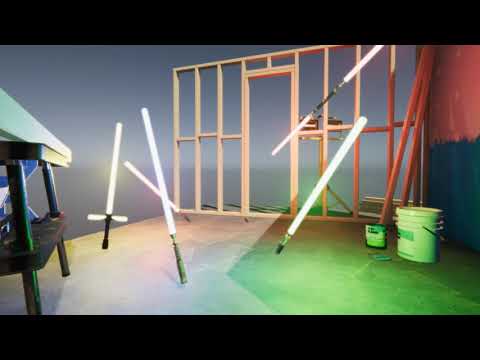
Note: I kept the HDRP standard demo scene that everyone is familiar with.
Quick Setup
Here are the quick setup steps:
-
create a new project "Weapon Tutorial" using "High-Defintion RP" in Unity 2019.1.5f1
-
enable Realtime Global Illumination in Window -> Rendering -> Lighting Settings
-
add Bloom: Rendering Settings -> Add Override -> Post-processing -> Bloom
set Intensity 0.491, Scatter 0.487 (whatever you prefer for the glow effect)
-
import the source code from github or the weapons_tutorial.unitypackage
-
drag the "Weapon (Single)" or "Weapon (Double)" or "Weapon (Cross)" prefab into the scene
-
hit play
-
press space to toggle the weapon on and off
Additional Info
-
the shader graph is a modified shader graph conversion of the one I posted in the Amplify Shader Editor thread
(Credits to "K Re" who did the glow effect graph tutorial for the unreal engine)
-
you might want to add audio for the weapon on / off / loop / swing sound in the Weapon script settings; unfortunately I'm not allowed to provide them
-
regarding light darkening when the weapons activate: if you don't want that, set "Default Post-process" -> Exposure -> Mode: Fixed and adjust Fixed Exposure value. I kept it with the slight darkening, because I like how it adds to the atmosphere
How it works
A lightsaber consists of a hilt and a blade. A hilt is fairly easily created in Blender. First create a circle and keep on extruding it. Scale the extrusions according to your requirements. Add a seam along an edge, unwrap it and use e. g. UVSquares to make the UVs squared. Looks like this:

That's the double-sided hilt, I mirrored it along the Z-axis
Although you could texturize the model in Blender, I prefer Substance Painter. Export the file as FBX and add a texture in Substance Painter:

The Blade is just a cylinder-like model. The important part is that the pivot point is set at the bottom of the Blade. The extension of the Blade over time in the script works by scaling it along the Z-axis.

Import the model and textures into Unity.
Create the weapon gameobject hierarchy like this:

The parent is just a GameObject with a simple SpinPivot script which makes the weapon spin for show purposes if activated.

Then there's the Weapon GameObject itself. It contains the Weapon.cs script which allows you to specify various settings:

- The blades in an array. All of these will be activated and deactivated upon keypress. Use as many as you like, minimum is 1
- The blade extend speed specifies the time interval in seconds at which the blade will be extended and collapsed
- Weapon Active specifies if the weapon is initially active or not
- Blade Color will be propagated to the blade and the light which is attached to the blade
- Blade Color Intensity defines how much color will be used. This very much depends on your lighting settings (eg if you use lum or another)
- Light Intensity is the intensity of the light which is attached to the blade. It's attached at the center of the blade, the intensity will vary depending on the expansion state
- Then there are various audio sources which will be played when the weapon is switched on, off and is active
The glow effect is created using a custom shader, a very simple one for now. You could do it with the built-in HDRP shaders as well, but I intend to enhance it with a pulsating one in the future.

Render Pipeline Notes
For now this is available for HDRP. Transforming it to Standard is as easy as creating the simple shader graph for it and converting the materials to standard material. Then add Post-processing v2 and add the Bloom effect to it.
Addendum
#1) Please note that Lightsaber is a registered trademark owned by LUCASFILM ENTERTAINMENT COMPANY LTD. The word is being used as reference because it's common knowledge.