CompositeXib
 CompositeXib copied to clipboard
Composite .xib Loading for UI's created in Interface Builder. Use Autolayout and load programmatically.
Custom UIView's loaded from .xib files
Composite .xib Loading for custom UIView's created using Interface Builder. See two ways to load, either using an existing .xib file, or programmatically with code. I use autolayout, which is a little scary, but worth learning for the ease in alignment/sizing between different views.
If you need to design custom UIView subclasses for an app, you might want to build them in Interface Builder. You'll want to use a .xib file if you need to load multiple copies of the custom UIView, or if you need to share the view between different view controllers.
Part 1: Load Custom UIView from Xcode's Interface Builder
-
Create a new UIView subclass (WidgetView.h/.m)
-
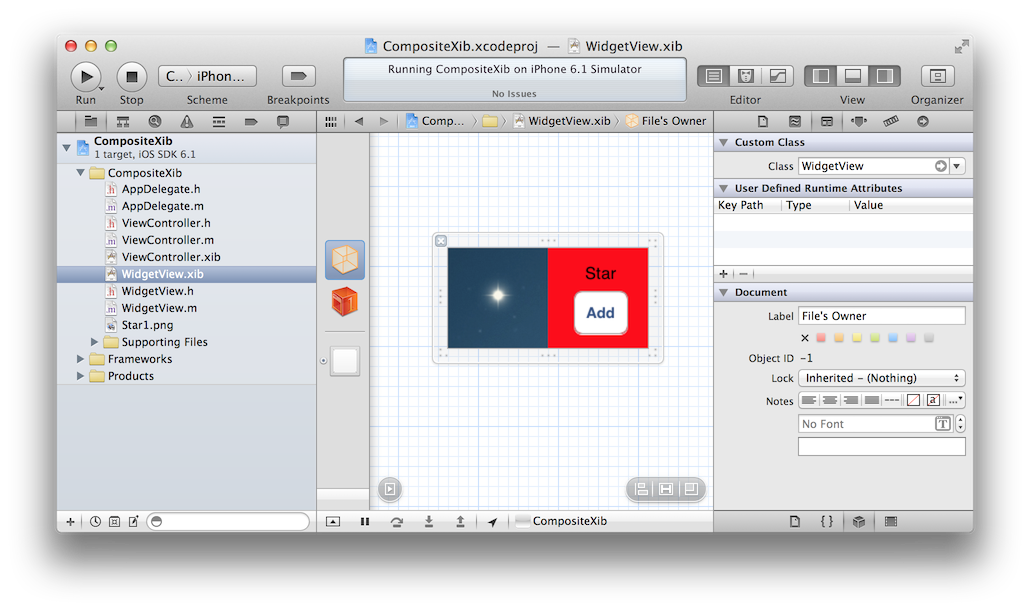
Create a new View .xib file (WidgetView.xib)
-
Set Files Owner for .xib to WidgetView
-
Add an IBOutlet UIView *view property to the WidgetView.h
-
Connect the outlet between the File's Owner and the View
-
Create a UIView on your ViewController.xib where you want to load the view.
-
Set the class to your custom UIView subclass (WidgetView)
-
Add code to load the .xib file inside the custom UIView (WidgetView.m)
- (id)initWithCoder:(NSCoder *)aDecoder {
	self = [super initWithCoder:aDecoder];
	if(self) {
		[self setup];
	}
	return self;
}

- (void)setup {
	[[NSBundle mainBundle] loadNibNamed:@"WidgetView" owner:self options:nil];
	[self addSubview:self.view];
}
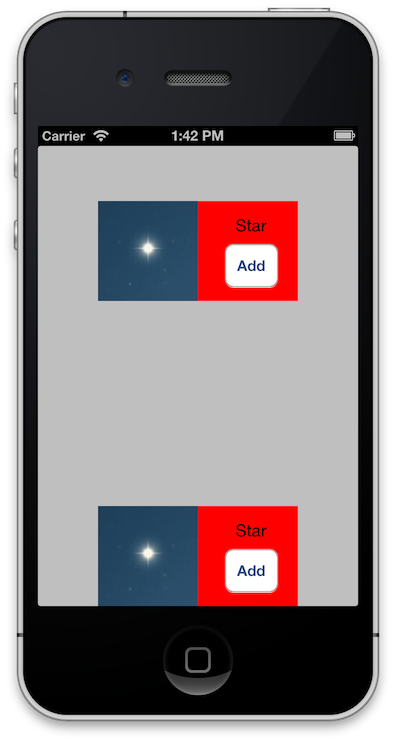
##Part 2: Load Custom UIView Programatically with Autolayout
We need to specify the size of the self.view in the custom UIView and the Widget's view itself
-
Update your UIView subclasses initWithFrame method to load the .xib file.
- (id)initWithFrame:(CGRect)frame { self = [super initWithFrame:frame]; if (self) { [self setup]; } return self; } - (void)setup { [[NSBundle mainBundle] loadNibNamed:@"WidgetView" owner:self options:nil]; [self addSubview:self.view]; // The new self.view needs autolayout constraints for sizing self.view.translatesAutoresizingMaskIntoConstraints = NO; // Horizontal 200 in width [self addConstraints:[NSLayoutConstraint constraintsWithVisualFormat:@"H:|[_view(200)]|" options:NSLayoutFormatDirectionLeadingToTrailing metrics:nil views:NSDictionaryOfVariableBindings(_view, self)]]; // Vertical 100 in height [self addConstraints:[NSLayoutConstraint constraintsWithVisualFormat:@"V:|[_view(100)]|" options:NSLayoutFormatDirectionLeadingToTrailing metrics:nil views:NSDictionaryOfVariableBindings(_view, self)]]; } -
Create and add view to the ViewController view with autolayout constraints
- (void)viewDidLoad {
    [super viewDidLoad];

    WidgetView *widget = [[WidgetView alloc] init];
    [self.view addSubview:widget];
    widget.translatesAutoresizingMaskIntoConstraints = NO;  // disable for autolayout

    // center x
    [self.view addConstraint:[NSLayoutConstraint constraintWithItem:widget attribute:NSLayoutAttributeCenterX relatedBy:NSLayoutRelationEqual toItem:self.view attribute:NSLayoutAttributeCenterX multiplier:1.0 constant:0]];

    // hug the bottom of the view
    [self.view addConstraint:[NSLayoutConstraint constraintWithItem:widget attribute:NSLayoutAttributeBottom relatedBy:NSLayoutRelationEqual toItem:self.view attribute:NSLayoutAttributeBottom multiplier:1.0 constant:0]];
}