EHTML
 EHTML copied to clipboard
HTML as Template Language

v1.0.39
EHTML (or Extended HTML) can be described as a set of custom elements that you can put on HTML page for different purposes and use cases. The main idea and goal of this library is to provide a convenient way to get rid of JavaScript code on the client side as much as it's possible for basic and routine stuff.
Disclaimer: "I cannot build complex things with EHTML yet, but I can build simple things with it so easily that no other library can do."
Contents
- Usage
- Introduction video
- Supported elements
- Supported actions on response
- Examples
- Simple E-HTML page
- Simple E-JSON
- E-JSON with progress bar
- E-JSON with mapped error
- E-JSON as a template
- Simple E-FOR-EACH
- Simple E-IF
- Simple E-FORM
- E-FORM_DYNAMIC-VALUE
- E-REUSABLE with E-FORM
- Simple E-GOOGLE-OAUTH-BUTTON
- E-PAGE-WITH-URL
- E-PAGE-WITH-URL + E-JSON
- E-TURBOLINK
- E-PAGE-WITH-URL + E-SELECT (with turbo-redirect)
- Simple E-GITHUB-OAUTH-BUTTON
- Contribution and QA
Usage
EHTML is very easy to include in your project. Save this file locally and use it:
<head>
  <script src="/../js/ehtml.bundle.min.js" type="text/javascript"></script>
</head>
Since v.1.0.38 you can disable some elements for E-HTML by adding attribute data-no-ehtml="true". It would improve performance, by reducing the number of elements that E-HTML needs to observe.
Since v.1.0.39 you can turn off/on EHTML MutationObserver by using following methods:
window.ehtmlMutationObserver.turnOff()
window.ehtmlMutationObserver.turnOn()
It would improve performance, by turning off MutationObserver. In this case, E-HTML would not react on new elements that's being created on a page.
Introduction Video

Supported elements
E-HTML
Sometimes html files can be very big, so why not just split them into different smaller html files and put sort of links to them in the main html file? e-html allows you to do that by introducing a module system in HTML.
So, let's say we have main articles.html file
<!DOCTYPE html>
<html xmlns="http://www.w3.org/1999/xhtml" lang="en">

  <head>
    <link rel="shortcut icon" href="/../images/favicon.ico"/>
    <meta charset="UTF-8">
    <meta name="viewport" content="width=device-width, initial-scale=1">
    <title>e-html</title>
    <link rel="stylesheet" href="/../css/main.css">
    <script src="/../js/ehtml.bundle.min.js" type="text/javascript"></script>
  </head>

  <body class="main">
    <div class="articles">

      <e-html data-src="/../html/first.html"></e-html>
      <e-html data-src="/../html/second.html"></e-html>
      <e-html data-src="/../html/third.html"></e-html>

    </div>
  </body>

</html>
and as you can see, we have three e-html tags here. And each of them refers to some html file which contains some part of the article.hmtl. This tag has only one custom attribute data-src, which tells us where exactly the file that we want to include is served.
And for example, first.html would look something like this
<div class="article">
  <!-- some content of the first article -->
</div>
And when you open articles.html in a browser, it will be rendered as if you included all the parts in one file:
<!DOCTYPE html>
<html xmlns="http://www.w3.org/1999/xhtml" lang="en">

  <head>
    <link rel="shortcut icon" href="/../images/favicon.ico"/>
    <meta charset="UTF-8">
    <meta name="viewport" content="width=device-width, initial-scale=1">
    <title>e-html</title>
    <link rel="stylesheet" href="/../css/main.css">
    <script src="/../js/ehtml.bundle.min.js" type="text/javascript"></script>
  </head>

  <body class="main">
    <div class="articles">

      <div class="article">
        <!-- content of the first article -->
      </div>
      <div class="article">
        <!-- content of the second article -->
      </div>
      <div class="article">
        <!-- content of the third article -->
      </div>

    </div>
  </body>

</html>
The main benefit of using this element is that you can much more easily modify your big html files. So, instead of having one big html file where you have to find a specific part of it to modify, you can just find a file, which contains this specific part and make changes there.
Of course, this element makes an additional http(s) request for fetching a specific part, but you can always cache the files, so it would not cause any performance issues.
E-JSON
e-json allows you to fetch json resource by GET request from the server and apply some actions on the response. So, for example, let's say you have an endpoint /album/{title}, which returns following response:
title = 'Humbug'
{
  "title": "Humbug",
  "artist": "Arctic Monkeys",
  "type": "studio album",
  "releaseDate": "19 August 2009",
  "genre": "psychedelic rock, hard rock, stoner rock, desert rock",
  "length": "39:20",
  "label": "Domino",
  "producer": "James Ford, Joshua Homme"
}
Then you can fetch it via e-json like in following html code:
<e-json
  data-src="/../album/Humbug"
  data-response-name="albumResponse"
  data-actions-on-response="
    mapToTemplate('${albumResponse.body}', '#album-info');
  ">

  <template id="album-info" data-object-name="album">
    <div data-text="Title: ${album.title}"></div>
    <div data-text="Artist: ${album.artist}"></div>
    <div data-text="Type: ${album.type}"></div>
    <div data-text="Release date: ${album.releaseDate}"></div>
    <div data-text="Genre: ${album.genre}"></div>
    <div data-text="Length: ${album.length}"></div>
    <div data-text="Label: ${album.label}"></div>
    <div data-text="Producer: ${album.producer}"></div>
  </template>
</e-json>
So, e-json has attributes data-src which tells us where from we can fetch json response. Attribute data-response-name specifies the name that we want to use for the response. It contains body, statusCode and headers properties, so you can use them in the attribute data-actions-on-response. In this case we just decided to map body of our response to the element with id album-info, which also must have the attribute data-object-name. This attribute specifies the name of the object that we want to map. It's important to mention that you can map object only to <template>, which is in e-json that provides the object for mapping. More details about actions on response you can find in this section.
If you need some request headers, you can specify them in the attribute data-request-headers with format { "headerName": "headerValue", ... }.
You can also add attributes data-ajax-icon and data-progress-bar as element selectors for presenting progress of fetching data from the server. You can see how to use them in the examples.
E-JSON template (v1.0.12)
You can use e-json as a <template> element, if you just need to map response.
title = 'Humbug'
{
  "title": "Humbug",
  "artist": "Arctic Monkeys",
  "type": "studio album",
  "releaseDate": "19 August 2009",
  "genre": "psychedelic rock, hard rock, stoner rock, desert rock",
  "length": "39:20",
  "label": "Domino",
  "producer": "James Ford, Joshua Homme"
}
<template is="e-json" data-src="/../album/Humbug" data-object-name="albumResponse">
  <div data-text="Title: ${albumResponse.body.title}"></div>
  <div data-text="Artist: ${albumResponse.body.artist}"></div>
  <div data-text="Type: ${albumResponse.body.type}"></div>
  <div data-text="Release date: ${albumResponse.body.releaseDate}"></div>
  <div data-text="Genre: ${albumResponse.body.genre}"></div>
  <div data-text="Length: ${albumResponse.body.length}"></div>
  <div data-text="Label: ${albumResponse.body.label}"></div>
  <div data-text="Producer: ${albumResponse.body.producer}"></div>
</template>
Here you don't use data-response-name attribute as you don't need apply actions on response via data-actions-on-response attribute. But you still have to specify data-object-name to define a variable for the response, so you can use it as a mapping object inside of e-json template.
And as for simple e-json you can also add attributes data-ajax-icon and data-progress-bar as element selectors for presenting progress of fetching data from the server. You can see how to use them in the examples.
E-FOR-EACH template
You can use standard template html element with attribute is="e-for-each" for iterating some object for mapping to an element. So, let's say you have an endpoint /album/{title}/songs, which returns following response:
title = 'Humbug'
{
  "title": "Humbug",
  "artist": "Arctic Monkeys",
  "songs": [
    { "title": "My Propeller", "length": "3:27" },
    { "title": "Crying Lightning", "length": "3:43" },
    { "title": "Dangerous Animals", "length": "3:30" },
    { "title": "Secret Door", "length": "3:43" },
    { "title": "Potion Approaching", "length": "3:32" },
    { "title": "Fire and the Thud", "length": "3:57" },
    { "title": "Cornerstone", "length": "3:18" },
    { "title": "Dance Little Liar", "length": "4:43" },
    { "title": "Pretty Visitors", "length": "3:40" },
    { "title": "The Jeweller's Hands", "length": "5:42" }
  ]
}
Then your html code would be something like this:
<e-json
  data-src="/../album/Humbug/songs"
  data-response-name="albumResponse"
  data-actions-on-response="
    mapToTemplate('${albumResponse.body}', '#album-info');
  ">

  <template id="album-info" data-object-name="album">

    <div data-text="Title: ${album.title}"></div>
    <div data-text="Artist: ${album.artist}"></div>

    <div><b data-text="${album.songs.length} songs:"></b></div>
    <template is="e-for-each" data-list-to-iterate="${album.songs}" data-item-name="song">
      <div class="song-box">
        <div data-text="No. ${song.index}/${album.songs.length}"></div>
        <div data-text="Title: ${song.title}"></div>
        <div data-text="Length: ${song.length}"></div>
      </div>
    </template>

  </template>
</e-json>
So, as you can see it's pretty straightforward: e-for-each template has attribute data-list-to-iterate where you can specify the list from the mapped object that you want to iterate. And attribute data-item-name specifies the name of the item that you want to map to the template. You can also use index property of the item in the mapping which starts from 1.
When you open a browser, template will be replaced with its n times duplicated inner content for each item, where n is the length of the list that has been iterated:
<e-json
  data-src="/../album/Humbug/songs"
  data-response-name="albumResponse"
  data-actions-on-response="
    mapToTemplate('${albumResponse.body}', '#album-info');
  ">

  <div>Title: Humbug</div>
  <div>Artist: Arctic Monkeys</div>

  <div><b>10 songs:</b></div>
  <div class="song-box">
    <div>No. 1/10</div>
    <div>Title: My Propeller</div>
    <div>Length: 3:27</div>
  </div>
  <div class="song-box">
    <div>No. 2/10</div>
    <div>Title: Crying Lightning</div>
    <div>Length: 3:43</div>
  </div>
  <div class="song-box">
    <div>No. 3/10</div>
    <div>Title: Dangerous Animals</div>
    <div>Length: 3:30</div>
  </div>
  <div class="song-box">
    <div>No. 4/10</div>
    <div>Title: Secret Door</div>
    <div>Length: 3:43</div>
  </div>
  <div class="song-box">
    <div>No. 5/10</div>
    <div>Title: Potion Approaching</div>
    <div>Length: 3:32</div>
  </div>
  <div class="song-box">
    <div>No. 6/10</div>
    <div>Title: Fire and the Thud</div>
    <div>Length: 3:57</div>
  </div>
  <div class="song-box">
    <div>No. 7/10</div>
    <div>Title: Cornerstone</div>
    <div>Length: 3:18</div>
  </div>
  <div class="song-box">
    <div>No. 8/10</div>
    <div>Title: Dance Little Liar</div>
    <div>Length: 4:43</div>
  </div>
  <div class="song-box">
    <div>No. 9/10</div>
    <div>Title: Pretty Visitors</div>
    <div>Length: 3:40</div>
  </div>
  <div class="song-box">
    <div>No. 10/10</div>
    <div>Title: The Jeweller's Hands</div>
    <div>Length: 5:42</div>
  </div>

</e-json>
E-IF template
This standard template html element with attribute is="e-if" decides if some particular part of html needs to be displayed or not while mapping some object to an element. So, let's say you have an endpoint /album/{title}/songs, which returns following response:
title = 'Humbug'
{
  "title": "Humbug",
  "artist": "Arctic Monkeys",
  "songs": [
    { "title": "My Propeller", "length": "3:27" },
    { "title": "Crying Lightning", "length": "3:43" },
    { "title": "Dangerous Animals", "length": "3:30" },
    { "title": "Secret Door", "length": "3:43" },
    { "title": "Potion Approaching", "length": "3:32" },
    { "title": "Fire and the Thud", "length": "3:57" },
    { "title": "Cornerstone", "length": "3:18" },
    { "title": "Dance Little Liar", "length": "4:43" },
    { "title": "Pretty Visitors", "length": "3:40" },
    { "title": "The Jeweller's Hands", "length": "5:42" }
  ]
}
And you would like to display only songs that shorter than '3:30' in length. Then your html code would be something like this:
<e-json
  data-src="/../album/Humbug/songs"
  data-response-name="albumResponse"
  data-actions-on-response="
    mapToTemplate('${albumResponse.body}', '#album-info');
  ">

  <template id="album-info" data-object-name="album">

    <div data-text="Title: ${album.title}"></div>
    <div data-text="Artist: ${album.artist}"></div>

    <div><b>Songs that shorter than 3:30:</b></div>
    <template is="e-for-each" data-list-to-iterate="${album.songs}" data-item-name="song">

      <template is="e-if"
        data-condition-to-display="${(song.length.split(':')[0] * 60 + song.length.split(':')[1] * 1) <= 210}"
      >
        <div class="song-box">
          <div data-text="No. ${song.index}/${album.songs.length}"></div>
          <div data-text="Title: ${song.title}"></div>
          <div data-text="Length: ${song.length}"></div>
        </div>
      </template>

    </template>

  </template>
</e-json>
This element has only one attribute data-condition-to-display that specifies a condition whether inner content of the template has to be displayed.
When you open a browser, you will see:
<e-json
  data-src="/../album/Humbug/songs"
  data-response-name="albumResponse"
  data-actions-on-response="
    mapToTemplate('${albumResponse.body}', '#album-info');
  ">

  <div>Title: Humbug</div>
  <div>Artist: Arctic Monkeys</div>

  <div><b>Songs that shorter than 3:30:</b></div>
  <div class="song-box">
    <div>No. 1/10</div>
    <div>Title: My Propeller</div>
    <div>Length: 3:27</div>
  </div>
  <div class="song-box">
    <div>No. 3/10</div>
    <div>Title: Dangerous Animals</div>
    <div>Length: 3:30</div>
  </div>
  <div class="song-box">
    <div>No. 7/10</div>
    <div>Title: Cornerstone</div>
    <div>Length: 3:18</div>
  </div>

</e-json>
E-FORM
Custom element e-form is a great solution, if you want to send data from your form in JSON format. So, let's say you have an endpoint /artist/{name}/albums/add with method 'POST' and expected request body is something like:
name = 'Arctic Monkeys'
{
  "title": "Humbug",
  "type": "studio album",
  "releaseDate": "19 August 2009",
  "genre": ["psychedelic rock", "hard rock", "stoner rock", "desert rock"],
  "length": "39:20",
  "label": "Domino",
  "producer": "James Ford, Joshua Homme"
}
Then you can make this request with following html code:
<e-form>

  Title:
  <input type="text" name="title">

  Type:
  <input type="radio" name="type" value="studio album" checked>
  <label for="one">One</label>

  <input type="radio" name="type" value="live album" checked>
  <label for="one">One</label>

  Release date:
  <input type="date" name="releaseDate">

  Genre:
  <input type="checkbox" name="genre" value="psychedelic rock">
  <input type="checkbox" name="genre" value="hard rock">
  <input type="checkbox" name="genre" value="stoner rock">
  <input type="checkbox" name="genre" value="desert rock">

  Total length:
  <input type="time" name="totalLength">

  Producer:
  <input type="text" name="producer">

  <button
    id="send"
    data-request-url="/artist/Arctic_Monkeys/albums/add"
    data-request-method="POST"
    data-request-headers="{}"
    data-ajax-icon="#ajax-icon"
    data-response-name="savedAlbum"
    onclick="this.form.submit(this)"
    data-actions-on-response="
      logToConsole('response: ', '${savedAlbum}');
    "
  />

  <img id="ajax-icon" src="/../images/ajax-loader.gif"/>

</e-form>
So, like standard form element e-form can have inputs with different types, selects, radio buttons, checkboxes and textareas. Every item in e-form mast have name attribute, which will be used as a key in the request body. And value of every item is used as a value for corresponding name in the request body.
This element will be rendered as a standard form element with attribute data-e-form="true", but it will send its data as json object. You can do it by attaching events on buttons or other active elements with function: this.form.submit(this), which constructs a request body by the form's items and submits it. Such approach is much better than standard action attribute in the form tag because you can attach different requests on several active elements using the same form.
Also you have to add other information about the request you want to make in the attributes: data-request-url, data-request-method, data-request-headers. You can even add attributes like data-ajax-icon, data-progress-bar and data-upload-progress-bar which can display progress of the request.
Since v1.0.29 You change button text and add class to it while you're waiting for ajax request to be completed. You can do it via data-button-ajax-text and data-button-ajax-class. You can see how it works in this example.
Like for e-json, you can do some actions on response with the name that you specify in data-response-name attribute. In this case, we just log the response from the request.
You can also do validation of your e-forms by attributes: required, data-validation-pattern, data-validation-error-class-for-element, data-validation-error-class-for-message-box, data-validation-bad-format-error-message and data-validation-min-files-number. More details you can find in the examples.
Since v1.0.32 You can treat response body as something that you want to download as a file. All you need is to specify the name of your file in submit button:
data-download-response-body-as-file-with-name="file.zip"
You can still apply actions on response body, status code and headers.
E-FORM-DYNAMIC-VALUE (v1.0.28)
Generally EHTML has static binding for elements (unless it's input fields that can change value by the user interaction). In order to bind value in memory (and also local/session storages and other global variables) and send this value in the e-form, you can use e-form-dynamic-value. By using e-form-dynamic-value attribute, you can be sure that its value is calculated only when you submit a form.
<e-form>
  ...
  <e-form-dynamic-value name="current-date" e-form-dynamic-value="${new Date()}"></e-form-dynamic-value>
  ...
</e-form>
More details you can find in the examples.
E-REUSABLE template (v1.0.8)
You use action mapToTemplate on a template with attribute is="e-reusable", so you can map response object multiple times. Also you can specify attribute data-append-to="#someSelector" or data-prepend-to="#someSelector" to decide where and how mapped content of the template should be placed. If you don't specify one of these attributes, then mapped content of the template will be placed right before the template.
So, the main difference between "reusable" template and other types of templates is that "reusable" template is not getting removed from the DOM, so you can use it several times.
More details you can find in the examples.
Since v1.0.30 you can use data-insert-into=#someSelector attribute in reusable template. This allows you to replace content of released template from previuos mapping with new mapped content of template. See link to the source code and check it how it works.
E-LOCAL-STORAGE-VALUE and E-SESSION-STORAGE-VALUE
For retrieving values from local storage you can use e-local-storage-value and use it in a form:
<e-form>

  <e-local-storage-value name="jwt" data-key="jwtToken"></e-local-storage-value>

  <button
    id="send"
    data-request-url="/verify"
    data-request-method="POST"
    data-request-headers="{}"
    data-ajax-icon="#ajaxIcon"
    data-response-name="response"
    onclick="this.form.submit(this)"
    data-actions-on-response="
      logToConsole('response: ', '${response}');
    "
  />

  <img id="ajaxIcon" src="/../images/ajax-loader.gif"/>

</e-form>
Element e-local-storage-value behaves like any input element in the e-form: it has attribute name which will be used as a key in request body, and value of the e-local-storage-value is a value that is stored in the local storage with the key that you specify in the data-key attribute.
So, in this case e-form will construct following request body:
{
  "jwt": "some value from local storage with key 'jwtToken' (it's like localStorage.getItem('jwtToken'))"
}
Element e-session-storage-value works in the same way as e-local-storage-value but with session storage:
<e-form>

  <e-local-session-value name="sessionToken" data-key="token"></e-local-storage-value>

  <button
    id="send"
    data-request-url="/verify/"
    data-request-method="POST"
    data-request-headers="{}"
    data-ajax-icon="#ajaxIcon"
    data-response-name="response"
    onclick="this.form.submit(this)"
    data-actions-on-response="
      logToConsole('response: ', '${response}');
    "
  />

  <img id="ajaxIcon" src="/../images/ajax-loader.gif"/>

</e-form>
{
  "sessionToken": "some value from session storage with key 'token' (it's like sessionStorage.getItem('token'))"
}
You can also get items from local and session storages in the attributes of any elements: some-attr="${localStorage.getItem('itemName')}" or some-attr="${sessionStorage.getItem('itemName')}".
E-GOOGLE-OAUTH-BUTTON
You can integrate Google Sign-In into your web app just by adding one button:
<e-google-oauth-button
  class="customSignIn"
  data-client-id="8310979471-lvmkisk1b33fjd25pjjqe8v8fa72rq2q.apps.googleusercontent.com"
  data-redirect-url="/../google"
  data-cookiepolicy="single_host_origin"
  data-scope="profile"
  data-request-token-key="googleToken"
  data-response-name="responseWithToken"
  data-actions-on-response="
    saveToLocalStorage('jwt', '${responseWithToken.body.jwt}');
  ">

  <span id="google-icon" class="icon"></span>
  <span class="buttonText">Sign in with Google</span>

</e-google-oauth-button>
It will be rendered as a simple button with attribute data-e-google-oauth-button="true". You can configure google oauth with custom attributes: data-client-id, data-redirect-url, data-cookiepolicy and data-scope.
Attribute data-request-token-key specifies a key in the request body that you will send to your api after it's been obtained from google endpoint. So, in this case your endpoint with path /../google(which you specified in the data-redirect-url) would expect request body: { "googleToken": "<some token from google>" }. And let's say your endpoint returns response with jwt token that's based on user data, which has been recived by "googleToken". You can use this response in attribute data-actions-on-response. For example, in this case we save it to local storage. The name of the response you specify in data-response-name like in e-json or e-form.
Demo of e-google-oauth-button you can find in the examples.
E-PAGE-WITH-URL template
You can define url parameters via template with attribute is="e-page-with-url":
<body>
  <template is="e-page-with-url" data-url-pattern="/album/{title}">
    <!-- content -->
  </template>
</body>
Or for example:
<body>
  <template is="e-page-with-url" data-url-pattern="/artists?{search}">
    <!-- content -->
  </e-page-with-url>
</body>
You can get url parameters in any attributes of any elements via urlParams object: some-attr="${urlParams.someValue}". It's important to place e-page-with-url in the beginning of <body> with all elements that use urlParams inside of it:
<body>
  <template is="e-page-with-url" data-url-pattern="/album/{title}">

    <div data-text="Album title: ${urlParams.title}"></div>

  </template>
</body>
So, for example, when you open url http://0.0.0.0:8000/album/Humbug in a browser, you would see:
<body>

  <div>Album title: Humbug</div>

</body>
Element e-page-with-url is a template because we have to initialize urlParams before we render all elements that use those parameters.
More details you can find in the examples.
E-TURBOLINK
EHTML supports turbolinks via e-turbolink. The main difference from classic turbolinks is that e-tubolink does not merge <head> from the page it fetches. The idea behind this decision was that it would make rendered html code much cleaner(but this decision is still discussable).
<e-turbolink data-href="/../html/next.html" data-ajax-favicon="/../images/ajax-loader.gif">
  next page
</e-turbolink>
e-turbolink will be rendered as a simple link <a> with attribute data-e-turbolink="true". When you click on a e-turbolink, it fetches a page which is served with the path that you specify in the attribute data-href, extracts <body> from there and swaps it with current <body>. Also it saves history, so you can use Reload, Back and Forward buttons in the browser.
As e-turbolink does not merge <head>, you have to design it in a way so it would work for every page that you want to "turbolink" there.
Also you can specify ajax favicon via attribute data-ajax-favicon, but it would probably not work in Chrome, as it does not support gif format in the favicons.
But you can use progress bars instead via data-with-progress-bar:
<e-turbolink data-href="/../html/next.html" data-with-progress-bar="progress-bar">
  next page
</e-turbolink>
where value of this attribute is a css class:
.progress-bar {
  width: 100%;
}
You can also specify a place for the progress bar via attribute data-progress-bar-place, by default it's body.
Since v1.0.35 scrollY position is recoreded for each history state, so you can access to it via popstate event:
window.addEventListener('popstate', function () {
  window.scrollTo(0, history.state.scrollY)
})
Since v1.0.36 we record positions in history API:
window.history.state.documentElementClientHeight = document.documentElement.clientHeight
window.history.state.documentBodyClientHeight = document.documentElement.clientHeight
If you have a lot of dynamic content, and you want to set scroll before all the content loads on a page, you can do something like this:
window.addEventListener('load', () => {
  if (window.history.state) {
    const currentHistoryState = window.history.state
    // If we load url with hash #, then we want element with #id to be scrolled into view.
    currentHistoryState.scrollY = undefined
    currentHistoryState.documentElementClientHeight = undefined
    currentHistoryState.documentBodyClientHeight = undefined
    window.history.replaceState(currentHistoryState, null, window.location.href)
  }
})

const updateScrollYInHistory = () => {
  const scrollingStoped = setTimeout(() => {
    const currentHistoryState = window.history.state
    currentHistoryState.scrollY = window.pageYOffset || document.documentElement.scrollTop
    currentHistoryState.documentElementClientHeight = document.documentElement.clientHeight
    currentHistoryState.documentBodyClientHeight = document.body.clientHeight
    window.history.replaceState(currentHistoryState, null, window.location.href)
    clearInterval(scrollingStoped)
  }, 120)
}

document.addEventListener('scroll', updateScrollYInHistory)

window.addEventListener('popstate', function(event) {
  document.removeEventListener('scroll', updateScrollYInHistory)
  setTimeout(() => {
    if (window.history.state.documentBodyClientHeight !== undefined) {
      document.body.style.height = `${window.history.state.documentBodyClientHeight}px`
      window.scrollTo(0, history.state.scrollY)
    }
    document.addEventListener('scroll', updateScrollYInHistory)
  }, 20)
})
We wait for 20ms to body onload into the page. We update scroll y position on scroll event, because user can scroll after he go back or forward in browser.
Demo of e-turbolink you can find in the examples.
E-SELECT
Standard select can be better. For example, it would be great if we could set a value to it, so it would be selected automatically on render. e-select does such thing:
<e-select
  name="color"
  value="green">
  <option value="red" name="color">Red</option>
  <option value="green" name="color">Green</option>
  <option value="blue" name="color">Blue</option>
</e-select>
It will be rendered as a simple select with attribute data-e-select="true" with automatically selected value that you specify in attribute value.
Demo of e-select you can find in the examples.
E-GITHUB-OAUTH-BUTTON
You can integrate GitHub Sign-In into your web app just by adding one button:
<e-github-oauth-button
  class="customSignIn"
  data-client-id="9740bb12713949b1c23d"
  data-redirect-uri="http://localhost:8000/html/github.html/"
  data-scope="user,repo">
  <span id="github-icon" class="icon"></span>
  <span class="buttonText">Sign in with Github</span>
</e-github-oauth-button>
It will be rendered as a simple button with attribute data-e-github-oauth-button="true". You can configure github oauth with custom attributes: data-client-id, data-redirect-uri and data-scope.
And your page which is in redirect-uri can look like:
<!-- html/github.html -->
<body class="main">
  <template is="e-page-with-url" data-url-pattern="/html/github.html?{code}">
    <div class="base">
      <e-form
        data-request-url="/../github"
        data-request-method="POST"
        data-request-headers="{}"
        data-ajax-icon="#ajax-icon"
        data-response-name="responseWithToken"
        data-actions-on-response="
          saveToLocalStorage('jwt', '${responseWithToken.body.jwt}');
          turboRedirect('/../e-github-oauth-button.html');
      ">
        <input type="hidden" name="code" value="${urlParams.code}">
        <img id="ajax-icon" class="ajax-icon" src="/../images/ajax-icon.svg"/>
      </e-form>
    </div>
  </template>
</body>
In the redirect uri we expect code param, which we want to retrieve via e-page-with-url template. And then using simple e-form with <input type="hidden"> we send the code in the request to our endpoint /../github, which is supposed to return response with some jwt token. After we get the jwt token, we save it into local storage and make turbo redirect to the original page where we have been redirected from. And you can notice that we use all data-request-* attributes right in the e-form. That allows us to send the form on rendering page, so we don't have to click on some button, for example.
Demo of e-github-oauth-button you can find in the examples.
E-SVG (v1.0.15)
With element e-svg you can load svg code right into your html page:
<!DOCTYPE html>
<html xmlns="http://www.w3.org/1999/xhtml" lang="en">

  <head>
    <link rel="shortcut icon" href="/../images/favicon.ico"/>
    <meta charset="UTF-8">
    <meta name="viewport" content="width=device-width, initial-scale=1">
    <title>e-html</title>
    <link rel="stylesheet" href="/../css/main.css">
    <script src="/../js/ehtml.bundle.min.js" type="text/javascript"></script>
  </head>

  <body class="main">

      <e-svg data-src="/../images/svg-from-server.svg"></e-svg>

  </body>

</html>
And let's say your svg image on /../images/svg-from-server.svg is something like
<svg version="1.1" id="Layer_1" xmlns="http://www.w3.org/2000/svg" xmlns:xlink="http://www.w3.org/1999/xlink" x="0px" y="0px" width="512px" height="512px" viewBox="0 0 512 512" style="enable-background:new 0 0 512 512;" xml:space="preserve">
  <circle id="background_45_" style="fill:#ECF0F0;" cx="256" cy="256" r="256"></circle>
  <path style="fill:#E27C3E;" d="...."></path>
  <polygon style="fill:#4C738A;" points="..."></polygon>
</svg>
Then once you load your page it would look like:
<!DOCTYPE html>
<html xmlns="http://www.w3.org/1999/xhtml" lang="en">

  <head>
    <link rel="shortcut icon" href="/../images/favicon.ico"/>
    <meta charset="UTF-8">
    <meta name="viewport" content="width=device-width, initial-scale=1">
    <title>e-html</title>
    <link rel="stylesheet" href="/../css/main.css">
    <script src="/../js/ehtml.bundle.min.js" type="text/javascript"></script>
  </head>

  <body class="main">

    <svg version="1.1" id="Layer_1" xmlns="http://www.w3.org/2000/svg" xmlns:xlink="http://www.w3.org/1999/xlink" x="0px" y="0px" width="512px" height="512px" viewBox="0 0 512 512" style="enable-background:new 0 0 512 512;" xml:space="preserve">
      <circle id="background_45_" style="fill:#ECF0F0;" cx="256" cy="256" r="256"></circle>
      <path style="fill:#E27C3E;" d="...."></path>
      <polygon style="fill:#4C738A;" points="..."></polygon>
    </svg>

  </body>

</html>
E-MARKDOWN (v1.0.34)
With element e-markdown you can load markdown right into your html page:
<!DOCTYPE html>
<html xmlns="http://www.w3.org/1999/xhtml" lang="en">

  <head>
    <link rel="shortcut icon" href="/../images/favicon.ico"/>
    <meta charset="UTF-8">
    <meta name="viewport" content="width=device-width, initial-scale=1">
    <title>e-html</title>
    <link rel="stylesheet" href="/../css/main.css">
    <script src="/../js/ehtml.bundle.min.js" type="text/javascript"></script>
  </head>

  <body class="main">

      <e-markdown data-src="/../md/md-from-server.md"></e-markdown>

  </body>

</html>
And let's say your markdown on /../md/md-from-server.md is something like
# Title
Then once you load your page it would look like:
<!DOCTYPE html>
<html xmlns="http://www.w3.org/1999/xhtml" lang="en">

  <head>
    <link rel="shortcut icon" href="/../images/favicon.ico"/>
    <meta charset="UTF-8">
    <meta name="viewport" content="width=device-width, initial-scale=1">
    <title>e-html</title>
    <link rel="stylesheet" href="/../css/main.css">
    <script src="/../js/ehtml.bundle.min.js" type="text/javascript"></script>
  </head>

  <body class="main">

    <h1>Title</h1>

  </body>

</html>
E-WRAPPER template (v1.0.16)
Template with is="e-wrapper" attribute is very powerful element which you can use for wrapping your dynamic content with some base static template.
So, let's say you have basic static template in your app:
<div class="base">
  <p>
    Header content
  </p>
  <p id="dynamic-content">
    <span>Default content</span>
  </p>
  <p>
    Footer content
  </p>
</div>
Then you can use this static template as a warapper in other pages
<body class="main">
  <template
    is="e-wrapper"
    data-src="/../html/wrapper.html"
    data-where-to-place="#dynamic-content"
    data-how-to-place="instead">
    <p>
      Variation of content
    </p>
  </template>
</body>
Attribute data-src specifies a path where base static template is served. By attribute data-where-to-place you specify which element from the template you want to wrap or replace with the content inside of e-wrapper template.
You can aso specify the way how it can be wrapped via data-how-to-place attribute with one of the possible values: 'instead', 'before' and 'after'. If you use option 'instead', element by selector in attribute data-where-to-place will be just replaced with content in your template e-wrapper. By using 'before' option, content in e-wrapper will be placed before the first element with selector in the attribute data-where-to-place. And by using 'after' option, the content will be placed after the element.
So, your page with e-wrapper in this case will be rendered like
<div class="base">
  <p>
    Header content
  </p>
  <p>
    Variation of content
  </p>
  <p>
    Footer content
  </p>
</div>
You can also use data-headers attribute, if needed.
E-JSON-VIEW (v1.0.36)
If you just want to display json in pretty html format, then use e-json-view tag. You can find example here examples.
Supported actions on response
EHTML supports some actions on response that you get in some elements like e-json, e-form or e-google-oauth-button. You can specify these actions in the attribute data-actions-on-response with response, which name you have to specify in the attribute data-response-name.
Moreover, since v1.0.25 (check in package.json) you can have access to the attributes of the element where you declare data-actions-on-response:
data-actions-on-response="logToConsole('${thisAttrs[\'data-src\']}');"
Since v1.0.27 (check in package.json) you can use custom global function on response:
<script>
 window.customActionOnResponse = (response) => {
   // do smth with response synchronously!
 }
</script>
...
data-actions-on-response="customActionOnResponse('${response}');"
logToConsole
If you just want to log response to console, use logToConsole function:
data-actions-on-response="logToConsole('${someResponse}')"
mapToTemplate
You can map response object to an element which must be <template>.
data-actions-on-response="mapToTemplate('${someResponse.body}', '#someTemplateId')"
Element with id someTemplateId must have data-object-name, so you can use object name in the mapping. You can use any selector for the second argument, but this function will only map the first element that was found by the selector you specified.
This function works only for attributes of html elements. So if you want to map an object to some text in some element, just use custom attribute data-text. For values of input fields use custom attribute data-value. Other attributes are mapping with their original names without data- prefix.
Since v1.0.26(check in package.json) you can also get access to attributes of mapping element (of the main(or root) template element that you map with object):
data-actions-on-response="mapToTemplate('${someResponse.body}', '#someTemplateId')"
<template id="someTemplateId" data-attr="attrValue">
  <div data-text="${mappingElmAttrs['data-attr']}"></div>
</template>
Since v1.0.31(check in package.json) you can use data-inner-html, so you can insert html instead of simple text.
redirect
You can redirect on response:
data-actions-on-response="redirect('/../some/path/${someResponse.body.itemId}')"
turboRedirect
You can redirect in the turbo style on response:
data-actions-on-response="turboRedirect('/../some/path/${someResponse.body.itemId}', { 'headerName': 'headerValue' }, { 'progressBarPlace': '#boxId', 'progressBarClassName': 'progress-bar', 'ajaxFavicon': '/../images/favicon.gif' })"
You can specify headers if you need them, otherwise just put empty object: { }. Also, you can specify optionaly progressBarPlace, progressBarClassName and ajaxFavicon like in the e-turbolink.
reload
You can reload a page on response:
data-actions-on-response="reload()"
saveToLocalStorage / saveToSessionStorage
You can save some value from response to the localStorage or sessionStorage:
data-actions-on-response="
  saveToLocalStorage('key', ${someResponse.body.value}');
  saveToSessionStorage('key', ${someResponse.body.value}');
"
removeFromLocalStorage / removeFromSessionStorage
You can remove values from the localStorage or sessionStorage on response:
data-actions-on-response="
  removeFromLocalStorage('key');
  removeFromSessionStorage('key');
"
hideElms / showElms / disableElms / enableElms
You can hide, show, disable and enable elements on response:
data-actions-on-response="
  hideElms('#someId', '.someClassName', ...);
  showElms('#someId', '.someClassName', ...);
  disableElms('#someId', '.someClassName', ...);
  enableElms('#someId', '.someClassName', ...);
"
removeElms (v1.0.8)
You can remove elements on response:
data-actions-on-response="
  removeElms('#someId', '.someClassName', ...);
"
toggleElms
You can toggle class name for elments on response:
data-actions-on-response="toggleElms('someClassName', '#someId', '.someClassName', ...)"
innerHTML / addHTMLTo / textContent
You can load html or text content into some element from some resource on response:
data-actions-on-response="
  innerHTML('#someElmSelector', '/../path/to/html/file.html', { 'headerName': 'headerValue' });
  addHTMLTo('#someElmSelector', '/../path/to/html/file.html', { 'headerName': 'headerValue' });
  textContent('#someElmSelector', '/../path/to/html/file.html', { 'headerName': 'headerValue' });
"
These three actions have arguments: elmSelector, url and headers. So, they load or append some content that was fetch by url and headers into the element that you specify by elmSelector.
innerHTMLFromResponse / addHTMLToFromResponse / textContentFromResponse (v1.0.21)
You can load html or text content into some element from the response you've got:
data-actions-on-response="
  innerHTMLFromResponse('#someElmSelector', '${response.body.html}');
  addHTMLToFromResponse('#someElmSelector', '${response.body.html}');
  textContentFromResponse('#someElmSelector', '${response.body.text}');
"
These three actions have arguments: elmSelector, html(text). So, you can get html(text) property from your JSON response and put it into some element with specified selector.
changeValueOf
You can change the value of some input element on response:
data-actions-on-response="changeValueOf('#someElmSelector', '${someResponse.body.someValue}')"
updateAttribute (v1.0.2)
You can update an attribute of some element on response:
data-actions-on-response="updateAttribute('#someElmSelector', 'attrName', 'newAttrValue')"
scrollIntoView (v1.0.20)
You can scroll to element on response:
data-actions-on-response="scrollIntoView('#someElmSelector')"
You can combine several actions on one response:
data-actions-on-response="
  mapToTemplate('${someResponse.body}', '#box');
  showElms('#box');
  logToConsole('statusCode:', '${someResponse.statusCode}');
"
You must use delimiter ; between actions.
Also, you can use simple if statement for each action if you want them to be invoked only in the particular cases:
data-actions-on-response="
  if ('${someResponse.statusCode === 200}') mapToTemplate('${someResponse.body}', '#response-box');
  if ('${someResponse.statusCode !== 200}') mapToTemplate('${someResponse.body}', '#error-box');
"
You can specify only one action for each if statement, and each if statement must be without curly braces.
You can also use actions in event listeners of elements, more details about that you can find in the examples.
Examples
You can find the code in the examples folder.
You can run examples locally:
git clone [email protected]:Guseyn/EHTML.git
cd EHTML
npm i
npm run examples
And then just open http://localhost:8001/.
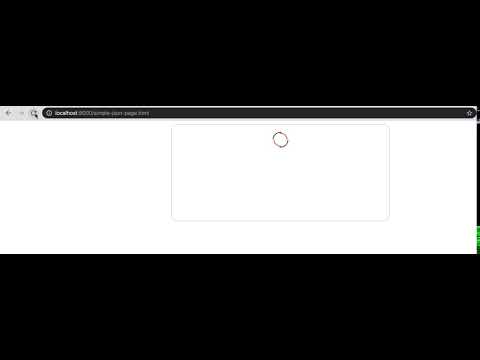
Simple E-HTML page
demo

code
<body class="main">
  <div class="base">
    <e-html data-src="/../html/why-i-dont-use-promises-and-async-await.html"></e-html>
    <e-html data-src="/../html/simple-rs-jwt.html"></e-html>
    <e-html data-src="/../html/simple-jwt.html"></e-html>
  </div>
</body>
Simple E-JSON
demo
response
Request URL: http://localhost:8000/profile?name=John
Request Method: GET
-----------------------------------------------------
Status Code: 200 ok
Content-Type: application/json
{
  "age": 27,
  "country": "Canada",
  "email": "[email protected]",
  "name": "John",
  "photo": "/../images/John.svg",
  "profession": "dentist",
}
code
<body class="main">
  <div class="base">
    <e-json
      data-src="/../profile?name=John"
      data-response-name="profileResponse"
      data-actions-on-response="mapToTemplate('${profileResponse.body}', '#profile-template')"
      data-ajax-icon="#ajax-icon"
    >
      <div class="profile-box">
        <img class="ajax-icon" id="ajax-icon" src="/../images/red-ajax-loader.gif"/>
        <template id="profile-template" data-object-name="profile">
          <img class="photo" src="${profile.photo}"/>
          <div class="user-info">
            <div class="name" data-text="${profile.name}"></div>
            <div class="email" data-text="${profile.email}"></div>
            <div class="other-details">
              <div data-text="Age: ${profile.age}"></div>
              <div data-text="Country: ${profile.country}"></div>
              <div data-text="Profession: ${profile.profession}"></div>
            </div>
          </div>
        </template>
      </div>
    </e-json>
  </div>
</body>
E-JSON with progress bar
demo

response
Request URL: https://guseyn.com/bigjson
Request Method: GET
---------------------------------------
Status Code: 200 ok
Content-Length: 1853154
Content-Type: application/json
code
<body class="main">
  <div class="base">
    <e-json
      data-src="https://guseyn.com/bigjson"
      data-response-name="response"
      data-progress-bar="#progress-bar"
      data-actions-on-response="mapToTemplate('${response}', '#response-template')"
    >
      <div class="response-box">
        <progress id="progress-bar"></progress>
        <template id="response-template" data-object-name="response">
          <div class="response-info">
            <div>
              Big JSON file has been fetched with status: <b data-text="${response.statusCode}"></b>
            </div>
            <div>
              Content-Length is: <b data-text="${response.headers['content-length']} bytes"></b>
            </div>
            <div>
              Name and email of the first user in the response: <br>
              <b data-text="name: ${response.body.items[0].name}, email: ${response.body.items[0].email}"></b>
            </div>
          </div>
        </template>
      </div>
    </e-json>
  </div>
</body>
E-JSON with mapped error
demo

response
Request URL: http://localhost:8000/profile?name=Unknown
Request Method: GET
-------------------------------------------------------
Status Code: 404 profile is not found
Content-Type: application/json
{
  "error": "profile is not found"
}
code
<body class="main">
  <div class="base">
    <e-json
      data-src="/../profile?name=Unknown"
      data-response-name="profileResponse"
      data-actions-on-response="mapToTemplate('${profileResponse}', '#profile-template')"
      data-ajax-icon="#ajax-icon"
    >
      <div class="profile-box">
        <img class="ajax-icon" id="ajax-icon" src="/../images/ajax-icon.svg"/>
        <template id="profile-template" data-object-name="profileResponse">
          <template is="e-if" data-condition-to-display="${profileResponse.statusCode === 200}">
            <img class="photo" src="${profileResponse.body.photo}"/>
            <div class="user-info">
              <div class="name" data-text="${profileResponse.body.name}"></div>
              <div class="email" data-text="${profileResponse.body.email}"></div>
              <div class="other-details">
                <div data-text="Age: ${profileResponse.body.age}"></div>
                <div data-text="Country: ${profileResponse.body.country}"></div>
                <div data-text="Profession: ${profileResponse.body.profession}"></div>
              </div>
            </div>
          </template>
          <template is="e-if" data-condition-to-display="${profileResponse.statusCode === 404}">
            <div class="error-box">
              User Not Found
            </div>
          </template>
        </template>
      </div>
    </e-json>
  </div>
</body>
E-JSON as a template
demo
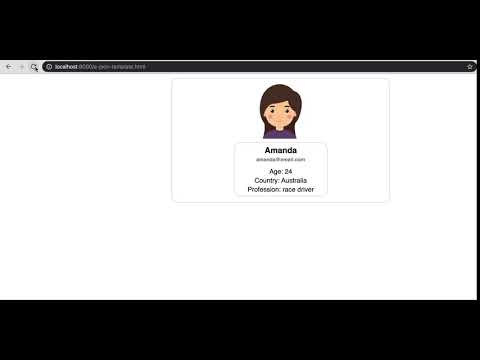
response
Request URL: http://localhost:8000/profile?name=Amanda
Request Method: GET
-----------------------------------------------------
Status Code: 200 ok
Content-Type: application/json
{
  "photo": "/../images/Amanda.svg",
  "name": "Amanda",
  "email": "[email protected]",
  "age": 24,
  "country": "Australia",
  "profession": "race driver"
}
code
<body class="main">
  <div class="base">
    <div class="profile-box">
      <img class="ajax-icon" id="ajax-icon" src="/../images/ajax-icon.svg"/>
      <template
        is="e-json"
        data-src="/../profile?name=Amanda"
        data-ajax-icon="#ajax-icon"
        data-object-name="profileResponse"
      >
        <img class="photo" src="${profileResponse.body.photo}"/>
        <div class="user-info">
          <div class="name" data-text="${profileResponse.body.name}"></div>
          <div class="email" data-text="${profileResponse.body.email}"></div>
          <div class="other-details">
            <div data-text="Age: ${profileResponse.body.age}"></div>
            <div data-text="Country: ${profileResponse.body.country}"></div>
            <div data-text="Profession: ${profileResponse.body.profession}"></div>
          </div>
        </div>
      </template>
    </div>
  </div>
</body>
Simple E-FOR-EACH
demo
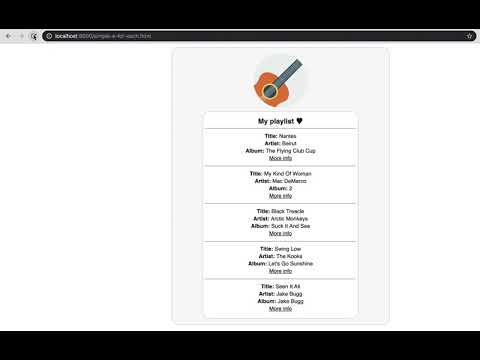
response
Request URL: http://localhost:8000/playlist
Request Method: GET
-------------------------------------------
Status Code: 200 ok
Content-Type: application/json
{
  "title": "My playlist ♥",
  "photo":"/../images/guitar.svg",
  "songs":[
    { "title":"Nantes", "artist": "Beirut", "album": "The Flying Club Cup", "link": "https://genius.com/Beirut-nantes-lyrics" },
    { "title": "My Kind Of Woman", "artist": "Mac DeMarco", "album": "2", "link": "https://genius.com/Mac-demarco-my-kind-of-woman-lyrics" },
    { "title": "Black Treacle", "artist": "Arctic Monkeys", "album": "Suck It And See", "link": "https://genius.com/Arctic-monkeys-black-treacle-lyrics" },
    { "title": "Swing Low", "artist": "The Kooks","album":"Let's Go Sunshine", "link":"https://genius.com/The-kooks-swing-low-lyrics" },
    { "title": "Seen It All", "artist": "Jake Bugg", "album": "Jake Bugg", "link":"https://genius.com/Jake-bugg-seen-it-all-lyrics" }
  ]
}
code
<body class="main">
  <div class="base">
    <e-json
      data-src="/../playlist"
      data-response-name="response"
      data-actions-on-response="mapToTemplate('${response.body}', '#response-template')"
      data-ajax-icon="#ajax-icon"
    >
      <div class="response-box">
        <img class="ajax-icon" id="ajax-icon" src="/../images/ajax-icon.svg"/>
        <template id="response-template" data-object-name="playlist">
          <img class="photo" src="${playlist.photo}"/>
          <div class="playlist-info">
            <div class="song-title" data-text="${playlist.title}"></div>
            <div class="songs-box">
              <template is="e-for-each" data-list-to-iterate="${playlist.songs}" data-item-name="song">
                <div class="song-box">
                  <div><b>Title: </b><span data-text="${song.title}"></span></div>
                  <div><b>Artist: </b><span data-text="${song.artist}"></span></div>
                  <div><b>Album: </b><span data-text="${song.album}"></span></div>
                  <div><a href="${song.link}">More info</a><b></b></div>
                </div>
              </template>
            </div>
          </div>
        </template>
      </div>
    </e-json>
  </div>
</body>
Simple E-IF
demo

response
Request URL: http://localhost:8000/playlist
Request Method: GET
-------------------------------------------
Status Code: 200 ok
Content-Type: application/json
{
  "title": "My playlist ♥",
  "photo":"/../images/guitar.svg",
  "songs":[
    { "title":"Nantes", "artist": "Beirut", "album": "The Flying Club Cup", "link": "https://genius.com/Beirut-nantes-lyrics" },
    { "title": "My Kind Of Woman", "artist": "Mac DeMarco", "album": "2", "link": "https://genius.com/Mac-demarco-my-kind-of-woman-lyrics" },
    { "title": "Black Treacle", "artist": "Arctic Monkeys", "album": "Suck It And See", "link": "https://genius.com/Arctic-monkeys-black-treacle-lyrics" },
    { "title": "Swing Low", "artist": "The Kooks","album":"Let's Go Sunshine", "link":"https://genius.com/The-kooks-swing-low-lyrics" },
    { "title": "Seen It All", "artist": "Jake Bugg", "album": "Jake Bugg", "link":"https://genius.com/Jake-bugg-seen-it-all-lyrics" }
  ]
}
code
<body class="main">
  <div class="base">
    <e-json
      data-src="/../playlist"
      data-response-name="response"
      data-actions-on-response="mapToTemplate('${response.body}', '#response-template')"
      data-ajax-icon="#ajax-icon"
    >
      <div class="response-box">
        <img class="ajax-icon" id="ajax-icon" src="/../images/ajax-icon.svg"/>
        <template id="response-template" data-object-name="playlist">
          <img class="photo" src="${playlist.photo}"/>
          <div class="playlist-info">
            <div class="playlist-title" data-text="${playlist.title}">
              <div>only from self-titled albums</div>
            </div>
            <div class="songs-box">
              <template is="e-for-each" data-list-to-iterate="${playlist.songs}" data-item-name="song">
                <template is="e-if" data-condition-to-display="${song.artist === song.album}">
                  <div class="song-box">
                    <div><b>Title: </b><span data-text="${song.title}"></span></div>
                    <div><b>Artist: </b><span data-text="${song.artist}"></span></div>
                    <div><b>Album: </b><span data-text="${song.album}"></span></div>
                    <div><a href="${song.link}">More info</a><b></b></div>
                  </div>
                </template>
              </template>
            </div>
          </div>
        </template>
      </div>
    </e-json>
  </div>
</body>
Simple E-FORM
demo
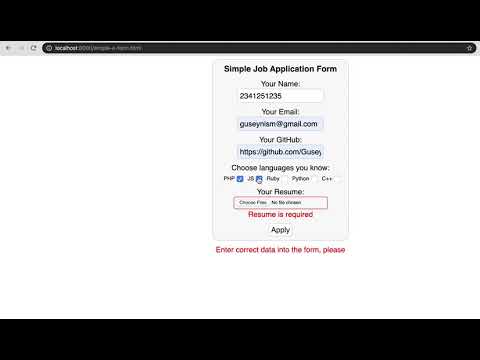
response
Request URL: https://guseyn.com/echo
Request Method: POST
Request Body: {"name":"Guseyn Ismayylov","email":"[email protected]","github":"https://github.com/Guseyn","langs":["php","js"],"resume":[{"name":"resume.pdf","size":151153,"type":"application/pdf","content":"data:application/pdf;base64,JVBERi0x...}]}
-------------------------------------------
Status Code: 200 ok
Content-Type: application/json
{
  "name": "Guseyn Ismayylov",
  "email": "[email protected]",
  "github": "https://github.com/Guseyn",
  "langs": [ "php", "js"],
  "resume": [
    {
      "name":"resume.pdf",
      "size":151153,
      "type":"application/pdf",
      "content":"data:application/pdf;base64,JVBERi0x.."
    }
  ]
}
code
<body class="main">
  <div class="base">
    <e-form
      class="form"
      id="form"
      data-validation-error-message="Enter correct data into the form, please"
      data-validation-error-class-for-message-box="form-message-error">

      <div id="form-content">
        <div class="name">
          Simple Job Application Form
        </div>
        <div class="form-label">Your Name:</div>
        <input
          type="text"
          name="name"
          class="form-input"
          required
          data-validation-pattern="^[a-z ,.'-]+$"
          data-validation-bad-format-error-message="Name can contain only alphabetic characters"
          data-validation-absence-error-message="Name is required"
          data-validation-error-class-for-element="elm-error"
          data-validation-error-class-for-message-box="message-error">

        <div class="form-label">Your Email:</div>
        <input
          type="email"
          name="email"
          class="form-input"
          required
          data-validation-pattern="email"
          data-validation-bad-format-error-message="This is not proper email address"
          data-validation-absence-error-message="Email is required"
          data-validation-error-class-for-element="elm-error"
          data-validation-error-class-for-message-box="message-error">
        <div class="form-label">Your GitHub:</div>
        <input
          type="url"
          name="github"
          class="form-input"
          required
          pattern="url"
          data-validation-absence-error-message="GitHub is required"
          data-validation-error-class-for-element="elm-error"
          data-validation-error-class-for-message-box="message-error">

        <div class="form-label">Choose languages you know:</div>
        <span class="lang-option">PHP</span>
        <input
          type="checkbox"
          name="langs"
          value="php">
        <span class="lang-option">JS</span>
        <input
          type="checkbox"
          name="langs"
          value="js">
        <span class="lang-option">Ruby</span>
        <input
          type="checkbox"
          name="langs"
          value="ruby">
        <span class="lang-option">Python</span>
        <input
          type="checkbox"
          name="langs"
          value="python">
        <span class="lang-option">C++</span>
        <input
          type="checkbox"
          name="langs"
          value="c++">

        <div class="form-label">Your Resume:</div>
        <input
          type="file"
          name="resume"
          class="form-input"
          data-read-progress-bar="#read-progress-bar"
          multiple required
          data-validation-absence-error-message="Resume is required"
          data-validation-min-files-number="1"
          data-validation-error-class-for-element="elm-error"
          data-validation-error-class-for-message-box="message-error">
        <progress id="read-progress-bar"></progress>

        <button
          data-request-url="https://guseyn.com/echo"
          data-request-method="POST"
          data-request-headers="{}"
          data-upload-progress-bar="#upload-progress-bar"
          data-progress-bar="#progress-bar"
          data-ajax-icon="#ajax-icon"
          data-response-name="response"
          onclick="this.form.submit(this)"
          data-actions-on-response="
            hideElms('#form-content');
            showElms('.applying-response-box');
            mapToTemplate('${response}', '#response-template');
          ">
          Apply
        </button>

        <img id="ajax-icon" class="ajax-icon" src="/../images/ajax-icon.svg"/>
        <progress id="upload-progress-bar"></progress>
        <progress id="progress-bar"></progress>
      </div>

      <div class="applying-response-box" style="display: none;">
        <template id="response-template" data-object-name="response">
          <div class="response-info">
            <div data-text="Thank you for your application, ${response.body.name}!"></div>
          </div>
        </template>
      </div>

    </e-form>
  </div>
</body>
.elm-error {
  border: 1px solid red;
}

.message-error {
  color: red;
}

.form-message-error {
  text-align: center;
  color: red;
  font-family: sans-serif;
}
validation patterns
You can specify in the attribute `data-validation-pattern` following predefined patterns: `date`, `dateTime`, `email`, `month`, `number`, `password`, `tel`, `time`, `url` which have following formats:

```js
const VALIDATION_PATTERNS = {
  date: /[0-3]\d\/[0-1]\d\/\d\d\d\d/,
  dateTime: /[0-3]\d\/[0-1]\d\/\d\d\d\d, \d\d:\d\d/,
  email: /^[a-zA-Z0-9.!#$%&’*+/=?^_`{|}~-]+@[a-zA-Z0-9-]+(?:\.[a-zA-Z0-9-]+)*$/,
  month: /^\d\d\d\d-\d\d$/,
  number: /(\d)+/,
  password: /^.*(?=.{8,})(?=.*[a-zA-Z])(?=.*\d)(?=.*[!#$%&? "]).*$/,
  tel: /[0-9]{0,14}$/,
  time: /\d\d:\d\d/,
  url: /((([A-Za-z]{3,9}:(?:\/\/)?)(?:[\-;:&=\+\$,\w]+@)?[A-Za-z0-9\.\-]+|(?:www\.|[\-;:&=\+\$,\w]+@)[A-Za-z0-9\.\-]+)((?:\/[\+~%\/\.\w\-_]*)?\??(?:[\-\+=&;%@\.\w_]*)#?(?:[\.\!\/\\\w]*))?)/
}
```

Or you can specify a string, which would be a base for RegExp with flags `ig`.
E-FORM-DYNAMIC-VALUE
response
Request URL: https://guseyn.com/echo
Request Method: GET
Request Body: {"date": "new Date()" }
-------------------------------------------
Status Code: 200 ok
Content-Type: application/json
{
  "date": "new Date()"
}
code
<body class="main">
  <div class="base">
    <e-form
      class="form"
      id="form">

      <div id="form-content">
        <div class="form-label">Item name:</div>
        <e-form-dynamic-value name="date" data-bound-to="${new Date()}">
        </e-form-dynamic-value>

        <button
          data-request-url="https://guseyn.com/echo"
          data-request-method="POST"
          data-ajax-icon="#ajax-icon"
          data-response-name="response"
          onclick="this.form.submit(this)"
          data-actions-on-response="
            mapToTemplate('${response}', '#response-template');
          ">
          Submit
        </button>

        <img id="ajax-icon" class="ajax-icon" src="/../images/ajax-icon.svg"/>
      </div>

      <div class="applying-response-box">
        <template id="response-template" is="e-reusable" data-object-name="response">
          <div class="response-info">
            <span>Response with submitted date: <b data-text="${response.body.date}"></b></span>
          </div>
        </template>
      </div>

    </e-form>
  </div>
</body>
E-REUSABLE template with E-FORM
demo

response
Request URL: https://guseyn.com/echo
Request Method: GET
Request Body: {"name": "some name"}
-------------------------------------------
Status Code: 200 ok
Content-Type: application/json
{
  "name": "some name"
}
code
<body class="main">
  <div class="base">
    <e-form
      class="form"
      id="form"
      data-validation-error-message="Enter correct data into the form, please"
      data-validation-error-class-for-message-box="form-message-error">

      <div id="form-content">
        <div class="form-label">Item name:</div>
        <input
          type="text"
          name="name"
          class="form-input"
          required
          data-validation-pattern="^[a-z ,.'-]+$"
          data-validation-bad-format-error-message="Item name can contain only alphabetic characters"
          data-validation-absence-error-message="Item name is required"
          data-validation-error-class-for-element="elm-error"
          data-validation-error-class-for-message-box="message-error">

        <button
          data-request-url="https://guseyn.com/echo"
          data-request-method="POST"
          data-ajax-icon="#ajax-icon"
          data-response-name="response"
          onclick="this.form.submit(this)"
          data-actions-on-response="
            mapToTemplate('${response}', '#response-template');
          ">
          Add Item
        </button>

        <img id="ajax-icon" class="ajax-icon" src="/../images/ajax-icon.svg"/>
      </div>

      <div class="applying-response-box">
        <div class="name">
          Items:
        </div>
        <div class="response-info">
          <span>item with name: <b>default</b></span>
        </div>
        <template id="response-template" is="e-reusable" data-object-name="response">
          <div class="response-info">
            <span>item with name <b data-text="${response.body.name}"></b></span>
          </div>
        </template>
      </div>

    </e-form>
  </div>
</body>
Simple E-GOOGLE-OAUTH-BUTTON
demo

response
Request URL: /../google
Request Method: GET
Request Body: {"googleToken": "<some fetched google token>"}
-------------------------------------------
Status Code: 200 ok
Content-Type: application/json
{
  "jwt": "<some jwt token from your endpoint>"
}
code
<body class="main">
  <div class="base">

    <template is="e-if" data-condition-to-display="${localStorage.getItem('jwt') != null}">
      <div class="response-box">
        <div class="response-info">
          <b>Welcome!</b>
        </div>
      </div>
    </template>

    <template is="e-if" data-condition-to-display="${localStorage.getItem('jwt') == null}">
      <div class="login-form">
        <input id="email" type="text" name="email" placeholder="My email" class="login-input">
        <input id="password" type="password" name="password" placeholder="My password" class="login-input">
        <div id="error" class="error"></div>
        <input id="go-button" type="button" value="Sign in" class="login-input">
        <div class="mode">
          <span id="sign-up" class="as-link">Sign up</span>
          /
          <span id="sign-in" class="as-link">Sign in</span>
        </div>
      </div>

      <div style="text-align: center; font-family: sans-serif;">or</div>

      <e-google-oauth-button
        class="customSignIn"
        data-client-id="8310979471-lvmkisk1b33fjd25pjjqe8v8fa72rq2q.apps.googleusercontent.com"
        data-redirect-url="/../google"
        data-cookiepolicy="single_host_origin"
        data-scope="profile"
        data-request-token-key="googleToken"
        data-response-name="responseWithToken"
        data-actions-on-response="
          saveToLocalStorage('jwt', '${responseWithToken.body.jwt}');
          reload();
        "
      >
        <span id="google-icon" class="icon"></span>
        <span class="buttonText">Sign in with Google</span>
      </e-google-oauth-button>
    </template>
  </div>
</body>
.customSignIn {
    margin: 10px auto;
    background: white;
    color: #444;
    width: 200px;
    border-radius: 5px;
    border: thin solid #888;
    box-shadow: 1px 1px 1px grey;
    white-space: nowrap;
    display: block;
}

.customSignIn:hover {
  cursor: pointer;
}

#google-icon {
  background: url('/../images/g-logo.png') transparent 5px 50% no-repeat;
}

span.icon {
  display: inline-block;
  vertical-align: middle;
  width: 48px;
  height: 48px;
}

span.buttonText {
  display: inline-block;
  vertical-align: middle;
  font-size: 14px;
  font-weight: bold;
  margin-left: 5px;
  font-family: 'Roboto', sans-serif;
}
E-PAGE-WITH-URL
demo

code
<body class="main">
  <template is="e-page-with-url" data-url-pattern="/e-page-url.html/{one}/{two}/{three}?{query}">
    <input data-value="${urlParams.one}"/>
    <input data-value="${urlParams.two}"/>
    <input data-value="${urlParams.three}"/>
    <input data-value="${urlParams.query}"/>
  </template>
</body>
E-PAGE-WITH-URL + E-JSON
demo

code
<body class="main">
  <template is="e-page-with-url" data-url-pattern="/e-page-url-with-e-json.html?{name}">
    <div class="base">
      <e-json
        data-src="/../profile?name=${urlParams.name}"
        data-response-name="profileResponse"
        data-actions-on-response="mapToTemplate('${profileResponse}', '#profile-template')"
        data-ajax-icon="#ajax-icon"
      >
        <div class="profile-box">
          <img class="ajax-icon" id="ajax-icon" src="/../images/ajax-icon.svg"/>
          <template id="profile-template" data-object-name="profileResponse">
            <template is="e-if" data-condition-to-display="${profileResponse.statusCode === 200}">
              <img class="photo" src="${profileResponse.body.photo}"/>
              <div class="user-info">
                <div class="name" data-text="${profileResponse.body.name}"></div>
                <div class="email" data-text="${profileResponse.body.email}"></div>
                <div class="other-details">
                  <div data-text="Age: ${profileResponse.body.age}"></div>
                  <div data-text="Country: ${profileResponse.body.country}"></div>
                  <div data-text="Profession: ${profileResponse.body.profession}"></div>
                </div>
              </div>
            </template>
            <template is="e-if" data-condition-to-display="${profileResponse.statusCode === 404}">
              <div class="error-box">
                User Not Found
              </div>
            </template>
          </template>
        </div>
      </e-json>
    </div>
  </template>
</body>
E-TURBOLINK
demo

code
<body>
  <div style="margin-left: 20px; margin-top: 20px;">
    <e-turbolink data-href="/../html/big.html" data-with-progress-bar="progress-bar">GO TO NICE PIC</e-turbolink>
  </div>
</body>
E-PAGE-WITH-URL + E-SELECT (with turbo-redirect)
demo
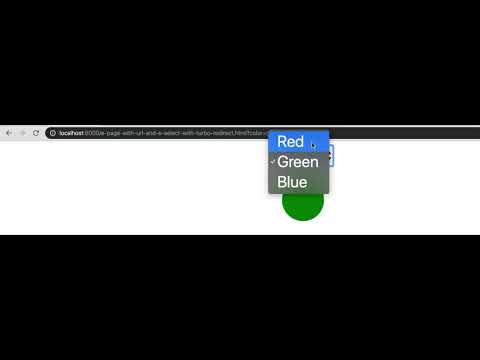
code
<body class="main">
  <template is="e-page-with-url" data-url-pattern="/turbo-actions.html?{color}">
    <div class="base">
      <e-select
        class="big-select"
        name="color"
        value="${urlParams.color}"
        onchange="
          window.turboRedirect(this, (target) => {
            return '/../e-page-with-url-and-e-select-with-turbo-redirect.html?color=' + target.value
          })
        "
      >
        <option value="red" name="color">Red</option>
        <option value="green" name="color">Green</option>
        <option value="blue" name="color">Blue</option>
      </e-select>
      <div id="color" width="100px;">
        <div class="circle" style="background: ${urlParams.color};"></div>
      </div>
    </div>
  </template>
</body>
Simple E-GITHUB-OAUTH-BUTTON
demo

response
# request is made on redirect uri page
Request URL: /../github
Request Method: GET
Request Body: {"code": "<some retrieved code from redirect uri page>"}
-------------------------------------------
Status Code: 200 ok
Content-Type: application/json
{
  "jwt": "<some jwt token from your endpoint>"
}
code
<body class="main">
  <div class="base">

    <template is="e-if" data-condition-to-display="${localStorage.getItem('jwt') != null}">
      <div class="response-box">
        <div class="response-info">
          <b>Welcome!</b>
        </div>
      </div>
    </template>

    <template is="e-if" data-condition-to-display="${localStorage.getItem('jwt') == null}">
      <div class="login-form">
        <input id="email" type="text" name="email" placeholder="My email" class="login-input">
        <input id="password" type="password" name="password" placeholder="My password" class="login-input">
        <div id="error" class="error"></div>
        <input id="go-button" type="button" value="Sign in" class="login-input">
        <div class="mode">
          <span id="sign-up" class="as-link">Sign up</span>
          /
          <span id="sign-in" class="as-link">Sign in</span>
        </div>
      </div>

      <div style="text-align: center; font-family: sans-serif;">or</div>

      <e-github-oauth-button
        class="customSignIn"
        data-client-id="9740bb12713949b1c23d"
        data-redirect-uri="http://localhost:8000/html/github.html/"
        data-scope="user,repo">
        <span id="github-icon" class="icon"></span>
        <span class="buttonText">Sign in with Github</span>
      </e-github-oauth-button>
    </template>
  </div>
</body>
.customSignIn {
    margin: 10px auto;
    background: white;
    color: #444;
    width: 200px;
    border-radius: 5px;
    border: thin solid #888;
    box-shadow: 1px 1px 1px grey;
    white-space: nowrap;
    display: block;
}

.customSignIn:hover {
  cursor: pointer;
}

#github-icon {
  background: url('/../images/github-logo.png') transparent 5px 50% no-repeat;
}

span.icon {
  display: inline-block;
  vertical-align: middle;
  width: 48px;
  height: 48px;
}

span.buttonText {
  display: inline-block;
  vertical-align: middle;
  font-size: 14px;
  font-weight: bold;
  margin-left: 5px;
  font-family: 'Roboto', sans-serif;
}
Page on redirect uri:
<body class="main">
  <template is="e-page-with-url" data-url-pattern="/html/github.html?{code}">
    <div class="base">
      <e-form
        data-request-url="/../github"
        data-request-method="POST"
        data-request-headers="{}"
        data-ajax-icon="#ajax-icon"
        data-response-name="responseWithToken"
        data-actions-on-response="
          saveToLocalStorage('jwt', '${responseWithToken.body.jwt}');
          turboRedirect('/../e-github-oauth-button.html');
      ">
        <input type="hidden" name="code" value="${urlParams.code}">
        <img id="ajax-icon" class="ajax-icon" src="/../images/ajax-icon.svg"/>
      </e-form>
    </div>
  </template>
</body>
Contribution and QA
If you have any questions or concers about EHTML, please feel free to share them in the issues. If you want to send a patch, feel free to create a fork and send it via pull request.