StudentCourseSystem
 StudentCourseSystem copied to clipboard
基于SSM和Vue+ElementUI的学生选课系统
设计文档
- 本人构建了数据库和后端部分,并根据业务逻辑前端项目上进行了更改和改进,使其更适应我的数据库
- 项目已部署至云端:学生选课系统
- 第一次使用vue-cli开发项目,如果详项目代码存在不严谨或错误的地方,欢迎各位指出,共同讨论
- 如果这个项目对您有帮助,请各位为本项目点一点star、关注一下作者
一、后端
(一)系统框架
Spring+SpringMVC+Mybatis+Mybatis-Plus(SSM)
1、Spring和SpringMVC
Spring是一个开源框架,它是为了解决企业应用开发的复杂性而创建的。框架的主要优势之一就是其分层架构,分层架构允许使用者选择使用哪一个组件,同时为 J2EE 应用程序开发提供集成的框架。Spring使用基本的JavaBean来完成以前只可能由EJB完成的事情。然而,Spring的用途不仅限于服务器端的开发。从简单性、可测试性和松耦合的角度而言,任何Java应用都可以从Spring中受益。Spring的核心是控制反转(IoC)和面向切面(AOP)。简单来说,Spring是一个分层的JavaSE/EE一站式轻量级开源框架。

SpringMVC是spring框架的一个模块,SpringMVC和Spring无需通过中间整合层进行整合,SpringMVC是一个基于MVC的web框架,SpringMVC 拥有控制器,作用跟Struts类似,接收外部请求,解析参数传给服务层。
2、Mybatis和Mybatis-Plus
MyBatis 是一款优秀的持久层框架,它支持自定义 SQL、存储过程以及高级映射。MyBatis 免除了几乎所有的 JDBC 代码以及设置参数和获取结果集的工作。MyBatis 可以通过简单的 XML 或注解来配置和映射原始类型、接口和 Java POJO(Plain Old Java Objects,普通老式 Java 对象)为数据库中的记录。MyBatis-Plus (简称 MP)是一个 MyBatis 的增强工具,在 MyBatis 的基础上只做增强不做改变,为简化开发、提高效率而生。

(二)系统架构
持久层(Entity)+数据访问层(Dao)+业务逻辑层(Service)+控制层(Controller)
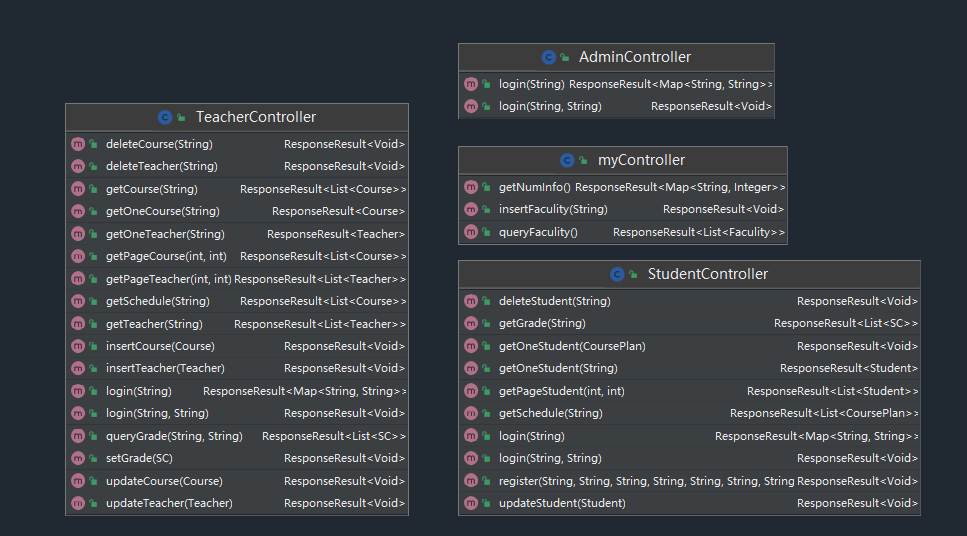
1、UML类图
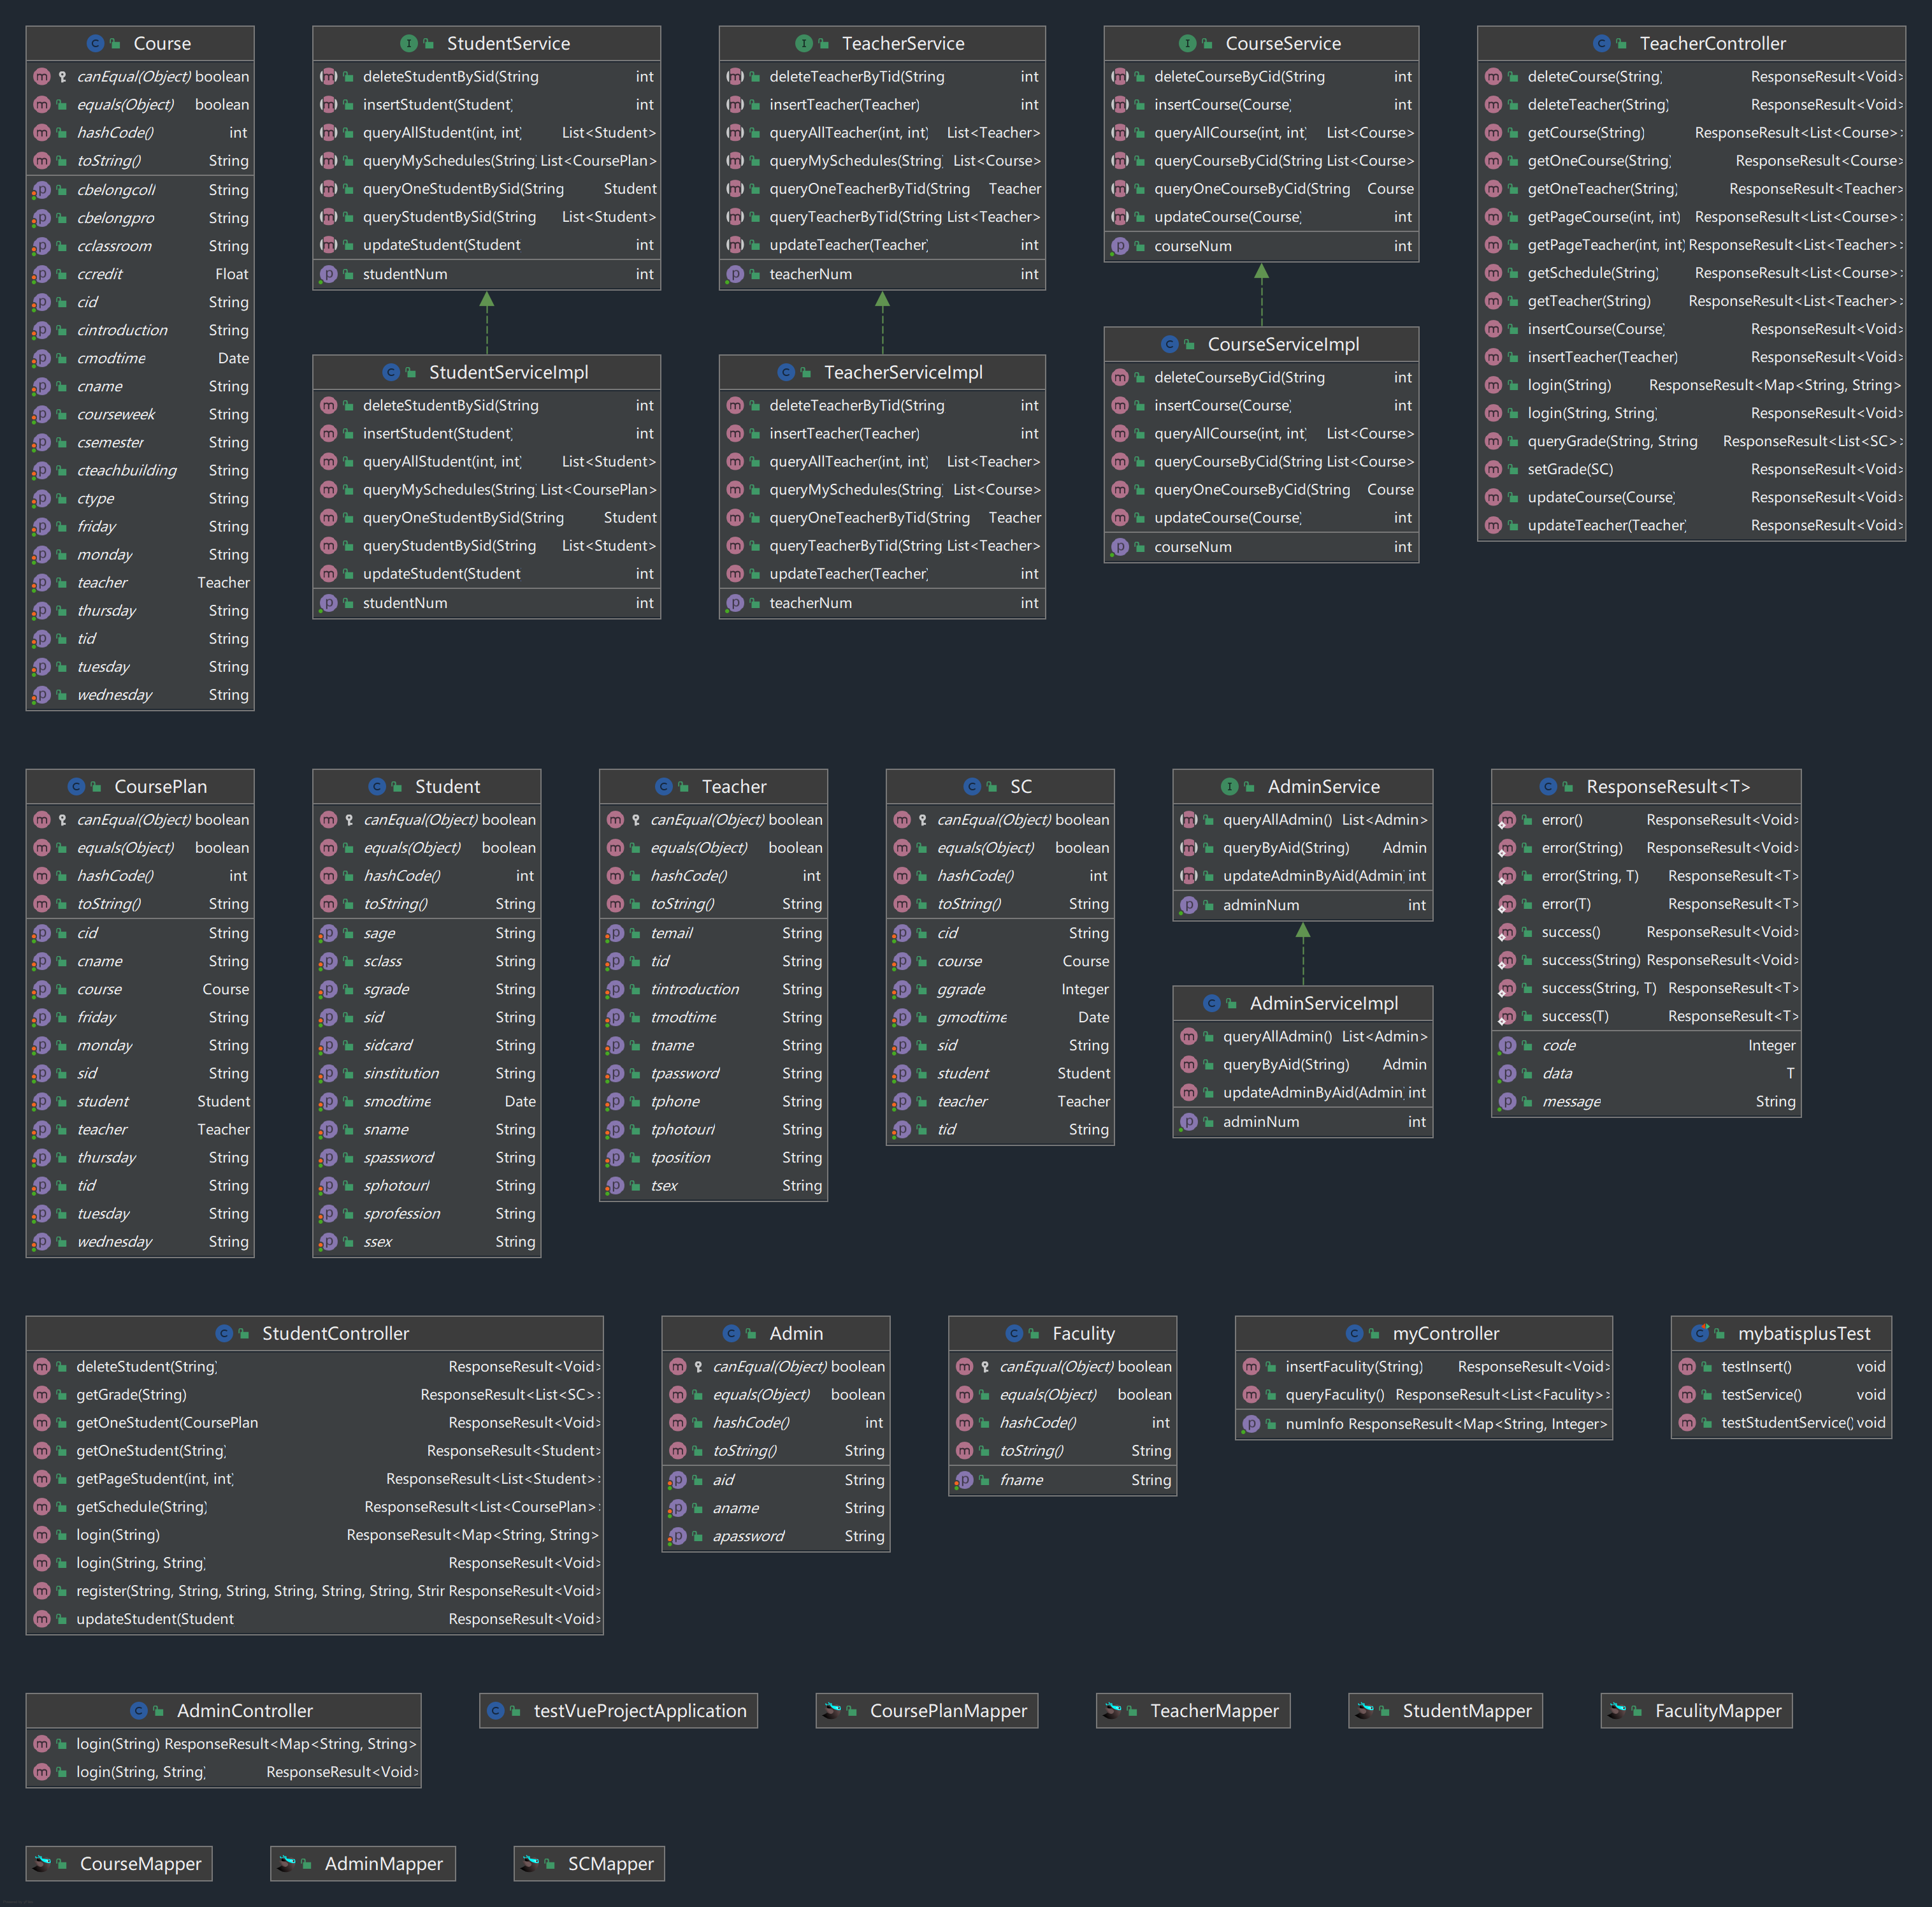
2、持久层
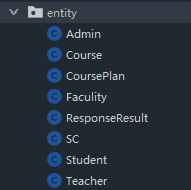
- 持久层主要作用是与数据库进行数据映射,与数据库的属性值保持一致。
- Course对应数据库的课程表
- CoursePlan对应数据库的课程安排表
- Student对应数据库的学生表
- Teacher对应数据库的教师表
- SC对应数据库的成绩表
- Admin对应数据库的管理员表
- Faculity对应数据库的院系表
- 为了让接口更加规范,我编写了ResponseResult<T>和ResultCode接口响应类,ResponseResult<T>属性code是响应码,message是响应的状态信息,**data<T>**则是响应数据,泛型T可以是上述定义的类;ResultCode则是定义的具体属性,常量SUCCESS是200(表示响应成功),ERROR是500(表示响应失败),ERROR_MESSAGE表示响应错误信息,SUCCESS_MESSAGE表示响应成功信息

3、数据访问层
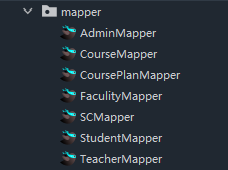
- 该部分使用Mybatis-Plus让每张表的接口类继承BaseMapper接口,BaseMapper封装了CRUD(增加Create、检索Retrieve、更新Update和删除Delete)基本方法
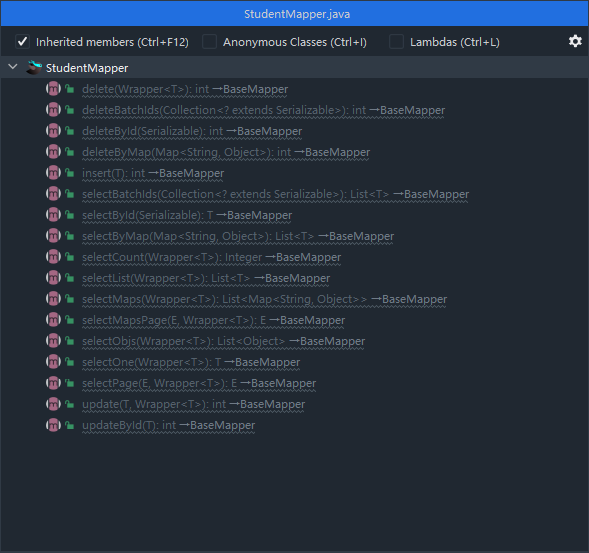
- 我们只需要让继承BaseMapper后的接口配置到Mybatis的映射文件即可

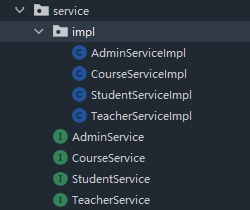
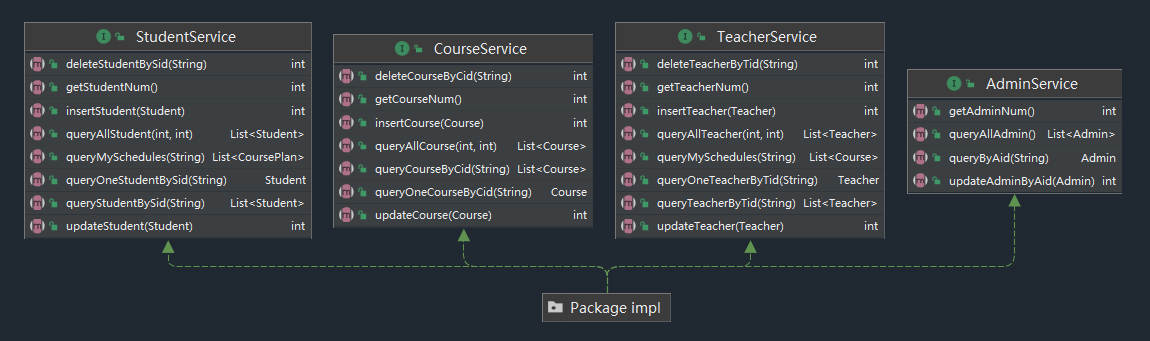
4、业务逻辑层
-
粗略的理解就是对一个或多个DAO进行的再次封装,封装成一个服务,封装后就不会是一个原子操作了,需要事物控制,负责管理具体的功能
-
这里根据需求编写了管理员、课程、教师和学生的业务接口,在业务实现类中根据上述Dao层编写代码实现具体业务
5、控制器
- 该部分负责请求转发,接受页面过来的参数,传给Service处理,接到返回值,再传给页面,负责管理业务(Service)调度和管理跳转
(三)相关配置
1、Spring和Mybatis-Plus
<?xml version="1.0" encoding="UTF-8"?>
<beans xmlns="http://www.springframework.org/schema/beans"
       xmlns:context="http://www.springframework.org/schema/context"
       xmlns:aop="http://www.springframework.org/schema/aop"
       xmlns:tx="http://www.springframework.org/schema/tx"
       xmlns:xsi="http://www.w3.org/2001/XMLSchema-instance"
       xsi:schemaLocation="
        http://www.springframework.org/schema/beans
        http://www.springframework.org/schema/beans/spring-beans.xsd
        http://www.springframework.org/schema/context
        http://www.springframework.org/schema/context/spring-context.xsd
        http://www.springframework.org/schema/aop
        http://www.springframework.org/schema/aop/spring-aop.xsd
        http://www.springframework.org/schema/tx
        http://www.springframework.org/schema/tx/spring-tx.xsd">

    <!-- IoC注解解析器 -->
    <context:component-scan base-package="com.gendml"/>

    <!-- DI注解解析器 -->
    <context:annotation-config/>

    <!-- 加载数据库配置信息 -->
    <context:property-placeholder location="classpath:config/druid.properties" system-properties-mode="NEVER"/>
    <!-- 连接池对象 -->
    <bean id="dataSource" class="com.alibaba.druid.pool.DruidDataSource"
          init-method="init" destroy-method="close">
        <property name="driverClassName" value="${driverClassName}"/>
        <property name="username" value="${username}"/>
        <property name="password" value="${password}"/>
        <property name="url" value="${url}"/>
        <property name="initialSize" value="${initialSize}"/>
        <property name="minIdle" value="${minIdle}"/>
        <property name="maxActive" value="${maxActive}"/>
        <!--配置获取连接等待超时的时间-->
        <property name="maxWait" value="${maxWait}"/>
        <!--配置间隔多久才进行一次检测,检测需要关闭的空闲连接,单位是毫秒-->
        <property name="timeBetweenEvictionRunsMillis" value="${timeBetweenEvictionRunsMillis}"/>
        <!--配置一个连接在池中最小生存的时间,单位是毫秒-->
        <property name="minEvictableIdleTimeMillis" value="${timeBetweenEvictionRunsMillis}"/>
    </bean>

    <!--配置sqlSessionFactory-->
    <bean id="sqlSessionFactory"
          class="com.baomidou.mybatisplus.extension.spring.MybatisSqlSessionFactoryBean">
        <property name="dataSource" ref="dataSource"/>
        <!-- 加载xxMapper.xml -->
        <property name="mapperLocations">
            <array>
                <value>classpath:mapper/*Mapper.xml</value>
            </array>
        </property>
        <!-- 配置分页插件 -->
        <property name="plugins">
            <array>
                <!--传入分页拦截器-->
                <bean class="com.baomidou.mybatisplus.extension.plugins.MybatisPlusInterceptor">
                    <property name="interceptors" ref="paginationInnerInterceptor"/>
                </bean>
            </array>
        </property>
    </bean>
    <!--分页拦截器-->
    <bean id="paginationInnerInterceptor" class="com.baomidou.mybatisplus.extension.plugins.inner.PaginationInnerInterceptor">
        <property name="dbType" value="MYSQL"/>
    </bean>

    <!--Mapper接口代理扫描器-->
    <bean class="org.mybatis.spring.mapper.MapperScannerConfigurer">
        <!-- 需要生成代理类对象的mapper接口包 -->
        <property name="basePackage" value="com.gendml.mapper"/>
        <!-- sqlSessionFactory 的name 用于为代理类中生成SqlSession -->
        <property name="sqlSessionFactoryBeanName" value="sqlSessionFactory"/>
    </bean>

    <!-- MP 全局配置 -->
    <bean id="globalConfig" class="com.baomidou.mybatisplus.core.config.GlobalConfig">
        <!-- 全局的主键策略 -->
        <property name="dbConfig" ref="dbConfig"/>
    </bean>
    <bean id="dbConfig" class="com.baomidou.mybatisplus.core.config.GlobalConfig.DbConfig">
        <!--映射数据库下划线字段名到数据库实体类的驼峰命名的映射-->
        <property name="tableUnderline" value="false"/>
    </bean>


    <!-- 配置事务 -->
    <bean id="txManager"
          class="org.springframework.jdbc.datasource.DataSourceTransactionManager">
        <property name="dataSource" ref="dataSource"/>
    </bean>

</beans>
2、SpringMVC配置
<?xml version="1.0" encoding="UTF-8"?>
<beans xmlns="http://www.springframework.org/schema/beans"
       xmlns:xsi="http://www.w3.org/2001/XMLSchema-instance" xmlns:p="http://www.springframework.org/schema/p"
       xmlns:context="http://www.springframework.org/schema/context"
       xmlns:mvc="http://www.springframework.org/schema/mvc"
       xsi:schemaLocation="http://www.springframework.org/schema/beans
                        http://www.springframework.org/schema/beans/spring-beans-3.1.xsd
                        http://www.springframework.org/schema/context
                        http://www.springframework.org/schema/context/spring-context-3.1.xsd
                        http://www.springframework.org/schema/mvc
                        http://www.springframework.org/schema/mvc/spring-mvc-4.0.xsd">
    <!-- 自动扫描该包,使SpringMVC认为包下用了@controller注解的类是控制器 -->
    <context:component-scan base-package="com.gendml"/>
    <!--测试的时候把mvc注解掉-->
    <mvc:annotation-driven>
        <mvc:message-converters>
            <!-- 处理响应中文内容乱码 -->
            <bean class="org.springframework.http.converter.StringHttpMessageConverter">
                <property name="defaultCharset" value="UTF-8"/>
                <property name="supportedMediaTypes">
                    <list>
                        <value>text/html</value>
                        <value>application/json</value>
                    </list>
                </property>
            </bean>
            <!-- 配置Fastjson支持 -->
            <bean class="com.alibaba.fastjson.support.spring.FastJsonHttpMessageConverter">
                <property name="charset" value="UTF-8"/>
                <property name="supportedMediaTypes">
                    <list>
                        <value>application/json</value>
                        <value>text/html;charset=UTF-8</value>
                    </list>
                </property>
                <property name="features">
                    <list>
                        <value>QuoteFieldNames</value>
                        <value>WriteMapNullValue</value>
                        <value>WriteDateUseDateFormat</value>
                        <value>WriteEnumUsingToString</value>
                        <value>DisableCircularReferenceDetect</value>
                    </list>
                </property>
            </bean>
        </mvc:message-converters>
    </mvc:annotation-driven>
</beans>
二、前端
(一)系统框架
Vue2.x+ElementUI+V-Charts
1、Vue.js
Vue.js是一款流行的JavaScript前端框架,是一个用于创建用户界面的开源JavaScript框架,也是一个创建单页应用的Web应用框架。Vue框架轻量、简单易学、双向数据绑定、组件化、数据和结构的分离、虚拟DOM、运行速度快,并且Vue有着强大的生态圈。

2、ElementUI
Element是饿了吗公司开发的一套为开发者、设计师和产品经理准备的基于 Vue 2.0 的桌面端组件库。

3、V-Charts
v-charts是基于 Vue2.0 和 Echarts 封装的图标组件,只需要统一提供一种对前后端都友好的数据格式设置简单的配置项,就可以生成常见的图表。

(二)总体设计
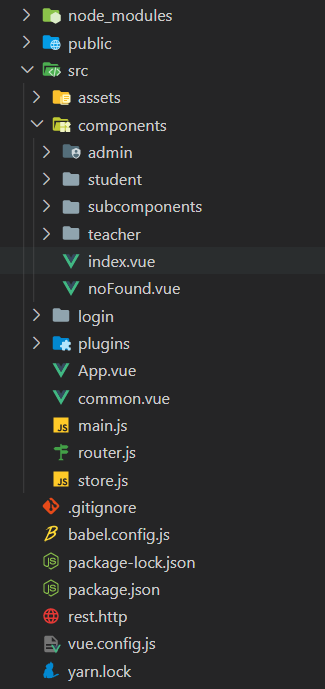
- 项目使用Vue-Cli脚手架编写,项目具体结构如下图所示
- 根据角色创建了三个主要模块的组件包括学生、教师和管理员
1、Vue脚手架配置
-
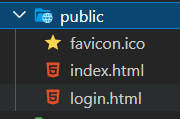
为了方便主页间组件的跳转,将登录注册组件放在了一个单独的vue子项目,同时配置登录和主页的入口html文件,方便登陆的vue项目向主页的vue项目的切换

-
由于我在完成后端开发时遇到跨域现象,所以配置了网络代理,在axios中每次发出请求前加上“/api”前缀,这里代理监听“/api”前缀的请求,将请求代理到后端服务器,并将原来的"/api"替换为空

2、Router配置
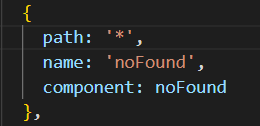
-
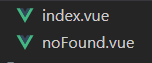
将匹配不到的路由统一转发到noFound组件
-
主页

-
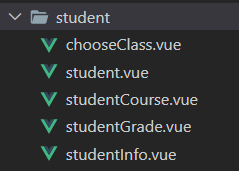
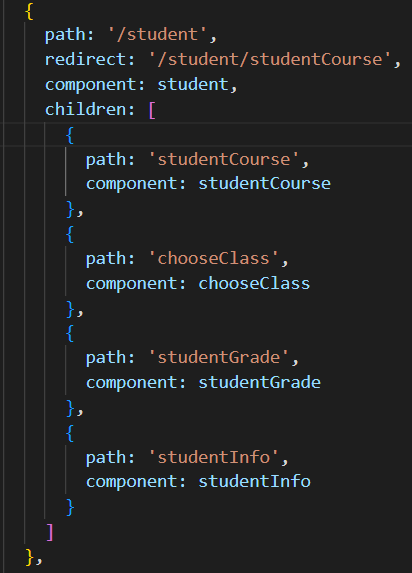
学生页面使用嵌套路由,student组件是父组件,四个子组件分别是四个功能:课表查询(studentCourse)、选课(chooseClass)、成绩管理(studentGrade)和个人信息修改(studentInfo)
-
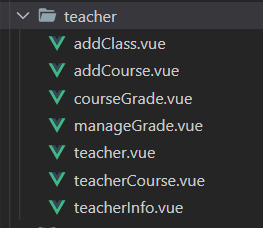
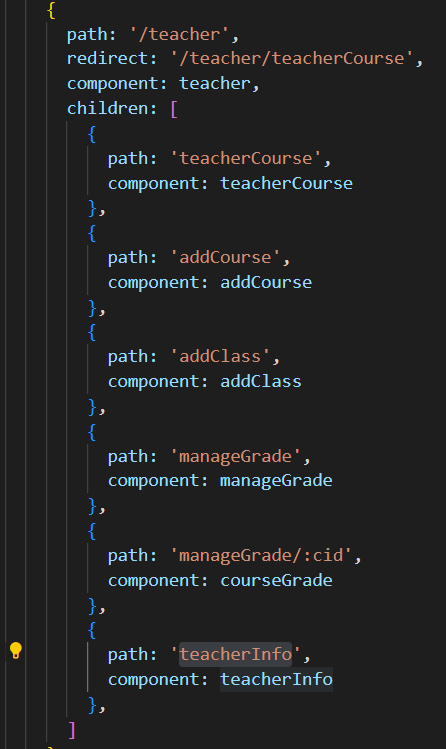
教师页面使用嵌套路由,teacher组件是父组件,六个子组件分别是六个功能:课表查询(teacherCourse)、添加课程(addCourse)、添加上课时间(addClass)、成绩管理(manageGrade)、录入某个课程成绩(manageGrade/:cid,参数cid表示课程id)和个人信息修改(teacherInfo)
-
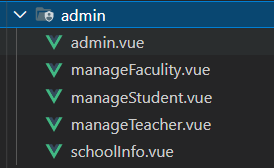
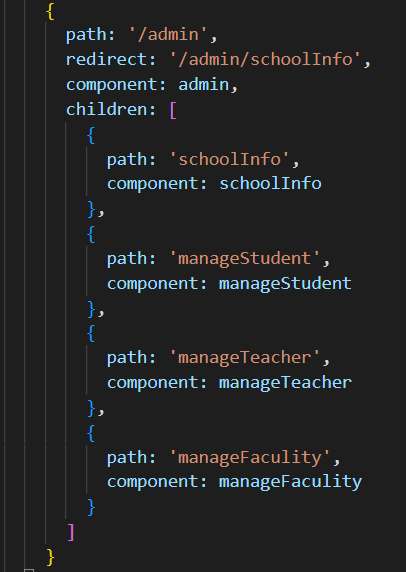
管理员页面使用嵌套路由,admin组件是父组件,五个子组件分别是五个功能:概况(schoolInfo)、管理学生(manageStudent)、管理教师(manageTeacher)和管理院系(manageFaculity)
-
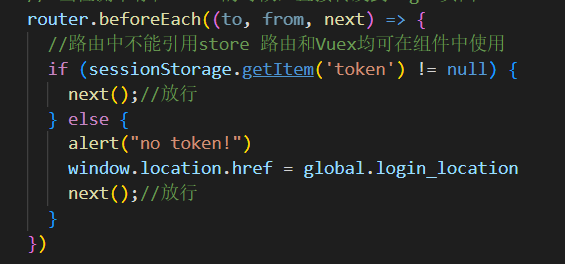
路由钩子函数beforeEach,我在编写后端登录接口时,响应了一段uuid字符串传入sessionStorage,作为登录token验证用户是否处于登陆状态,这里的功能是每次在做路由转发前检查sessionStorage存储的token,如果存在那么放行,如果不存在那么通过上述配置的html入口文件重定向到login组件
3、Vuex配置
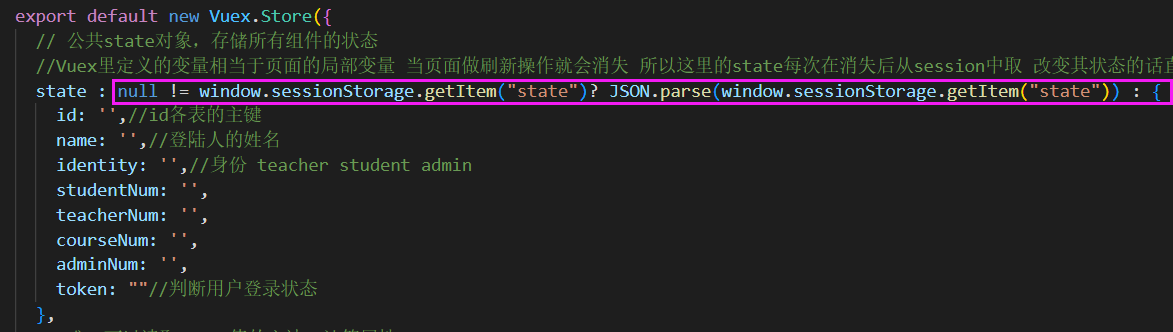
-
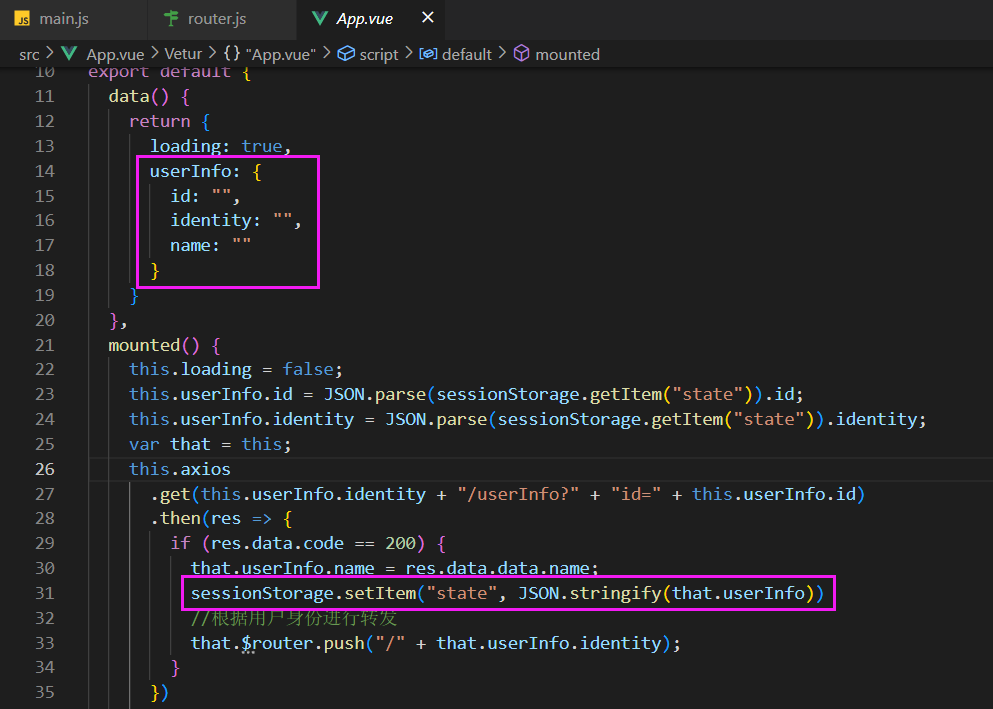
登陆完成会跳转到主页的Vue项目,我在主页项目的父组件(App.vue)中在元素挂起前通过axios和读取本地sessionStorage获取用户姓名、角色和id并将其放入state对象中(自定义的JSON对象),再将state对象和token存入sessionStorage中

-
在Vuex中定义state对象,由于Vuex里定义的变量相当于页面的局部变量,当页面做刷新操作就会消失,所以这里的state每次在消失后从session中取,保证了Vuex的持续且动态地使用