Pi-Hole-for-WSL1
 Pi-Hole-for-WSL1 copied to clipboard
Ad-blocking DNS server for Windows • Unbound pre-configured • Deployment ready in minutes • Does not require hypervisor/docker
PH4WSL1.cmd · Pi-hole for Windows

Install script to help Pi-hole run semi-natively under Windows 10/11 and Server 2019/2022 by leveraging the Windows Subsystem for Linux, renamed later to WSL1. Because WSL1 does not require a hypervisor and full Linux kernel it's the most lightweight way to run Pi-hole on Windows. Pi-hole and associated Linux binaries are visible in Task Manager right alongside your Windows apps (See Windows 11 screenshot above.)
- Brief installation walk-through on YouTube
- Jump to Install Instructions
Latest Updates for 2022-06-24
-
Gravity Sync lets you easily synchronize multiple Pi-hole instances. Run
Gravity Sync.cmdand copy/paste the command into the console of another Debian or Ubuntu-based Pi-hole.
- Less Pi-hole code is patched since upstream moved from
lsoftossfor port and service checking. Now a wrapper forsson WSL1 reformats the output ofnetstat.exeinto something Pi-hole can work with. - Integrated Unbound DNS Resolver and set the default Pi-hole configuration to use encrypted DNS.
- Updated to Debian 11
- Fixes for Windows 11 compatibility
- Added links in the install folder for
Pi-hole System Update.cmd,Pi-hole Gravity Update.cmd, andPi-hole Web Admin.cmd - Debian is configured to stay up-to-date with 'unattended-upgrades'
Note
There is no endorsement or partnership between this page and Pi-hole© LLC. They deserve your support if you find this useful.
Pi-hole for Windows can be used to block ads and encrypt DNS queries for your local Windows PC or entire network. If you use it to serve DNS for your entire network, it's highly recommended you install a second Pi-hole for Windows instance on another PC on your network, and enable Gravity Sync to ensure DNS is constantly available should one of the Windows PCs need to reboot for a security update or other reason.
Pi-hole for Windows is a great way to upcycle old hardware. If you have a Windows PC, tablet, or HDMI stick with 1GB RAM and it boots Windows 10 x64 you are good to go. If you don't have a Windows license, Hyper-V Server 2019 works and is a free download from Microsoft.
INSTALL INSTRUCTIONS
- Save PH4WSL1.cmd to your computer, right click the file and select "Run as Administrator."
Download and configuration steps complete in 2-15 minutes, depending on your hardware and antivirus solution. If Windows Defender is active the installation will take longer. Some users have reported issues with other antivirus products during installation.
This script performs the following steps:
- Enable WSL1 and install a Debian-built image from salsa.debian.org
- Download the LxRunOffline distro manager and install Debian 11 (Bullseye)
- Perform interface/gateway detection and create a /etc/pihole/setupVars.conf file for automated install
- Run the official installer from Pi-hole©
- Create shim so Pi-hole gets the expected output from
/bin/ssalong with other fix-ups for WSL1 compatibility. - Add exceptions to Windows Firewall for DNS and the Pi-hole admin page
NOTE
After the install completes, the Scheduled Task needs to be configured for auto-start at boot (before logon).
- Open Windows Task Scheduler (taskschd.msc) and right-click the Pi-hole for Windows task, click edit.
- On the General tab, place a checkmark next to both Run whether user is logged on or not and Hidden
- On the Conditions tab, un-check the option Start the task only if the computer is on AC power
Additional Info
-
DHCP Server is not supported and is disabled in the Pi-hole Web UI.
-
IPv6 DNS now works in addition to IPv4.
-
To reset or reconfigure Pi-Hole, run Pi-hole Configuration.cmd in the Pi-hole install folder.
-
To completely uninstall Pi-Hole, open the Pi-hole install folder in Windows Explorer. Right-click
Pi-hole Uninstall.cmdand click Run As Administrator. If you are uninstalling or reinstalling and need to retain your Pi-hole's configuration, export it first via the web interface.
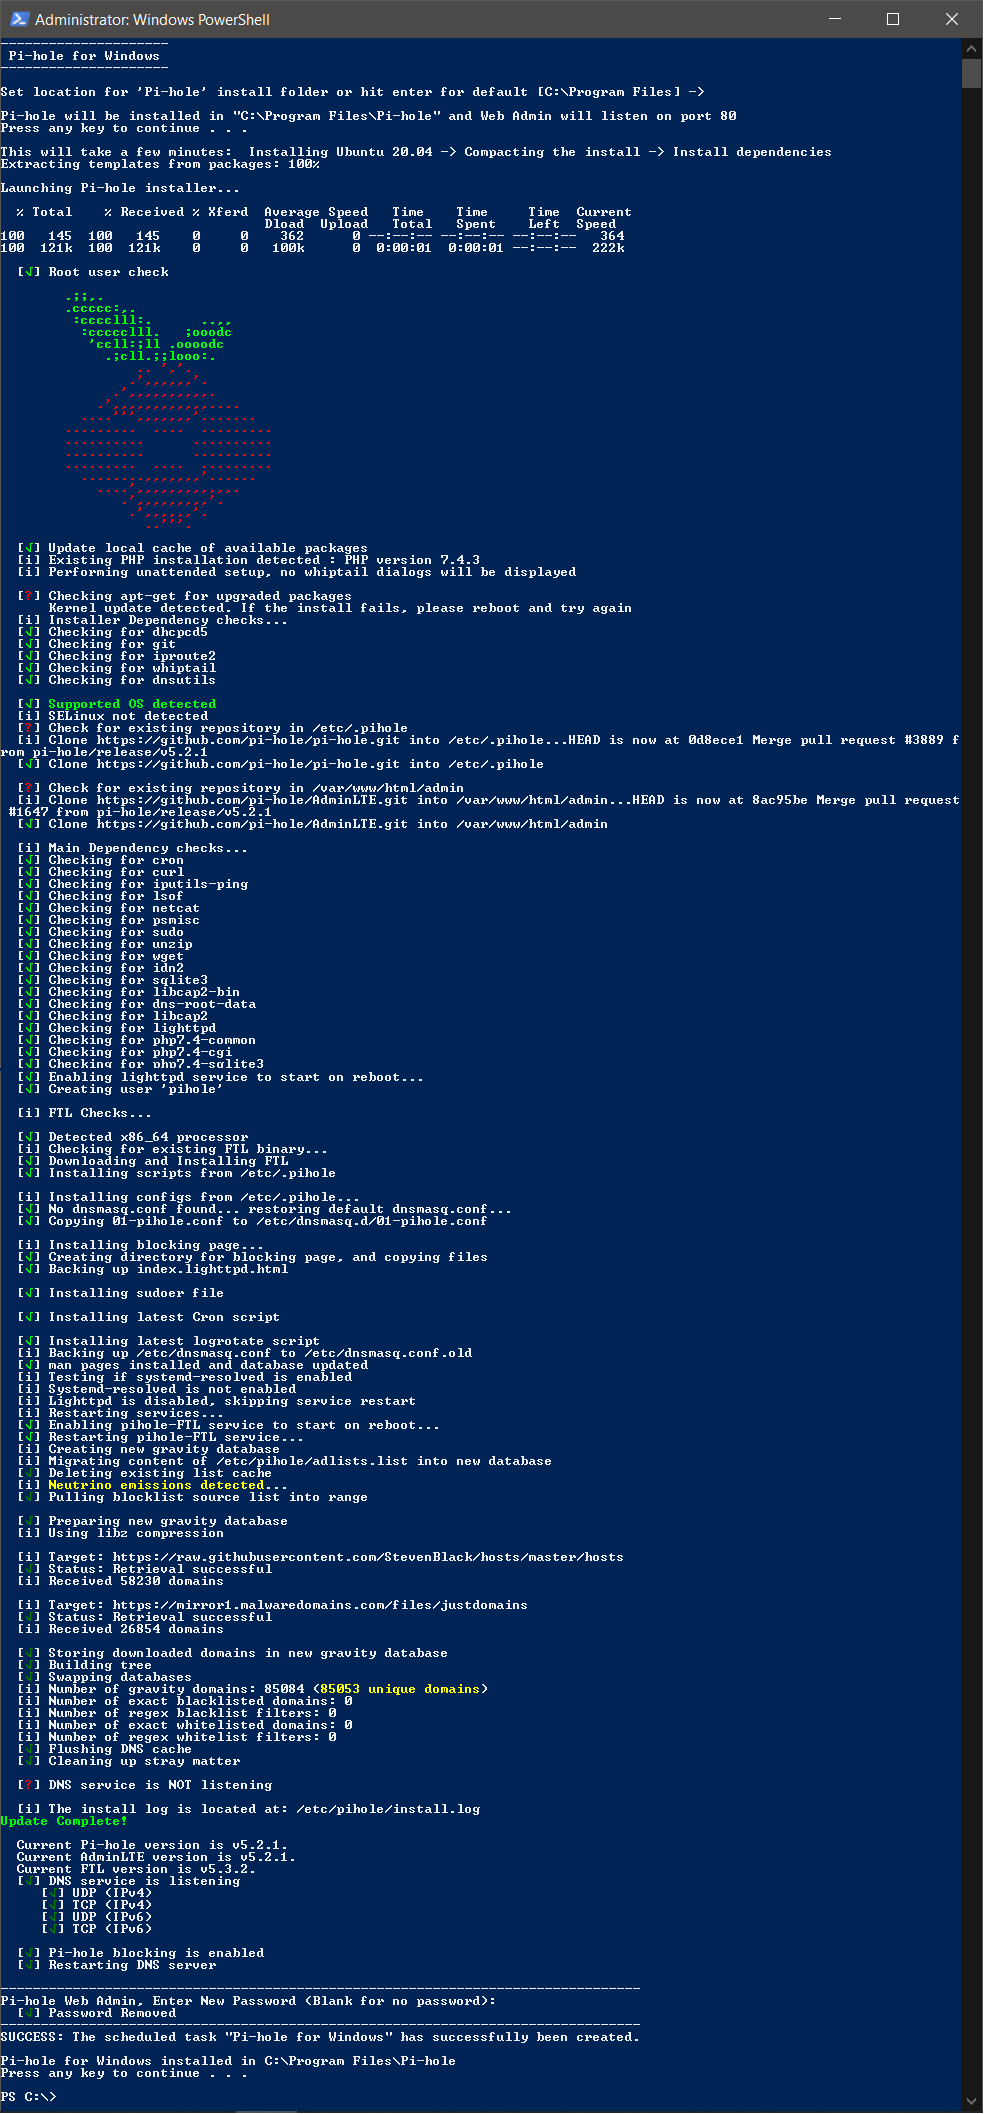
Screenshots
Installer run
Install Folder

Install Complete

Metadata
Owner
Metadata
Ad-blocking DNS server for Windows • Unbound pre-configured • Deployment ready in minutes • Does not require hypervisor/docker