docker.solaranzeige
 docker.solaranzeige copied to clipboard
docker.solaranzeige

Prerequisites
You will need to have docker installed on your system and the user you want to run it needs to be in the docker group.
Note: The image is a multi-arch build providing variants for amd64, arm32v7 and arm64v8 and also, an legacy amd64 Build for old Synology Kernels. - the correct variant for your architecture needs to be tagged e.g :amd64, :arm32v7, :arm64v8, :legacy
Technical info for docker GUIs (e.g. Synology, UnRaid, OpenMediaVault)
To learn how to manually start the container or about available parameters (you might need for your GUI used) see the following example:
docker run \
  -d \
  -e USER_ID="99" \
  -e GROUP_ID="100" \
  -e TIMEZONE="Europe/Berlin" \
  -e UPDATE="yes" \
  -e MOSQUITTO="yes" \
  -e INFLUXDB="yes" \
  -p 3000:3000 \
  -p 1883:1883 \
  -p 8080:80 \
  -v {SOLARANZEIGE_STORAGE}:/solaranzeige \
  -v {INFLUXDB_STORAGE}:/var/lib/influxdb \
  -v {GRAFANA_STORAGE}:/var/lib/grafana \
  -v {PVFORECAST_STORAGE}:/pvforecast \
  -v {WWW_STORAGE}:/var/www \
  --name=Solaranzeige \
  --restart unless-stopped \
  --tmpfs /tmp \
  --tmpfs /var/log \
  takealug/solaranzeige:tag
The available parameters in detail:
| Parameter | Optional | Values/Type | Default | Description |
|---|---|---|---|---|
USER_ID |
yes | [integer] | 99 | UID to run Solaranzeige as |
GROUP_ID |
yes | [integer] | 100 | GID to run Solaranzeige as |
TIMEZONE |
yes | [string] | Europe/Berlin | Timezone for the container |
-p |
no | [integer] | 3000:3000 | Map Grafana Listenport inside this Container to Host Device Listen Port (Bridge Mode) |
-p |
no | [integer] | 1883:1883 | Map Mosquitto Listenport inside this Container to Host Device Listen Port (Bridge Mode) |
-p |
no | [integer] | 80:8080 | Map Apache2 Listenport inside this Container to Host Device Listen Port (Bridge Mode) |
UPDATE |
yes | yes, no | no | Turn On / Off automatic Update for Solaranzeige each restart inside this Docker |
MOSQUITTO |
yes | yes, no | yes | Turn On / Off mosquitto service inside this Container |
INFLUXDB |
yes | yes, no | yes | Turn On / Off influxdb service inside this Container |
Frequently used volumes:
| Volume | Optional | Description |
|---|---|---|
SOLARANZEIGE_STORAGE |
no | The directory to persist /solaranzeige with Crontab Settings to |
INFLUXDB_STORAGE |
no | The directory to to persist /var/lib/influxdb to |
GRAFANA_STORAGE |
no | The directory to to persist /var/lib/grafana to |
PVFORECAST_STORAGE |
no | The directory to to persist /pvforecast to |
WWW_STORAGE |
no | The directory to to persist /var/www to |
When passing volumes please replace the name including the surrounding curly brackets with existing absolute paths with correct permissions.
Note:
INFLUXDB_STORAGEpersist the Database for Grafana. Note:GRAFANA_STORAGEpersist Grafana settings and Dashboards. Note:WWW_STORAGEpersist logfiles and all script-files from solaranzeige.de. Note:PVFORECAST_STORAGEpersist PVForecast data from https://github.com/StefaE/PVForecast
First Run / Initial Setup Solaranzeige
Inside this Container you need to run /solaranzeige/setup connect to the Container e.g
docker exec -ti Solaranzeige /solaranzeige/setup
Note: For initial Setup instructions see https://solaranzeige.de/phpBB3/viewtopic.php?f=5&t=305
Please, after you finish your Initial Setup, restart this Container, and select your Grafana - Dashboard
Modify Crontab Settings (Needed for Wallbox or Multi controller Configuration)
Just edit your Persist {SOLARANZEIGE_STORAGE}/solaranzeige_cron File and restart your Container dont forget to add an empty Newline at the End of this File.
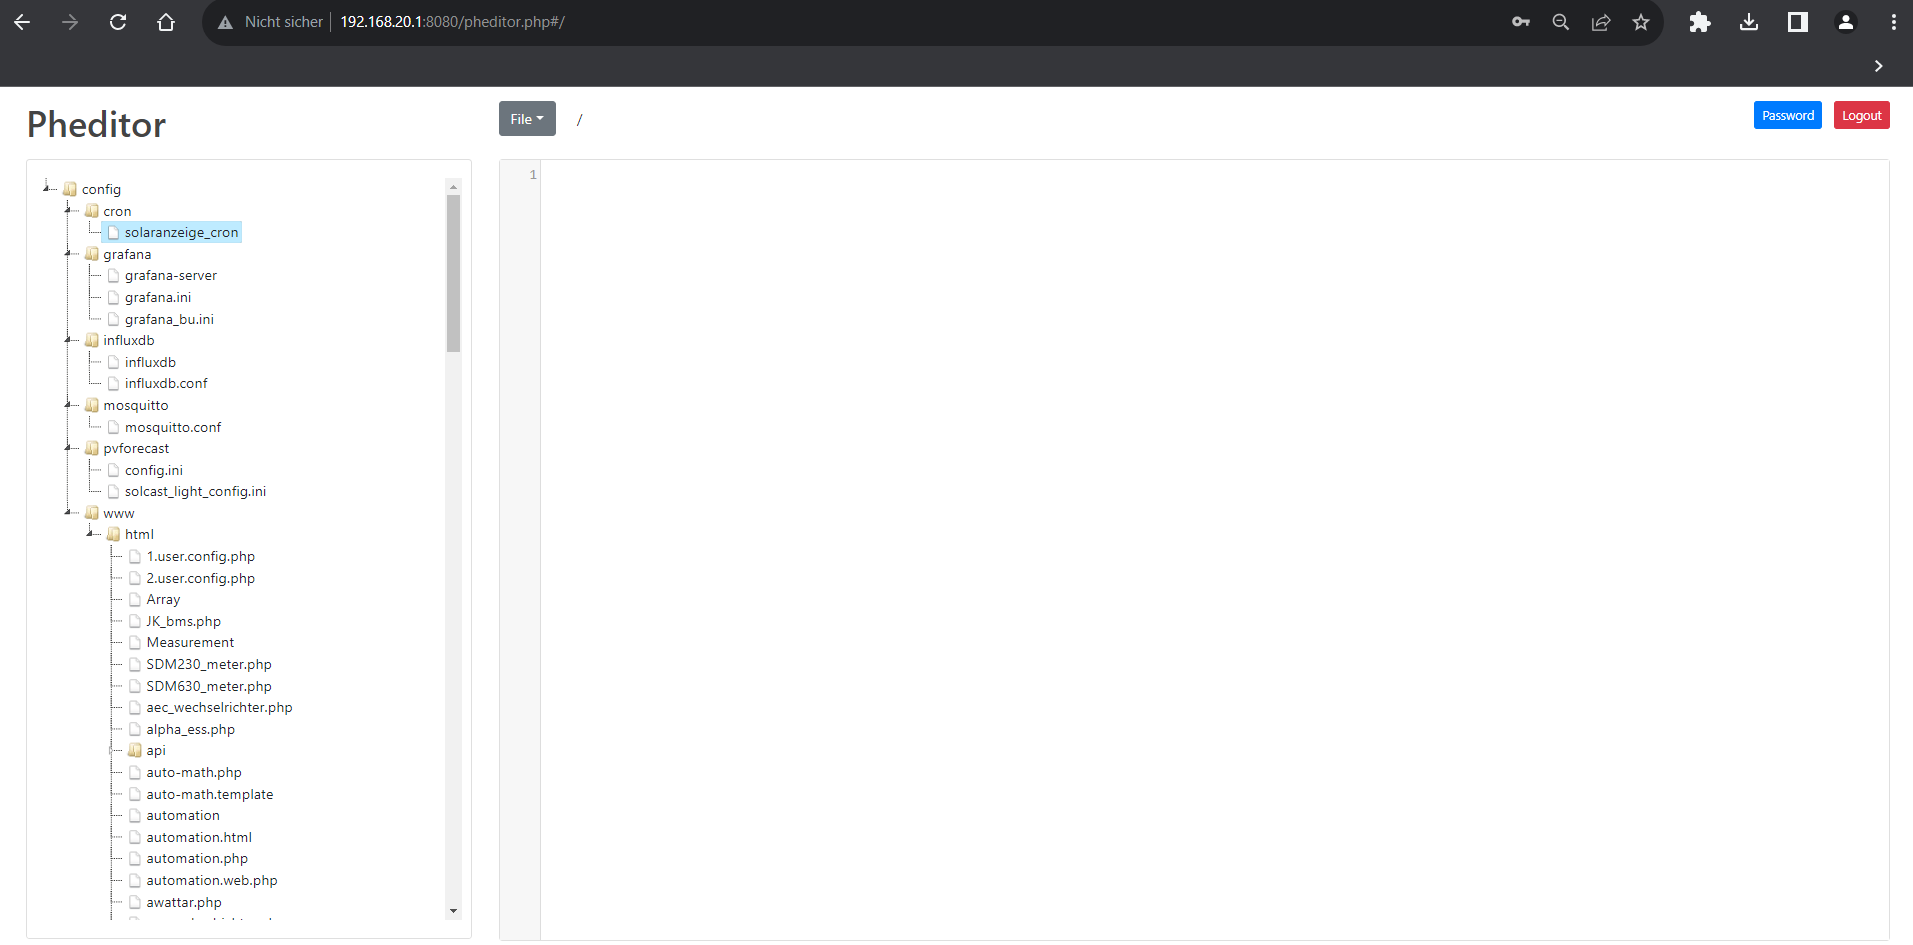
Modify all Settings like Grafana / Influx ect vie Webbrowser
Open your Webbrowser and open Solaranzeiges "Quick Access" e.g. IP:8080 and use "File Editor" , standard password is "solar" after saving, please restart your Container to take effect.
Support my work
If you like my Work, please  - thank you! :-)
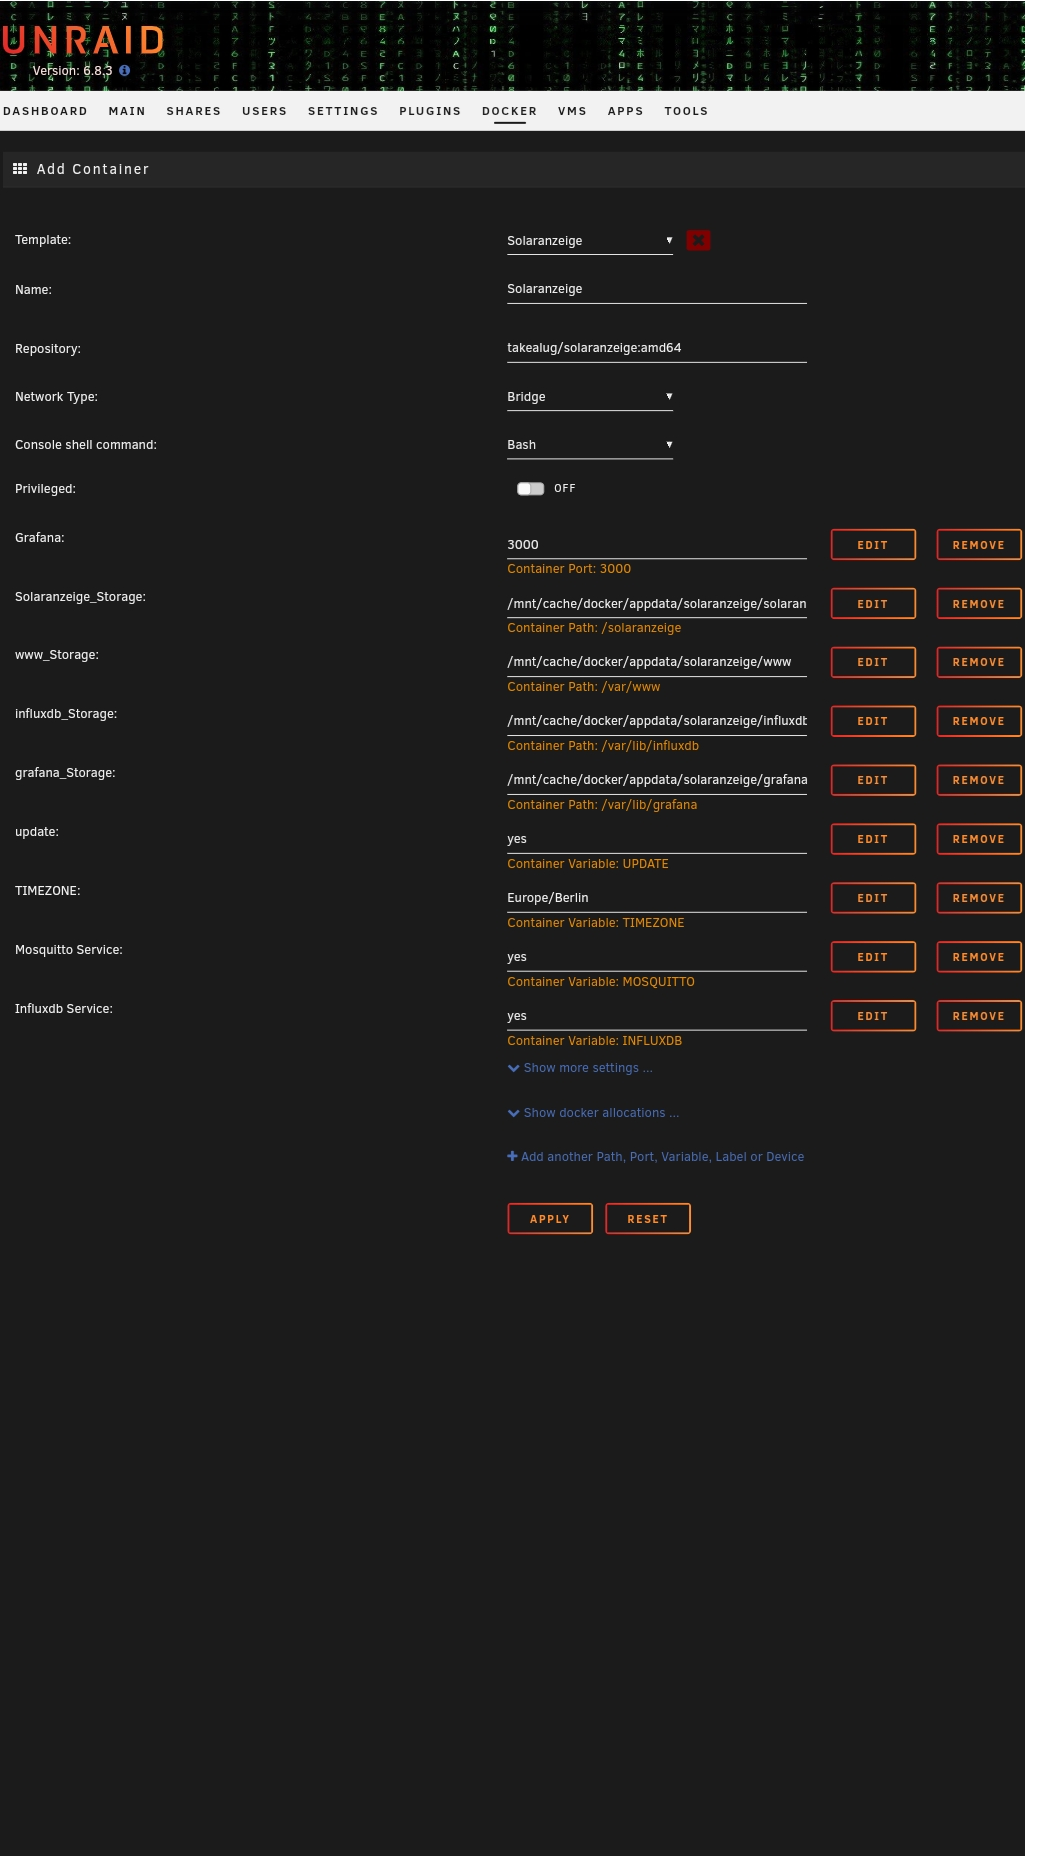
Unraid Template
Note: An Template for Unraid can be found here : https://raw.githubusercontent.com/DeBaschdi/docker.solaranzeige/master/Templates/Unraid/my-Solaranzeige.xml Please safe it to into \flash\config\plugins\dockerMan\templates-user, after that you can use this Template in Unraids Webui. Docker > Add Container > Select Template and choose Solaranzeige