OpenLabeling
 OpenLabeling copied to clipboard
Label images and video for Computer Vision applications
OpenLabeling: open-source image and video labeler

Image labeling in multiple annotation formats:
- PASCAL VOC (= darkflow)
- YOLO darknet
- ask for more (create a new issue)...

Citation
This project was developed for the following paper, please consider citing it:
@INPROCEEDINGS{8594067,
  author={J. {Cartucho} and R. {Ventura} and M. {Veloso}},
  booktitle={2018 IEEE/RSJ International Conference on Intelligent Robots and Systems (IROS)},
  title={Robust Object Recognition Through Symbiotic Deep Learning In Mobile Robots},
  year={2018},
  pages={2336-2341},
}
Latest Features
- Jun 2019: Deep Learning Object Detection Model
- May 2019: [ECCV2018] Distractor-aware Siamese Networks for Visual Object Tracking
- Jan 2019: easy and quick bounding-boxe's resizing!
- Jan 2019: video object tracking with OpenCV trackers!
- TODO: Label photos via Google drive to allow "team online labeling". New Features Discussion
Table of contents
- Quick start
- Prerequisites
- Run project
- GUI usage
- Authors
Quick start
To start using the YOLO Bounding Box Tool you need to download the latest release or clone the repo:
git clone --recurse-submodules [email protected]:Cartucho/OpenLabeling.git
Prerequisites
You need to install:
- Python
- OpenCV version >= 3.0
python -mpip install -U pippython -mpip install -U opencv-pythonpython -mpip install -U opencv-contrib-python
- numpy, tqdm and lxml:
python -mpip install -U numpypython -mpip install -U tqdmpython -mpip install -U lxml
Alternatively, you can install everything at once by simply running:
python -mpip install -U pip
python -mpip install -U -r requirements.txt
- PyTorch Visit the link for a configurator for your setup.
Run project
Step by step:
-
Open the
main/directory -
Insert the input images and videos in the folder input/
-
Insert the classes in the file class_list.txt (one class name per line)
-
Run the code:
-
You can find the annotations in the folder output/
python main.py [-h] [-i] [-o] [-t] [--tracker TRACKER_TYPE] [-n N_FRAMES]

optional arguments:
 -h, --help                Show this help message and exit
 -i, --input               Path to images and videos input folder | Default: input/
 -o, --output              Path to output folder (if using the PASCAL VOC format it's important to set this path correctly) | Default: output/
 -t, --thickness           Bounding box and cross line thickness (int) | Default: -t 1
 --tracker tracker_type    tracker_type being used: ['CSRT', 'KCF','MOSSE', 'MIL', 'BOOSTING', 'MEDIANFLOW', 'TLD', 'GOTURN', 'DASIAMRPN']
 -n N_FRAMES               number of frames to track object for
To use DASIAMRPN Tracker:
- Install the DaSiamRPN submodule and download the model (VOT) from google drive
- copy it into 'DaSiamRPN/code/'
- set default tracker in main.py or run it with --tracker DASIAMRPN
How to use the deep learning feature
- Download one or some deep learning models from https://github.com/tensorflow/models/blob/master/research/object_detection/g3doc/detection_model_zoo.md
and put it into
object_detection/modelsdirectory (you need to create themodelsfolder by yourself). The outline ofobject_detectionlooks like that:tf_object_detection.pyutils.pymodels/ssdlite_mobilenet_v2_coco_2018_05_09
Download the pre-trained model by clicking this link http://download.tensorflow.org/models/object_detection/ssdlite_mobilenet_v2_coco_2018_05_09.tar.gz and put it into object_detection/models. Create the models folder if necessary. Make sure to extract the model.
Note: Default model used in main_auto.py is ssdlite_mobilenet_v2_coco_2018_05_09. We can
set graph_model_path in file main_auto.py to change the pretrain model
-
Using
main_auto.pyto automatically label data firstTODO: explain how the user can
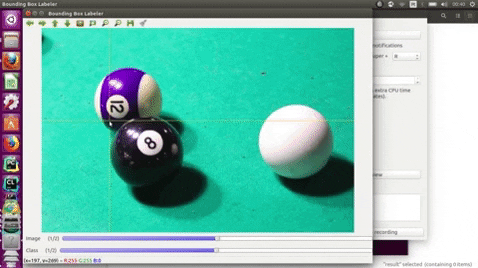
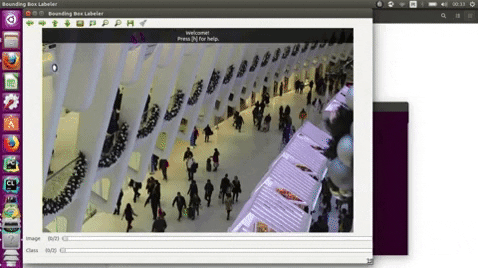
GUI usage
Keyboard, press:

| Key | Description |
|---|---|
| a/d | previous/next image |
| s/w | previous/next class |
| e | edges |
| h | help |
| q | quit |
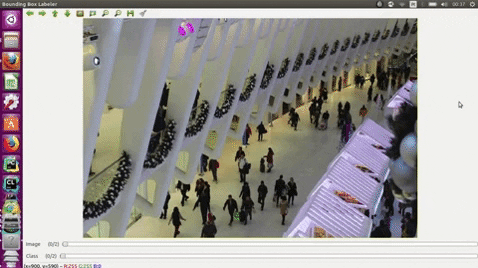
Video:
| Key | Description |
|---|---|
| p | predict the next frames' labels |
Mouse:
- Use two separate left clicks to do each bounding box
- Right-click -> quick delete!
- Use the middle mouse to zoom in and out
- Use double click to select a bounding box
Authors
-
João Cartucho
Feel free to contribute
