Intersection-Observer的使用
参考
justjavac-IntersectionObserver
使用Intersection Observer API构建无限滚动组件
1.介绍
网页开发时,常常需要了解某个元素是否进入了"视口",即用户能不能看到它
传统的实现方式: 监听scroll事件后,取得目标元素相对于视口左上角的坐标,由此来判断是否在视口之内,缺点如下:
-
scroll事件密集,不进行防抖/节流处理的话,容易造成性能问题
-
代码不整洁
使用IntersectionObserver API,可以自动观察元素是否可以见,这里可见的本质是: 目标元素与视口产生一个交叉区域,所以这个api叫做"交叉观察器"
也是有点年头了
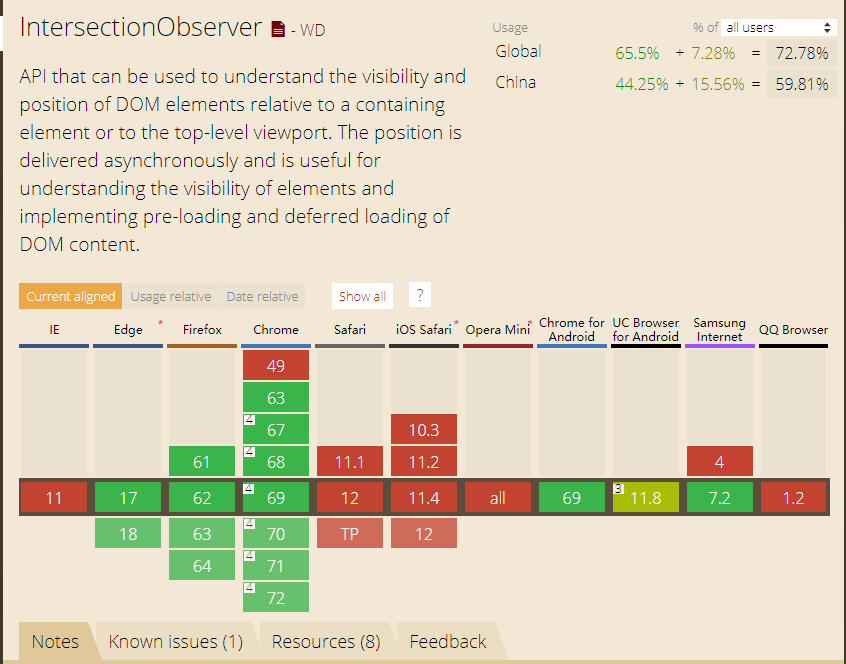
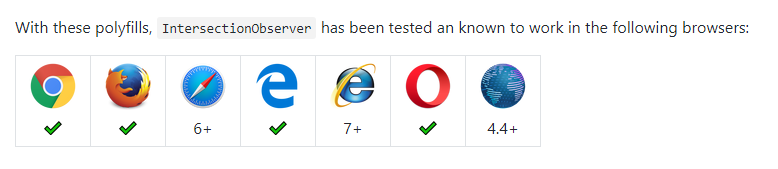
虽然即便都8102年了, 因为他的兼容性问题, 使用的还不多,不过这些问题应该交给polyfill来解决~

2.使用
2.1 基本操作
使用浏览器元素提供的构造函数创建一个观察器实例,接收两个参数: 可见性变化时的回调函数,配置对象
const observer = new IntersectionObserver(callback, option)
开始/停止/关闭观察器
const el = docuemnt.getElementById('¿¿¿')
// 开干 观察多个DOM节点就需要调用多次
observer.observe(el)
// 罢工
observer.unobserve(el)
// 关闭
observer.disconnect()
2.2 callback参数
callback函数的参数entries是一个数组,每一个成员都是一个IntersectionObserverEntry对象,数组的长度等于你观察的节点个数
IntersectionObserverEntry对象有这些属性
目前使用到的仅仅是isIntersecting属性:
- 返回一个布尔值, 如果目标元素与交叉区域观察者对象(intersection observer) 的根相交,则返回 true . 如果返回 true,则 IntersectionObserverEntry 描述了变换到交叉时的状态; 如果返回 false, 那么可以由此判断,变换是从交叉状态到非交叉状态.
2.3 options可选参数
threshold 属性: 是一个数组,每个成员都是一个门槛值,决定了什么时候触发回调函数
// 当目标元素 0%、25%、50%、75%、100% 可见时,会触发回调函数。
new IntersectionObserver(
  entries => {/* ... */},
  {
    threshold: [0, 0.25, 0.5, 0.75, 1]
  }
);
root属性: Intersection API支持容器内滚动,通过该属性指定目标元素所在的容器节点
rootMargin属性: 定义根元素的margin,用来拓展或缩小矩形的大小,从而影响交叉区域的大小,它使用CSS的定义方法,
比如10px 20px 30px 40px,表示 top、right、bottom 和 left 四个方向的值。
3.使用
3.1 vue无限滚动加载组件
observer.vue
<template>
  <div class="observer">
    <slot v-if="isLoading"></slot>
  </div>
</template>

<script>
  export default {
    props: {
      options: {
        type: Object,
        default: () => ({})
      },
      isLoading: {
        type: Boolean,
        default: false
      }
    },
    data: () => ({
      observer: null,
    }),
    mounted() {
      const options = this.options || {};
      this.observer = new IntersectionObserver(([entry]) => {
        if (entry && entry.isIntersecting) {
          this.$emit('intersection')
        }
      }, options);
      this.observer.observe(this.$el);
    },
    destroyed() {
      this.observer.disconnect();
    },
  };
</script>

<style scoped>
  .observer {
    height: 1px;
  }
</style>
使用,如果需要定义加载时的样式,写在slot中就好
<template>
  <div>
    <ul></ul>
    <Observer @intersection="loadMore" :isLoading="isLoading">
      正在加载中...
    </Observer>
  </div>
</template>

<script>
export default {
  data(){
    return {
      isLoading: false
    }
  },
  methods: {
    async loadMore(){
      this.isLoading = true
      const resp = await $get('xxxxxxxxxxxxxxxxxx')
      this.isLoading = false
    }
  },
}
</script>
3.2 懒加载指令
function inserted(el, binding) {
  const imgSrc = el.dataset['src']
  // 兼容性判断
  if (window.IntersectionObserver === undefined) {
    el.src = imgSrc
    return
  }
  // options
  const rootMargin = binding.value || '0px'
  const options = {
    rootMargin: rootMargin,
  }
  // 注册观察器, 在图片加载完成后关闭观察期
  const observer = new IntersectionObserver(([entry]) => {
    if (entry && entry.isIntersecting) {
      el.src = imgSrc
      el.onload = function () {
        observer.disconnect()
        delete el._onLazy
      }
    }
  }, options)
  // 开始观察
  observer.observe(el)
  el._onLazy = {
    observer,
  }
}
function unbind(el) {
  if (!el._onLazy) return
  const { observer } = el._onLazy
  // 关闭观察器
  observer.disconnect()
  delete el._onLazy
}

export default {
  inserted,
  unbind,
}
使用
<img data-src="xxx" v-lazy/>
<img data-src="xxx" v-lazy="'50px 0px'"/>
4. 兼容性处理
使用polyfill前
使用polyfill后
4.1 SPA中使用,以vue为例
npm install intersection-observer
在main.js中
import 'intersection-observer'
4.2 SSR中使用,以nuxt为例
创建plugins/intersection-observer.js
import 'intersection-observer'
在nuxt.config.js中
plugins:[
  {
    src:'~plugins/intersection-observer',
    ssr: false
  }
],
完事
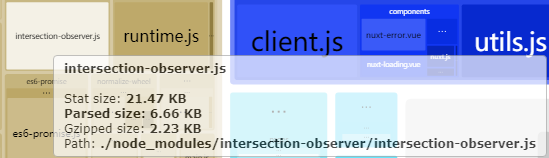
打包效果
4.3 edge的一个小坑
最开始用于滚动加载时,在edge上出现了相反的效果: 滚动到底部后没有加载,滚动到顶部才加载
暂时的解决方案为: 如果滚动加载不需要内容,需要给他设置height,1px即可