blog-frontend
 blog-frontend copied to clipboard
Published
20 hours ago •
 Caaalabash
Sentry的搭建以及Vue集成记录
Sentry Intro
支持范围:可以理解为支持所有主流语言和框架的接入,没有什么不能接入
特点:
-
只收集错误信息,避免从一堆无用日志中找问题
-
对于前端来说能收集的错误范围:
- 自动捕获异常:代码运行时错误
- 主动捕获异常: 接口错误 / 异步操作错误
- 手动抛出异常:)
Sentry前端使用效果
使用Sentry,避免前端代码在0监控的情况下裸奔:),从目前接入后的最终效果来看,有如下的作用:
-
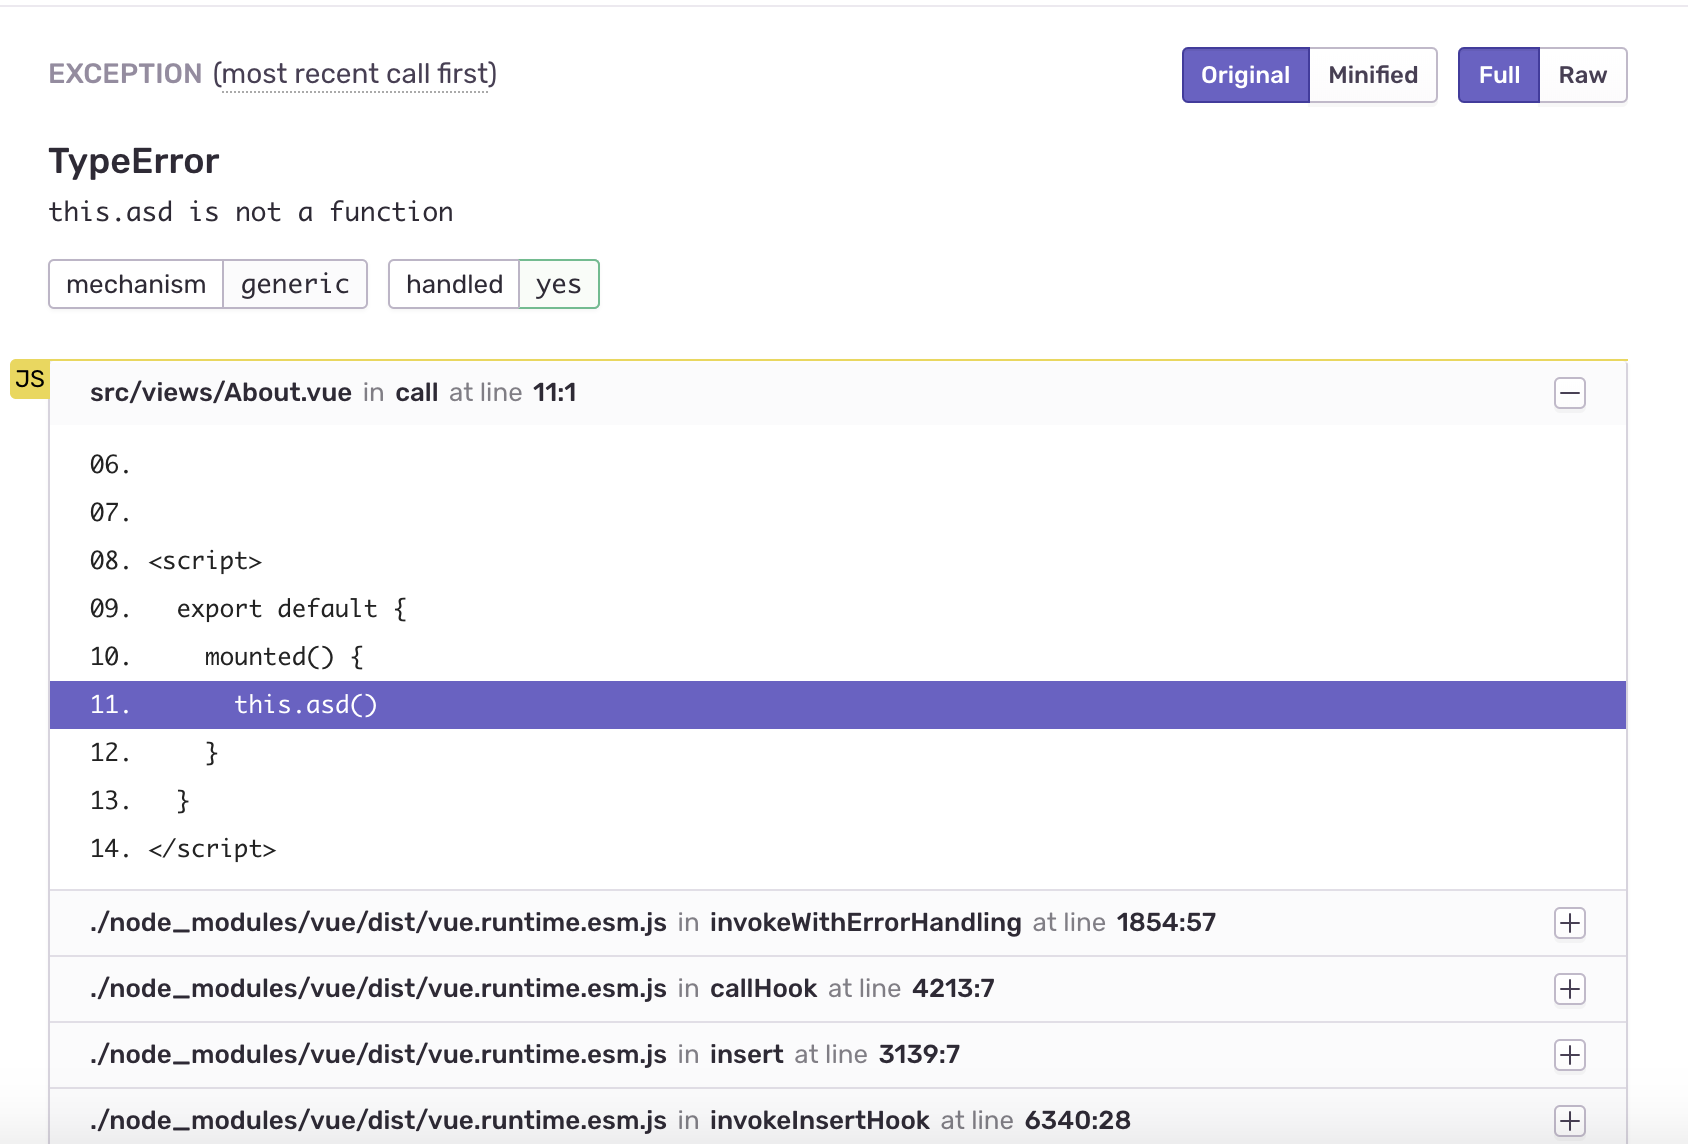
【局部】 能够收集到
JavaScript代码中的缺陷, 例如常见错误cannot read property of undefined, 并通过sourceMap准确定位到问题代码的位置
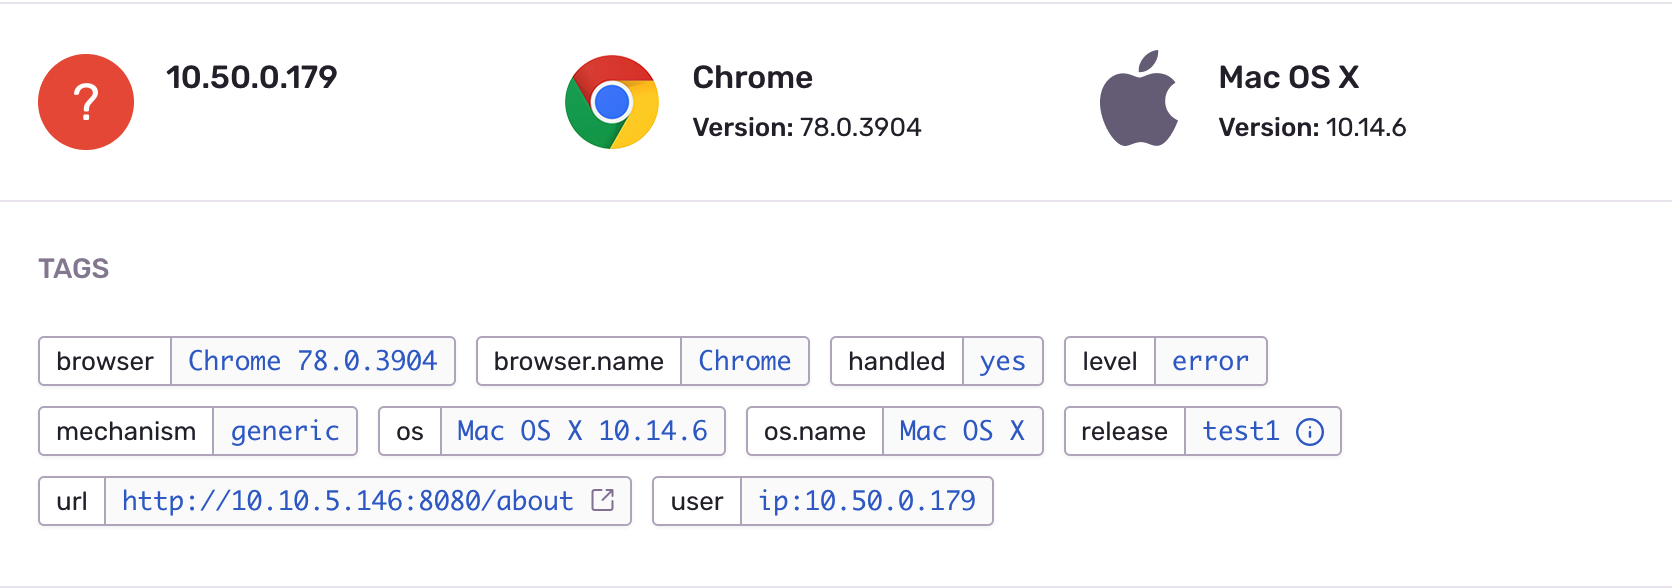
- 【局部】 能够收集到出现问题用户的基本信息:例如IP、浏览器版本、系统版本、访问路径
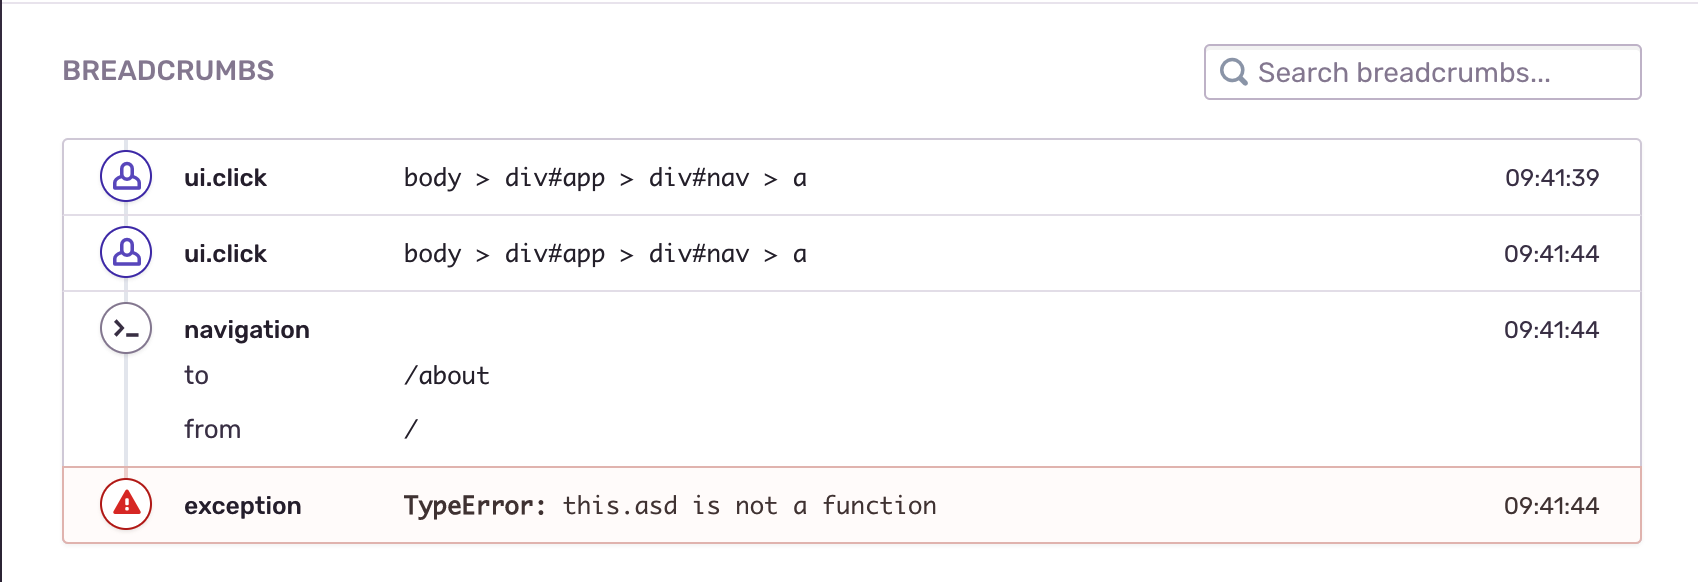
- 【局部】 能够收集到错误的复现流程
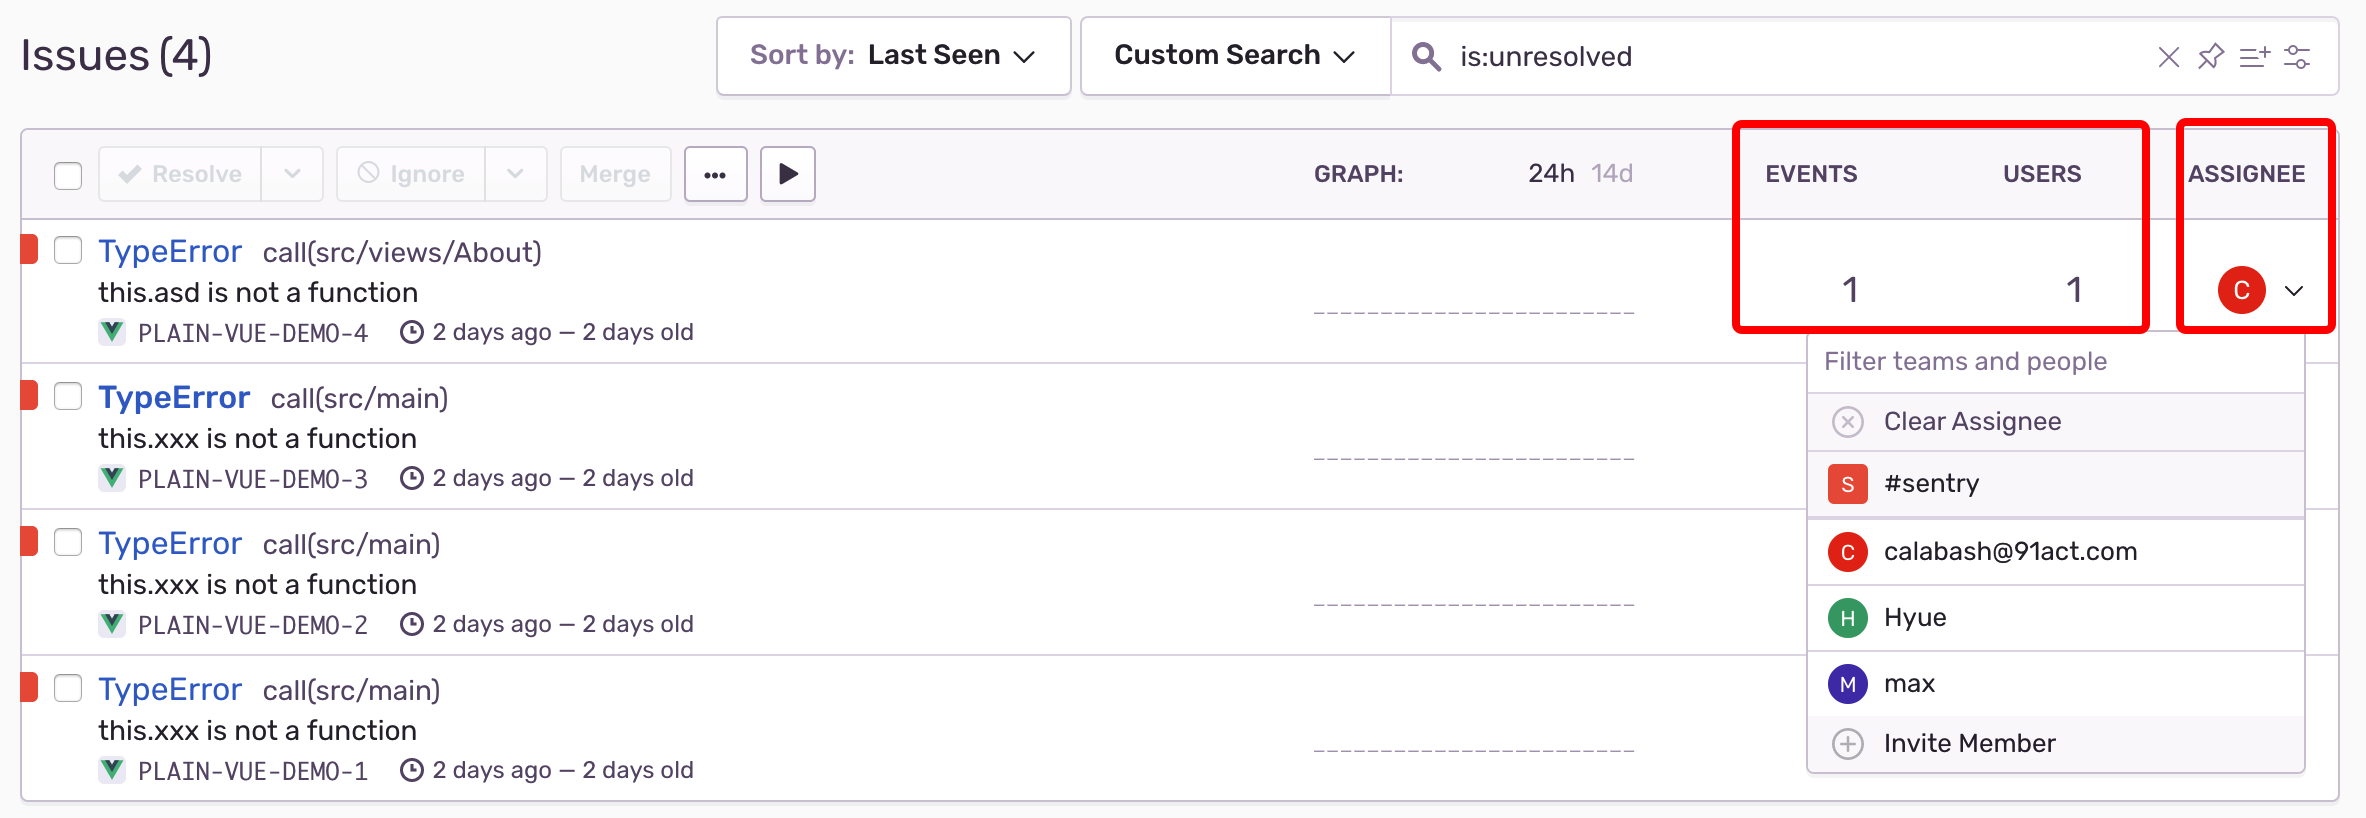
- 【宏观】 问题的出现频率以及影响返回,并可以指定交给谁处理
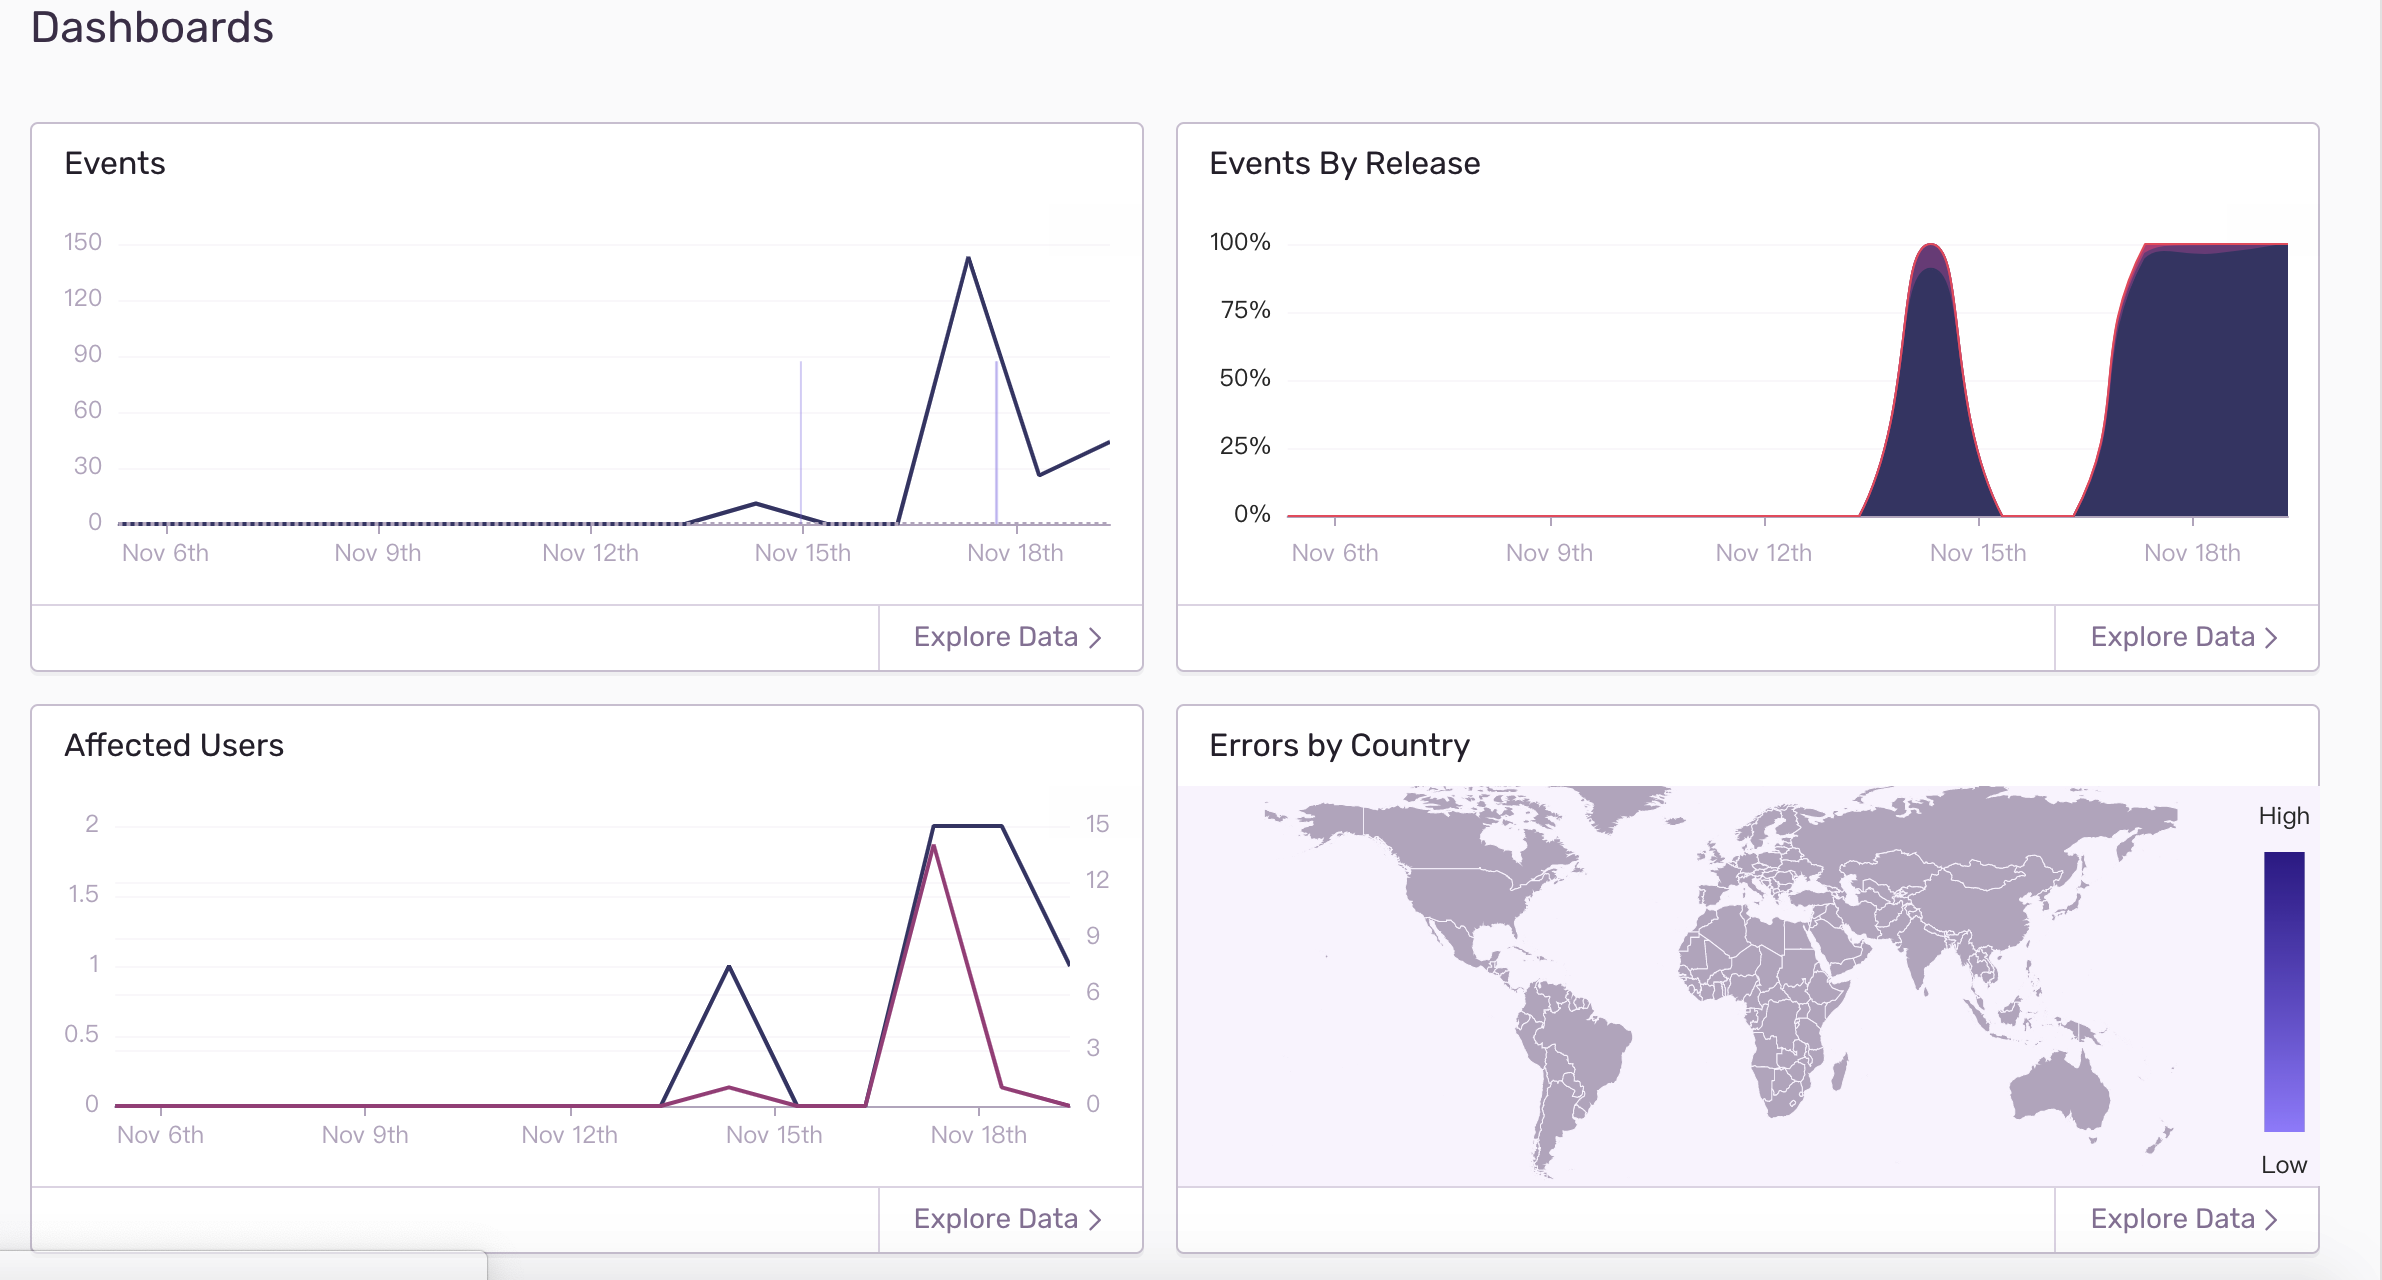
- 【宏观】 以及一些看起来比较鸡肋但是好看的图表
总之,只记录错误日志,便于定位问题以及发现潜在问题
下文分为两个部分:
-
Vue项目接入Sentry的过程
-
通过容器启动sentry的过程
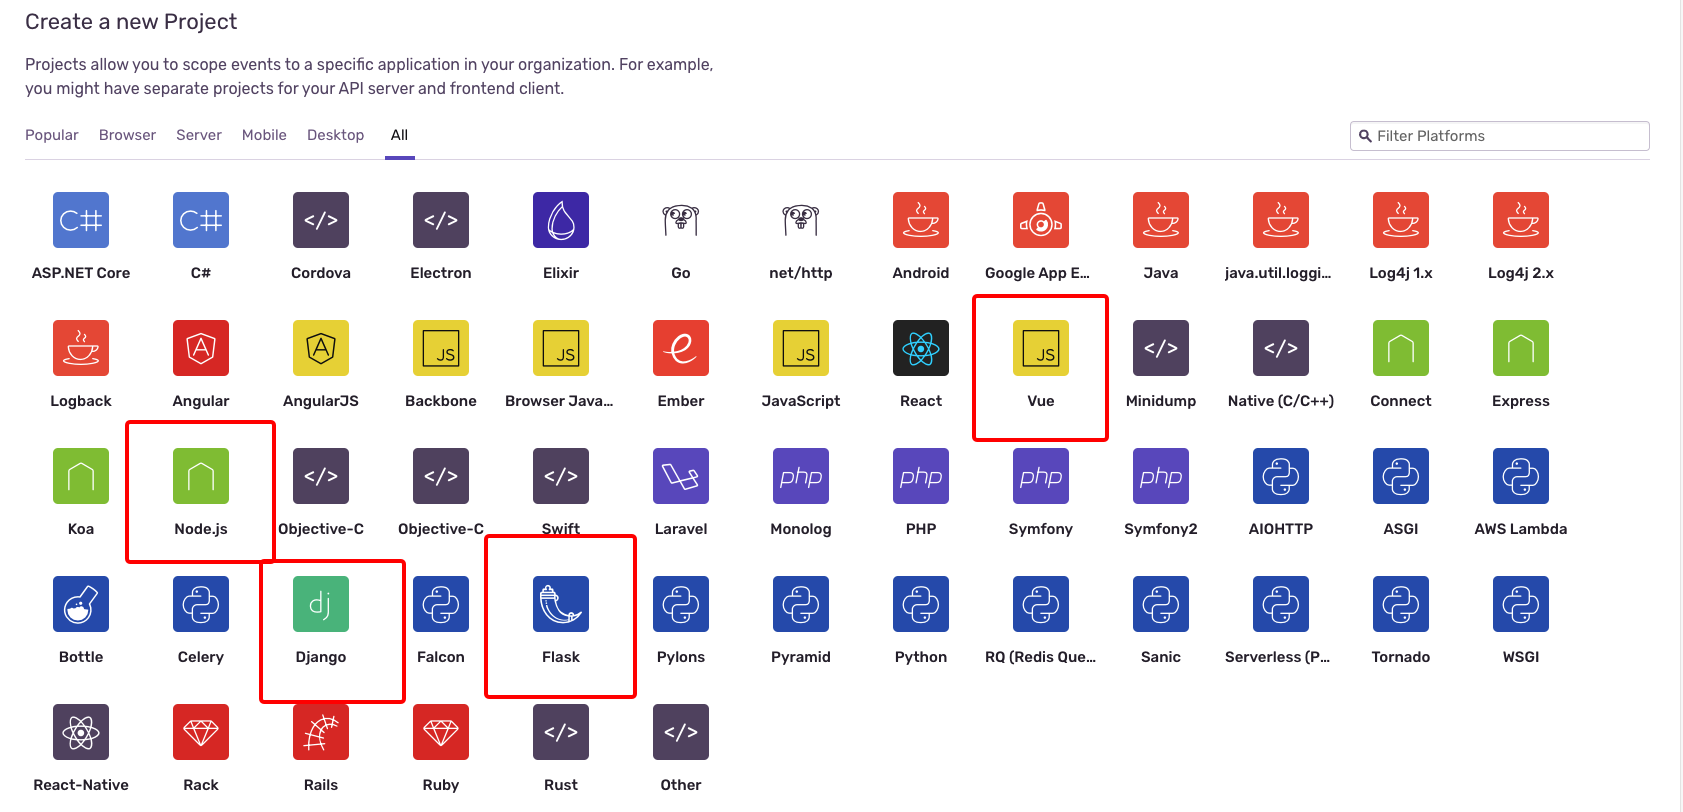
1. Vue项目接入Sentry的过程
- 在Sentry可视化界面创建一个项目,执行如下命令
npm install @sentry/browser @sentry/integrations -S
- 在
app.js中添加代码,
import Vue from 'vue'
import * as Sentry from '@sentry/browser';
import * as Integrations from '@sentry/integrations';

Sentry.init({
  // dsn由Sentry提供, 复制即可
  dsn: 'https://[email protected]/8',
  integrations: [new Integrations.Vue({Vue, attachProps: true})],
});

// 注意Sentry.init应该咋new Vue之前
new Vue(options).$mount('#app')
- 到第二步, 基本的接入就完成了, 只是缺少
sourceMap, 无法准确定位问题的位置, 因此需要上传sourceMap
npm install @sentry/webpack-plugin -D
- 在根目录创建
.sentryclirc文件, 参考内容如下
[defaults]
url = https://sentry.xxx.com
org = xxx
project = sso

[auth]
token = d121fed268874c45bf72157b23594731371ab7e30835c4259832da9a72b40b0ba
- 在
vue.config.js中添加
const SentryPlugin = require('@sentry/webpack-plugin')

module.exports = {
  publicPath: '/manage/',
  productionSourceMap: true,
  chainWebpack: config => {
    if (process.env.NODE_ENV === 'production') {
      config.plugin('sentry').use(SentryPlugin, [{
        // 指定忽略文件配置
        ignoreFile: '.gitignore',
        // 指定上传目录
        include: './dist',
        // 指定sentry上传配置
        configFile: './.sentryclirc',
        // 指定发布版本, 可以写定
        release: process.env.RELEASE_VERSION,
        // 保持与publicPath相符
        urlPrefix: '~/manage/'
      }])
    }
  },
  pluginOptions: {
    /**
     * 使用vue-cli-plugin-dll提升构建速度, 构建时间14s => 5s
     * @description 构建前端项目时往往希望第三方库(vendors)和自己的代码可以分开打包, 因为第三方包不会经常变化
     * @doc https://github.com/fingerpan/vue-cli-plugin-dll
     * @side-effects 使用dll似乎影响了sentry对sourceMap问题的定位, 因此为了sentry, 放弃dll
     */
    // dll: {
    //   entry: ['vue', 'vue-router', 'vuex', 'axios'],
    //   open: process.env.NODE_ENV === 'production',
    //   inject: true
    // }
  }
}
-
@sentry/webpack-plugin在上传后不会删除sourceMap, 因此需要稍微拓展一下npm run build命令, 修改package.json:
  "scripts": {
    "build": "vue-cli-service build && rm -fr dist/js/*.map"
  }
OVER
2.通过容器启动sentry的过程
-
版本:
Docker 17.05.0+&&Compose 1.19.0+ -
cd onpremise -
mkdir -p data/{sentry,postgres} -
./install.sh(会有许多资源被墙住,解决方案是在墙外机器pull下镜像, push进墙内:() -
正常的
docker-compose build && docker-compose run --rm web upgrade && docker-compose up -d\
当然不会这容易, 每一步都是坑, 最终启动后大概需要2g内存, 效果如下
