authing-js-sdk
 authing-js-sdk copied to clipboard
🖥 Authing SDK for JavaScript, Miniprogram


English | 简体中文
The Authing JavaScript / node SDK consists of two parts:ManagementClient and AuthenticationClient。
-
Authenticationclientincludes the methods of registering and logging in, resetting the mobile phone number mailbox, and modifying the account information. It requests as your end user and is suitable for use in the browser and back-end environment. -
Managementclientis suitable for use in the back-end or trusted front-end environment. Generally speaking, All the operations you can do in the Authing Console can be completed with this SDK
Install
Use npm:
npm install authing-js-sdk
Use yarn:
yarn add authing-js-sdk
If you want to use it in the react native environment, you need to run it in the RN project root directory first:
npx rn-nodeify --install "crypto,stream",after that, ashim.jsfile will be generated in the project root directory, and then in the App.js first line introductionimport './shim.js'.
Use CDN:
<script src="https://cdn.jsdelivr.net/npm/authing-js-sdk/build/browser/index.min.js"></script>

<script>
  /** You can obtain the Authenticationclient and Managementclient through the global variable authenticating */
  var authing = new Authing.AuthenticationClient({
    appId: 'AUTHING_APP_ID',
  });
</script>
Use Authentication module
Initialize
Authenticationclient needs to pass in 'appId' for initialization:
You can view your application list in Applications on the console
import { AuthenticationClient } from 'authing-js-sdk';

const authing = new AuthenticationClient({
  appId: 'YOUR_APP_ID',
});
The complete parameter list is as follows:
appId: Authing appId, required;accessToken: By user'sid_tokeninitializes the SDK (optional. You can cache the user'sid_tokenin the front-end localstorage to realize the purpose of remembering login).timeout: Request timeout, default: 10000 (10 seconds)。onError: Error handling function, you can use it to catch all exceptions requested by the authoring client globally. See for complete error codes doc。The function is defined as:
(code: number, message: string, data: any) => void
host: Authing server address. If you are using the public cloud version, please ignore the parameter. This parameter is required if you are using the version of privatized deployment. The format is as follows:https://authing-api.mydomain.com,No `/' at the end.preflight: Whether to enable network status pre check. The default value is false. This parameter is used to check whether the user's network shields the domain name of the authing server (the intranet of some enterprises shields the third-party websites). No notification will be given if the check is successful, and the incoming error handling function will be called if the check fails. The SDK initialization speed will be slow after the pre check. Please use it with caution.cdnPreflight: Whether to enable CDN network status pre check. The default value is false. This parameter is used to check whether the user's network can access the qiniu cloud CDN (which cannot be accessed in some scenarios where the agent is enabled). If the check succeeds, no notification will be given. If the check fails, the incoming error handling function will be called. After performing CDN pre check, the SDK initialization speed will be slow. Please use it with caution.
Usage
If the SDK is used in the browser environment, after the user completes the login, the SDK will write the user's token to localStorage, and subsequent requests will carry the token for access.
const email = '[email protected]';
const password = 'passw0rd';
const user = await authing.loginByEmail(email, password); // Log in successfully and write the token to localStorage

//You can do this after logging in
await authing.updateProfile((nickname: 'Bob'));
Social Login
Through authenticationclient.social.authorize send an authorized login request. This method will directly open a new window and jump to the login authorization page of a third-party social login service provider (such as GitHub, wechat, dingpin, etc.). The user after the authorization is completed, this window will be automatically closed and the 'onsuccess' callback function will be triggered. Through this function, you can obtain the user information.
Example:
const authenticationClient = new AuthenticationClient({
  appId: 'YOUR_APP_ID',
});

await authenticationClient.social.authorize('github', {
  onSuccess: (user) => {
    console.log(user);
  },
  onError: (code, message) => {},
  // Customize the location of the pop-up window
  position: {
    w: 100,
    h: 100,
  },
});
Authing currently supports nearly 20 kinds of social logins at home and abroad, such as wechat, GitHub, sign in with apple, Alipay.
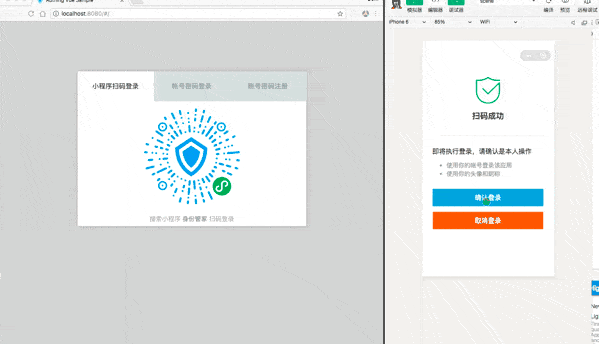
Small program code scanning login
Small program code scanning login refers to wechat login using authing small program Small Login, click here to learn more。
You can use 5 lines of code to realize a complete code scanning login form:
authenticationClient.wxqrcode.startScanning('qrcode', {
  onSuccess: (userInfo, ticket) => {
    console.log(userInfo, ticket);
  },
});
For complete usage and parameters, please refer to Code scanning login module。
App scan code login
App scanning login refers to using your own app scanning to login to the website,click here to learn more。
ou can use 5 lines of code to realize a complete code scanning login form:
authenticationClient.qrcode.startScanning('qrcode', {
  onSuccess: (userInfo, ticket) => {
    console.log(userInfo, ticket);
  },
});
Module list
- AuthenticationClient Core module
- QrCodeAuthenticationClient Small program code scanning login and app code scanning login
- MfaAuthenticationClient Multi factor authentication module
- SocialAuthenticationClient Social login module
Use management module
Initialize
ManagementClient initialization requires the user pool ID to be passed in userPoolId and user pool key secret:
Click here to learn how to get userPoolId and secret。
import { ManagementClient } from 'authing-js-sdk';

const managementClient = new ManagementClient({
  userPoolId: 'YOUR_USERPOOL_ID',
  secret: 'YOUR_USERPOOL_SECRET',
});
The complete parameter list is as follows:
userPoolId: User pool ID.secret: User pool key.accessToken: Initialize the SDK through the administrator's token。(Optional,Either secret or accesstoken must be filled in)。timeout: Request timeout, in milliseconds; the default is 10000 (10 seconds).onError: Error handling function, you can use it to catch all exceptions requested by the authoring client globally. The function is defined as:
(code: number, message: string, data: any) => void
See for complete error codes: doc。
host: Authing server address. If you are using the public cloud version, please ignore the parameter. This parameter is required if you are using the version of privatized deployment. The format is as follows:https://authing-api.mydomain.com,No/at the end。preflight: Whether to enable network status pre check. The default value is false. This parameter is used to check whether the user's network shields the domain name of the authing server (the intranet of some enterprises shields the third-party websites). No notification will be given if the check is successful, and the incoming error handling function will be called if the check fails. The SDK initialization speed will be slow after the pre check. Please use it with caution.cdnPreflight: Whether to enable CDN network status pre check. The default value is false. This parameter is used to check whether the user's network can access the qiniu cloud CDN (which cannot be accessed in some scenarios where the agent is enabled). If the check succeeds, no notification will be given. If the check fails, the incoming error handling function will be called. After performing CDN pre check, the SDK initialization speed will be slow. Please use it with caution.
Usage
ManagementClient. It can be used to manage users, roles, policies, groups, organizations, and user pool configurations. Theoretically, any operation you can do in the Authing Console can be completed with this SDK
Get user directory list:
// list: list of users on the current page
// totalCount: total users
const { list, totalCount } = await managementClient.users.list();
Create role:
const role = await managementClient.roles.create('code', 'Role name');
Modify user pool configuration:
const userpool = await managementClient.userpool.update({
  registerDisabled: true, // Close user pool registration
});
Module list
- UsersManagementClient Management module
- RolesManagementClient Role management module
- GroupsManagementClient Group management module
- OrgManagementClient Organization management module
- PoliciesManagementClient Policy management module
- AclManagementClient Access control module
- UdfManagementClient Custom field metadata management module
- WhitelistManagementClient White list management module
- UserPoolManagementClient User pool setting management module
Error handling
You can use try catch to handle errors:
try {
  const user = await authing.loginByEmail('[email protected]', 'passw0rd');
} catch (error) {
  console.log(error.code); // 2004
  console.log(error.message); // user does not exist
}
See for complete error codes doc。
You can also specify onerror to uniformly catch all authing request exceptions, such as using antd and other front-end components to display error prompts
import { message } from 'antd';
const authing = new AuthenticationClient({
  userPoolId,
  onError: (code, msg: any) => {
    message.error(msg);
  },
});
Privatization deployment
In the scenario of privatization deployment, you need to specify the graphql endpoint of your privatized authoring service (without protocol header and path). If you are unclear, you can contact the authoring idaas service administrator.
import { AuthenticationClient, ManagementClient } from 'authing-js-sdk';

const authenticationClient = new AuthenticationClient({
  appId: 'YOUR_APP_ID',
  host: 'https://core.you-authing-service.com',
});

const managementClient = new ManagementClient({
  userPoolId: 'YOUR_USERPOOL_ID',
  secret: 'YOUR_USERPOOL_SECRET',
  host: 'https://core.you-authing-service.com',
});
Interface index
Authentication module:
Multi factor authentication module
Management module:
Management authority and access control
Manage registration white list
Manage user pool configuration
Log
Detailed changes for each version are recorded in the document.
Contribution
- Fork it
- Create your feature branch (git checkout -b my-new-feature)
- Commit your changes (git commit -am 'Add some feature')
- Push to the branch (git push origin my-new-feature)
- Create new Pull Request