Visual-Fusion-for-AVs
 Visual-Fusion-for-AVs copied to clipboard
An attempt to create a sensor fusion model for camera & laser scanner inputs for Autonomous Vehicles
Sensor Fusion For Perception in Autonomous Vehicles
This project aims to combine data from two sensors, cameras (2D) and LiDAR(3D), into a real time obstacle tracking and classication model for AVs. This attempt itself is based on data collected from cars fitted with cameras and Velodyne LiDAR systems, and the config files for the setup are included in this repo.
What about the data?
The data here comes from RGB cameras mounted on the car (images), as well as a LiDAR system fitted on the top spitting out point clouds. You can find the files in the data folder, separated into images & points.
What's the idea behind this?
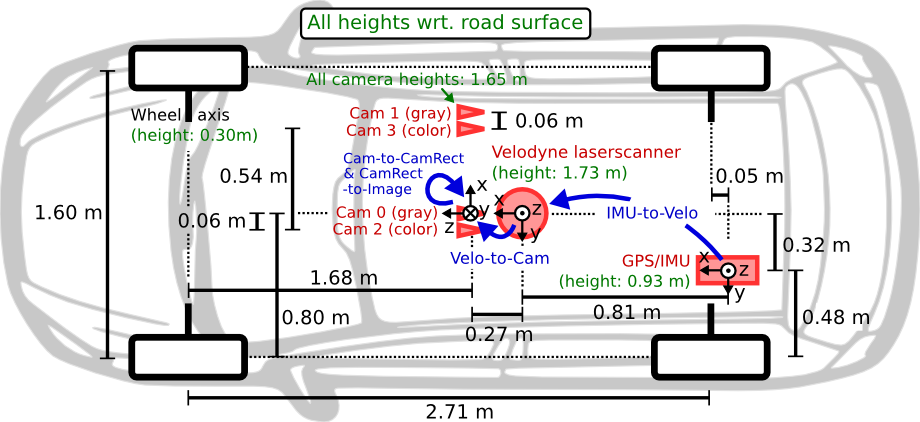
As autonomous vehicles become more mainstream, it's fun to see how they perceive the world around them. Here's a typical setup in a rig like such:
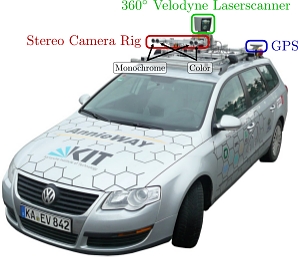
Overall, the goal is to combine the data from these sensors to make the machine perceive obstacles, track them and classify them. This can then be used downstream to decide ideal reactions to each different kind of obstacle object. We will be using YOLOV4 in this project to track and classify the objects in 2D. If you're not familiar with YOLO V4, I highly recommend checking it out.
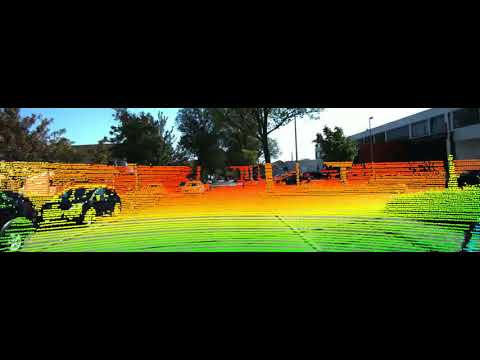
The challenge becomes when you think about combining 3D point clouds from the Velodyne laser scanner with the 2D images coming from the cameras. In more technical terms, the first step would be to project the points from the LiDAR scan onto the 2D pixels.
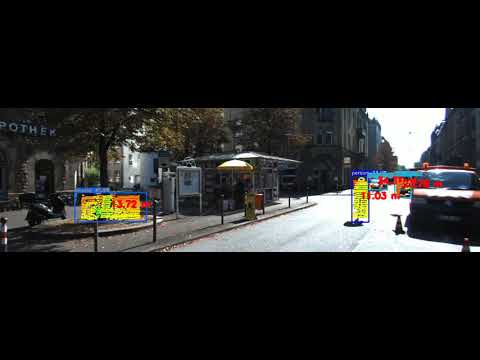
The second part is then how do we take these sensors and draw 3D bounding boxes around obstacles?
Libraries used
The entire code is reproducible on Google Colab. I would suggest cloning the repo, uploading it to your Google Drive and then trying it yourself! A binder version for both is available too.
I made use of the incredible Open3D library, the pypotree library as well as the Yolo V4 model and weights.
Calibration matrices
All the calibration files are in the calibration folder under data. It should be perfectly fine to run the first notebook using the data uploaded here. Unfortunately due to size limits I couldn't upload the other datasets I used, but I highly recommend checking out other datasets I list below!
Results
The results are pretty fun to see! I'm attaching a few examples below. Kindly note that I've uploaded the data only for the first video, but you can find many other datasets and tune the code for yourself! An example would be the list of resources found here:
Results from Part 1 (Projecting LiDAR onto Images):
Results from Part 2 (Drawing 3D Bounding Boxes and keeping only points of interest):
Results on a highway dataset:
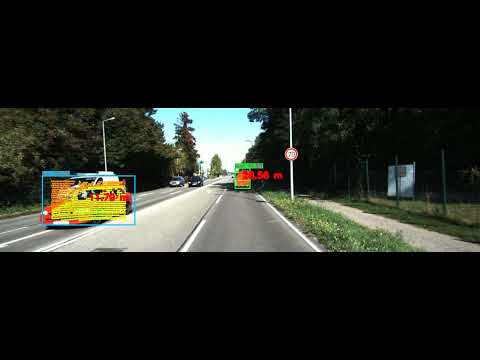
As you might see, the results are pretty good! The next step would be to use this algorithm in a more downstream task, and deploying it on a robot powered by a Raspberry Pi or an NVIDIA Jetson. That project coming up soon!
Metadata
Owner
Metadata
An attempt to create a sensor fusion model for camera & laser scanner inputs for Autonomous Vehicles