HtmlWebShot
 HtmlWebShot copied to clipboard
Published
20 hours ago •
 1Danish-00
A python3 package which Can Create Images From url, Html-CSS, Svg and from any readable file and texts with many setup features.
HtmlWebShot


A python3 package which Can Create Images From url, Html-CSS, Svg and from any readable file and texts with many setup features.
Setup & Installation
-
Install HtmlWebShot:
$ pip3 install htmlwebshot -
Install wkhtmltopdf:
- Debian/Ubuntu:
$ apt-get install wkhtmltopdf -y - MacOs:
$ brew install homebrew/cask/wkhtmltopdf - Alternative Support
$ wget https://github.com/1Danish-00/HtmlWebShot/raw/main/script.sh | sh - Win / Arch / Others
click here
- Debian/Ubuntu:
Usage
Import & Instantiate
from htmlwebshot import WebShot
shot = WebShot()
Multiple Arguments
-
size: (int , int) : tuple : height, width default: full-screen -
quality: int : between 1 to 100 -
delay: float : delay time in sec to load page -
flags: list : know More -
params: dict : know more -
config: path setup know more
Simple Method
Using Url
shot.create_pic(url="https://google.com")
Using Html File
shot.create_pic(html="myfile.html", output="picture.jpg")
Using Html with CSS
via files
shot.create_pic(html="myfile.html", css="background.css", output="picture.jpg")
via string
html = """<h1> Hello World </h1>
<p>Write something about the world.</p>"""
css = "body {background: pink;} p {color: red;}"

shot.create_pic(html=html, css=css, output="picture.jpg")
Using Svg Or Any Other Readable File/Text
shot.create_pic(other="violin.svg", output="picture.jpg")
text = "What should I write here???"
shot.create_pic(other=text, size=(100,200))
You can use with async too
await shot.create_pic_async( # parameters are same for both
Some Examples
from htmlwebshot import WebShot
shot = WebShot()
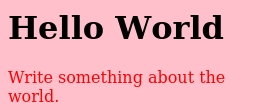
shot.size = (110, 270)
shot.quality = 80 # maximum 100
html = """<h1> Hello World </h1>
<p>Write something about the world.</p>"""
css = "body {background: pink;} p {color: red;}"
shot.create_pic(html=html, css=css, output="picture.jpg")
Click Here To See Output Image Of Above Code.
from htmlwebshot import WebShot
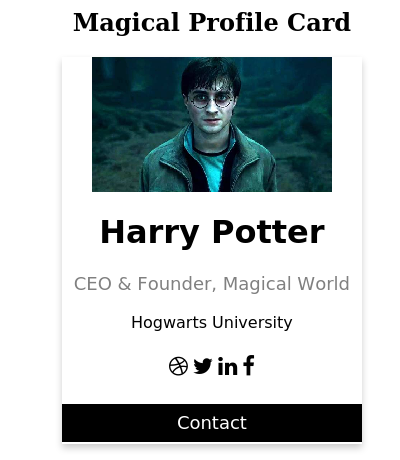
shot = WebShot()
shot.quality = 100
shot.params = {"--crop-x":300, "--crop-w": 400}
shot.create_pic(html="profile.html", css="profile.css")
Click Here To See Output Image Of Above Code.
Click For More Examples
from htmlwebshot import WebShot
shot = WebShot()

shot.quality = 85
shot.flags = ["--enable-javascript"]

shot.create_pic(html="jsgraph.html")
Click Here To See Output Image Of Above Code.

from htmlwebshot import WebShot
shot = WebShot()

shot.flags = ["--quiet"]
shot.quality = 100

shot.create_pic(other="violin.svg", size=(500,600))
Click Here To See Output Image Of Above Code.

Flags Uses
Click Here To Check All Flags:
-
--quiet: Be less verbose -
--disable-smart-width: To force size to be accurate -
--custom-header-propagation: Add HTTP headers specified by flag--custom-headerfor each resource request -
--no-custom-header-propagation: Don't Add HTTP headers specified by flag--custom-headerfor each resource request -
--disable-javascript: Don't allow web pages to run javascript -
--enable-javascript: Allow web pages to run javascript -
--proxy-hostname-lookup: Use the proxy for resolving hostnames -
--stop-slow-scripts: Stop slow running javascripts -
--no-stop-slow-scripts: Don't Stop slow running javascripts
from htmlwebshot import WebShot
shot = WebShot()
shot.flags = ["--quiet", "--enable-javascript", "--no-stop-slow-scripts"]
Available Params
Click Here To Check All Params options:
-
--bypass-proxy-for:<value>Bypass proxy for host (repeatable) -
--cookie:<name><value>Set an additional cookie (repeatable), value should be url encoded. -
--cookie-jar:<path>Read and write cookies from and to the supplied cookie jar file -
--crop-h:<int>Set height for cropping -
--crop-w:<int>Set width for cropping -
--crop-x:<int>Set x coordinate for cropping -
--crop-y:<int>Set y coordinate for cropping -
--custom-header:<name><value>Set an additional HTTP header (repeatable) -
--encoding:<encoding>Set the default text encoding, for input -
--format:<format>Output file format -
--minimum-font-size:<int>Minimum font size -
--password:<password>HTTP Authentication password -
--post:<name><value>Add an additional post field (repeatable) -
--post-file:<name> <path>Post an additional file (repeatable) -
--proxy:<proxy>Use a proxy -
--run-script:<js>Run this additional javascript after the page is done loading (repeatable) -
--ssl-crt-path:<path>Path to the ssl client cert public key in OpenSSL PEM format, optionally followed by intermediate ca and trusted certs -
--ssl-key-password:<password>Password to ssl client cert private key -
--ssl-key-path:<path>Path to ssl client cert private key in OpenSSL PEM format -
--user-style-sheet:<path>Specify a user style sheet, to load with every page -
--username:<username>HTTP Authentication username -
--window-status:<windowStatus>Wait until window.status is equal to this string before rendering page -
--zoom:<float>Use this zoom factor
from htmlwebshot import WebShot
shot = WebShot()
shot.params = {
    "--custom-header": "Accept-Encoding gzip",
    "--minimum-font-size": 50,
    "--format": "png",
    "--zoom": 10,
    }
Config Path
If you installed pkg directly then no need to configure it, It'll auto configure.
But If u installed externally then you have to setup config path.
from htmlwebshot import WebShot, Config
shot = WebShot(
    quality=80,
    config=Config(
        wkhtmltopdf="C:\Program Files\wkhtmltopdf\\bin\wkhtmltopdf.exe",
        wkhtmltoimage="C:\Program Files\wkhtmltopdf\\bin\wkhtmltoimage.exe",
    ),
)
Metadata
25
Stars
4
Forks
Watchers
Owner
Metadata
A python3 package which Can Create Images From url, Html-CSS, Svg and from any readable file and texts with many setup features.