DietPi-Docs
 DietPi-Docs copied to clipboard
Replacing Balena Etcher with USBimager
I got an email with a suggestion. Checkout: https://bztsrc.gitlab.io/usbimager/
It supports all OSes that Etcher does, but is over 300 times lighter (file size). Requires a test if GPT/EFI images boot fine.
On Linux and macOS, dd could be used as well, but users need to find the right /dev path manually first and it does not prevent overwriting internal drives or even the root drives, when the wrong path is used 😄.
Works pretty well on macOS, except for a few caveats. You actually have to run the binary inside the app package with sudo, otherwise it will error. Also, it lets you quit in the middle of a write, corrupting it.
Balena Etcher works without root permissions? On Linux usually disk group membership permits raw disk writes, not sure how such is managed on macOS and if there should/could be a confirmation prompt to gain such sort of admin access?
Etcher gives you a passwerd prompt, yes. That seems to be the only way to gain full disk write access, as adding it to an allowed Full Disk Access list doesn't seem to work either.
Probably it did work with macOS 10 and needs adjustment on v11 to correctly use that permission API or such. Looks like we should report it here: https://gitlab.com/bztsrc/usbimager/-/issues
The problem is that I am using macOS 10. The other open issue (albeit on Linux) states that:
USBImager doesn't use policykit or other fancy authentication stuff, it is as simple as it gets.
Ah, that sentence might be the explanation indeed. Another suggestion for the devs then would be to error out in the first place, when the tool runs without root permissions (on macOS) instead of at a stage where writes have been done already, if I understood "Also, it lets you quit in the middle of a write, corrupting it." right.
Simple is good, but when it's about permissions, things either need to use native authentication mechanisms or error out in the very first place: https://github.com/MichaIng/DietPi/blob/master/dietpi/dietpi-config#L23-L24 🙂
An issue with USBimager is that it does not differentiate between disk images and partition images. A DietPi image contains a partition table, hence it is meant to overwrite the whole disk, not to be written into one partition of may already exists. When I insert an already formatted SD card, I'm offered to flash the image to either of the partitions, while correct would be to only allow flashing onto the whole drive.
I'm not sure whether it would still do everything correct, but it is at least confusing. If I was about giving a recommendation (for Windows), it would be clearly Rufus, currently. Some say the menu options it has makes it confusing, but when a disk image with partition table is selected, everything is greyed out, it shows (and on start warns) that it will overwrite "multiple partitions" on the target drive, when present, it allows to flash to regular USB drives as well (useful for PC images and the trend to use USB-attached SSD boot for SBCs), and the many options are also hidden behind "additional drive" and "additional format" buttons, and of course are a value as well, e.g. bad blocks check for SSDs and SD cards.
It's three times larger than USBimager but still hundred times smaller than Etcher. Really only issues is that it is only Windows, and hence cannot be used as a single recommendation: https://github.com/pbatard/rufus/wiki/FAQ#Do_you_plan_to_port_Rufus_to_LinuxMac_OSSome_other_OS
Hmm, so you make DietPi and not running Linux on your computer. The dev of USBimager has a Mac as well or had one. I switched to Linux 2011 and USBimager works flawlessly.
it does not differentiate between disk images and partition images.
RPi OS has more than one partition - I never had to take care with USBimager. It was my understanding of an image, that it is simply written, bit by bit on the chosen medium. Then I write Armbian, DietPi or an Ubuntu on the same stick, why would I care what was there before?
It comes with a beautiful PDF manual: On MacOS: go to "System Preferences", "Security & Privacy" and "Privacy". Add USBImager to the list of "Full Disk Access". Or use “sudo /Applications/USBImager.app/Contents/MacOS/usbimager”.
Linux: The X11 version gains "disk" group membership on execution automatically. For GTK you'll have to add your user to that group manually or run USBImager via sudo, or compile with udisks2 support, otherwise you'll get "permission denied" errors.
A new release since you have tried it: https://gitlab.com/bztsrc/usbimager/-/releases
Also, it lets you quit in the middle of a write, corrupting it.
Moreover, if you remove the SDcard or MemoryStick from the computer, while writing to it, the medium doesn't work! scnr DietPi, if I remove power in the middle of the first boot - does it still work? Or is this simply a: Don't do that?
Hmm, so you make DietPi and not running Linux on your computer.
Yes, for desktop works still bound to Windows.
It was my understanding of an image, that it is simply written, bit by bit on the chosen medium.
A single filesystem is written bit by bit too, but into the boundaries of an existing partition table. While USBImager obviously does everything correct, the dialogues it shows are (at least where when I tested) confusing. Since it is about what we recommend to possibly inexperienced users, this matter much IMO.
The fact that you need to mess with permissions, in case reed a PDF etc when using USBImager is a similar issue, not when you know about it, but for inexperienced users. For our documentation we need a tool which simply works with a few clicks and doesn't give you much change to do something wrong or cause worries due to confusing outputs.
if you remove the SDcard or MemoryStick from the computer, while writing to it
It's about accidents, pushing the wrong button or key. Some tools forcefully finish sensitive tasks before abortion or even grey out related buttons. But I agree that this is a pretty minor issue as one can simply restart flashing, and it can be seen positive as well when you can quit immediately when recognising that you used the wrong image or SD card or so 😄.
I'm sure it is a great tool for users who are fine with such glitches, are able to apply sufficient permissions once and then have a tiny efficient tool to do their regular flashing tasks, so this is not blame. It's simply that we need to keep in mind those users which probably never worked with the console yet, flash an image the first time, may be a bit unsure or worry whether everything is/was going well etc. It's a pain that the unnecessarily gigantic Ether is the only (known to us) tool which has such a clean and simple bullet-prove interface, supporting nearly all OSes.
However, I'll give USBImager another try when flashing the next image 🙂.
Just a few software comes with a nice manual - this is simply a benefit. The tool itself is as easy as it gets.
to apply sufficient permissions
If you use Linux, you have to enter sudo everytime you want to access the disks. Etcher USBimager no advantage. And yes, a person like me who does this more often than others can tweak the system, like I did.
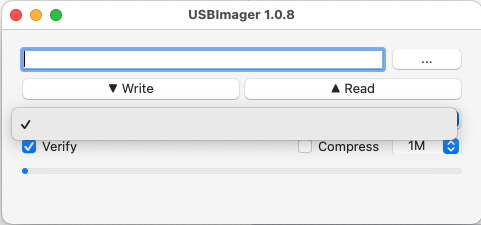
However, there are two version of USBimager: Simplified (write only) GDI wo https://gitlab.com/bztsrc/usbimager/raw/binaries/usbimager_1.0.8_wo-i686-win-gdi.zip screenshot is here: https://gitlab.com/bztsrc/usbimager
I guess it is more a question whether you fancy an environment friendly software or a bloated, unnecessary for the task electron app. Server and Data are everything else than environment friendly.
Some have already done the next step, keep up: https://armbian.atlassian.net/browse/AR-385?oldIssueView=true
If you use Linux, you have to enter sudo everytime you want to access the disks.
If I'm not mistaken, Etcher uses policykit based permissions to allow non-root disk writes, and on macOS the mentioned native login prompt to gain it.
I guess it is more a question whether you fancy an environment friendly software or a bloated, unnecessary for the task electron app.
No this is not the question, but, as mentioned, whether you can simply execute and click through the flasher to get started or whether you need to first setup permissions manually, start it from console with full root privileges or other neither secure nor convenient steps. USBImager explicitly decided to not hassle with any OS wise authentication/permission systems. That is perfectly fine, even better for guys like you and me who do the needed once and then have an extremely slim portable flasher, but it is not great to recommend to possibly inexperienced users who may never used a console before. This way while USBImager is surely a great tool, it simply addresses a different user space.
Also keep in mind that guys like you and me anyway use the flashing tool they used before and do not need to read this docs at all or jump over that part. So it really is for those which need to guidance on how to flash an image at all.
Some have already done the next step, keep up: https://armbian.atlassian.net/browse/AR-385?oldIssueView=true
This is not about whether to flash Armbian with USBImager or not but to add it as tool/package to the Armbian desktop image systems. So you can use USBImager from an Armbian system where you initially needed to flash it already 😉. Hence a completely different topic, not at all related about how to best bootstrap users and make the getting started as easy as possible. Also likely Armbian then adds the configurations required to run it without root. See the request where they ask about Debian packaging.
However, as said, aside of the permissions issue, I need to retest USBImager and see whether the dialogue glitches have been resolved in the meantime.
@StephanStS
Regarding USBImager, here is the confusion I had and which is still true:
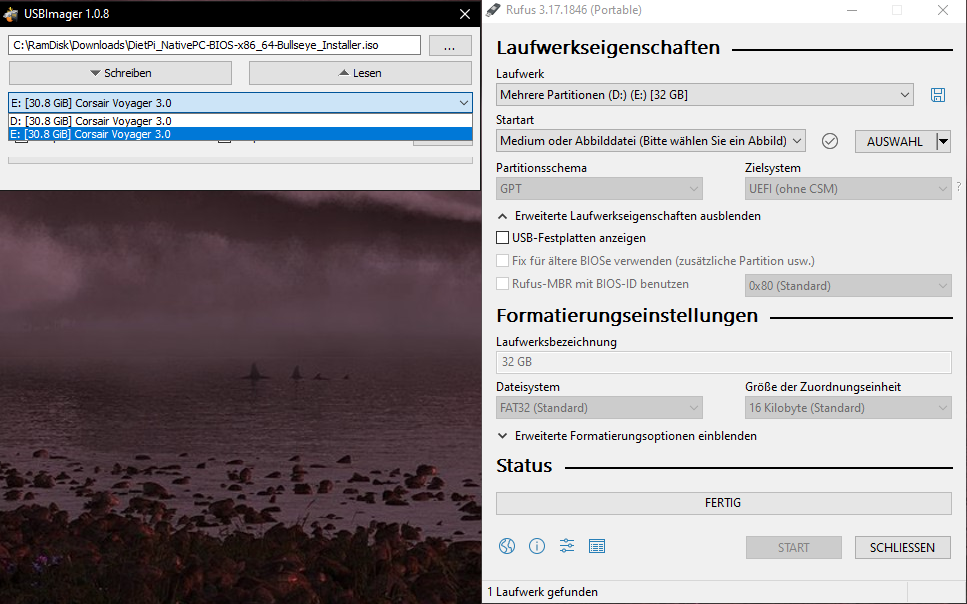
The USB drive currently has two partitions and Windows assigns two dedicated drive letters to it, as expected. While the ISO (same with any other of our images) is intended to be written to the whole drive, you can select each of the two partitions, as if the image would be written to one partition only, which would make it not bootable.
The USB drive currently has two partitions and Windows assigns two dedicated drive letters to it, as expected. While the ISO (same with any other of our images) is intended to be written to the whole drive, you can select each of the two partitions, as if the image would be written to one partition only, which would make it not bootable.
Rufus on the other hand detects this very well and shows just one drive to select with the info that it contains multiple partitions and listing all affected drive letters, making it pretty clear. When writing the image with Rufus, it additionally prints a warning that all partitions of the drive will be erased.
USBImager on the other hand, when you select drive E: and write, an error is shown, after which Windows for some reason un-assigns/removes the drive letter E:. Afterwards only drive letter D: can be selected and writing to it works with USBImager.
BUT: Checking the partitioning on Windows afterwards, it still shows the same as before. So it indeed has written the ISO content only to the first partition instead of to the whole drive. The image is hence no bootable. More strangely, the first partition was and is only 512 MiB large, smaller than the content of the image, so USBImager seems to have written the ISO until outside of the bounds of the first partition into the second one, destroying the second partition's data without indicating this (as only the first partition was selected), and causing a completely broken partition table.
The first partition was an ext4 partition from a previous Hardkernel Odroid N2 image, which has a dedicated 512 MiB ext4 boot partition. So to be sure what happened, I checked it on a Linux system:
Disk /dev/sdb: 29.83 GiB, 32027705344 bytes, 62554112 sectors
Disk model: Voyager 3.0
Units: sectors of 1 * 512 = 512 bytes
Sector size (logical/physical): 512 bytes / 512 bytes
I/O size (minimum/optimal): 512 bytes / 512 bytes
Disklabel type: dos
Disk identifier: 0x2020db9f

Device     Boot Start     End Sectors  Size Id Type
/dev/sdb1  *       64 1114111 1114048  544M 17 Hidden HPFS/NTFS

2022-03-19 19:44:08 root@VM-Building:~# mount /dev/sdb1 /mnt/external/
mount: /mnt/external: WARNING: source write-protected, mounted read-only.

2022-03-19 19:49:41 root@VM-Building:~# ntfsfix /dev/sdb1
Mounting volume... NTFS signature is missing.
FAILED
Attempting to correct errors... NTFS signature is missing.
FAILED
Failed to startup volume: Invalid argument
NTFS signature is missing.
Trying the alternate boot sector
Unrecoverable error
Volume is corrupt. You should run chkdsk.
The first partition is broken as well, showing a different filesystem type which is not even detected by NTFS utilities, and of course it wasn't on Windows. The second partition is gone.
I now tried to write a regular .img (instead of an ISO) to the drive, I even (accidentally) took one that fully fits into the first partition. This worked well.
Then I flashed again an image with two partitions (RPi). Again both partitions are selectable. Checking any of them again throws the error it showed before "access denied: unable to unmount the drive or lock the device" (manually translated from German language). This time Windows does not un-assign any drive letter. Starting USBImager explicitly as admin doesn't change anything, so USBImager is and remains now unable to write to this drive.
Of course I can manually unmount and remove drive letter in Windows. Doing so, then detaching and attaching the drive somehow shows drive letter E: only, being the ext4 drive, I guess, since it is not accessible. Somehow the Windows drive & formatting tools show only one partition now with 486 MiB size, which doesn't match any of both. USBImager now doesn't show anything that can be selected, Rufus correctly shows the drive as "Disk 1", being the 100% indicator of the whole drive, not any partition and not related to any drive letter (which is always a partition on Windows). Detaching and attaching the drive again, now Windows doesn't assign any drive letter, USBImager doesn't detect anything, Rufus does so just fine.
Ah, interesting, another VERY bad thing: Actually, the attempts to write via USBImager where the failures did show up did destroy the partition table. Checking back on a Linux system, it shows the same single 486 MiB partition now, which matches the image I was trying to write. So it was writing the partition table already before recognising that it cannot access/unmount/lock the device, instead of checking this first.
Of course since Rufus is Windows-only, outstanding was a comparison with Etcher: Downloaded the latest portable executable, starting it and, well, it shows the drive correctly immediately, no issues at all.
I now wanted to know whether USBImager is at all able to flash ISO images. Okay that is bad, as of the destroyed partition table, Windows is completely unable to format the drive now, neither the 486 MiB partition, nor creating a new volume after removing this manually via drive & formatting tools. Luckily we have Linux. Using dietpi-drive_manager I formatted the drive to contain only a single FAT partition. Now it's showing up on Windows again, is accessible, all fine. Selected the ISO image and the drive, first it failed to unmount/lock the drive (same error as above, despite being started as admin), okay indeed something was still accessing it. Forced unmounting it, retried, now it throws "device not ready: error while writing to target device" (manually translated). Awesome, the partition table again is destroyed 💥. While USBImager keeps failing to write anything (also tried another image now) to that drive, Rufus and Etcher both do so without issues, restoring a valid partition table.
Bottom line:
- USBImager is not able to correctly display and handle drives with multiple partition tables, i.e. all our RPi and UEFI images.
- USBImager is not able to detect a drive which has no drive letter assigned, which is quite often the case in Windows with non-Windows filesystems. Windows itself behaves pretty unreliable and unpredictable in these cases, sometimes assigning a drive letter, sometimes not, sometimes only one of two, etc, but Etcher and Rufus are able to deal with this without any issues, USBImager is not.
- USBImager writes the partition table even when it is not able to write the partitions, rendering the drive content destroyed.
- USBImager is not able to write ISO images at all on my tests.
- USBImager needs to be executed with root permissions on Linux and macOS, not an issue in general, but an additional hurdle for inexperienced users as discussed above already.
All this makes me thing whether we should at all mention this tool (we have a blog article in the pipeline and thought about adding it as alternative to the docs). For medium/high experienced users it is all no issue, of course, we are able to recover broken partition tables, flash with other tools, if required, and USBImager is greatly tiny and fast, especially compared to Echter, and available on most OSes, compared to Rufus. But our docs and also the blog are addressing the lesser experienced users (others won't need those docs or articles, know flashing tools and likely have their favourite installed already), where, even if it works without issues in 95% cases, in the remaining 5% of cases it causes havoc from the view of these users, causing us support trouble. What we write must work reliable and fool prove for all users, when possible, and it is with Etcher and on Windows additionally Rufus.
I'm actually having a slightly bigger problem, in that it doesn't detect drives at all. Admin or not, I've tried every related command line option. Running on macOS Monterey 12.2.1 (should be current latest version). There's also no arm64 macOS version, along with the fact that it's not notarized, so it requires taking some extra steps to open it.
$ diskutil list

--snip--

/dev/disk3 (external, physical):
   #:                       TYPE NAME                    SIZE       IDENTIFIER
   0:      GUID_partition_scheme                        *31.9 GB    disk3
   1:                        EFI EFI                     209.7 MB   disk3s1
   2:       Microsoft Basic Data UNTITLED                31.7 GB    disk3s2
Probably it has an issue with GPT partitions as well? I've explicitly tested with MBR images and also formatted on Linux with MBR to not mix tests.
Actually I'm not sure what Windows uses by default when formatting a drive which is not too large for MBR. There is no selection for it with native formatting tools.
Strange. Is the drive mounted already? On Windows, if it has no drive letter assigned, USBImager does not see it either.
Ah now I remember what we found last meeting: https://gitlab.com/bztsrc/usbimager#usage
MacOSX: 10.14 an up: go to "System Preferences", "Security & Privacy" and "Privacy". Add USBImager to the list of "Full Disk Access".
Alternatively run from a Terminal as sudo /Applications/USBImager.app/Contents/MacOS/usbimager (this latter is the only way under 10.13).
Alone that such steps are required makes it pretty much not an option for our docs 🤔.
Okay, probably it's simply not compatible with Monterey yet, there was no release or commit the last half year.
@MichaIng: Do we want to go ahead with this issue or close it without changing the docs? Are there many of the described issues gone with our actual .xz images?
The issues were all unrelated to compression. Let's close this. I have no time to test through all the issues again and they were so many that I am sure not all of them have been fixed/changed. This does not mean to close the discussion: If someone finds time to test again, and all or most points have improved, I am happy to add it to our docs.