powerai-vision-object-detection
 powerai-vision-object-detection copied to clipboard
Use deep learning to create a model and a REST endpoint to allow your app to detect, locate and count your product on store shelves
Object detection with Maximo Visual Inspection (Formerly PowerAI Vision)
Note: This repo has been updated to use Maximo Visual Inspection(Formerly PowerAI Vision). Same product, new name. Previously called PowerAI Vision.
In this code pattern, we will use Maximo Visual Inspection to detect and label objects, within an image, based on customized training.
Note: This example can easily be customized with your own data sets.
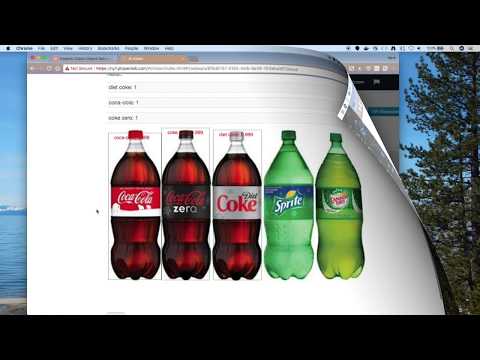
An example data set has been provided with images of Coca-Cola bottles. Once we train and deploy a model, we'll have a REST endpoint that allows us locate and count Coke bottles in an image.
Deep learning training will be used to create a model for Object Detection. With Maximo Visual Inspection, deep learning training is as easy as a few clicks of a mouse. Once the task has completed, the model can be deployed with another click.
Maximo Visual Inspection presents REST APIs for inference operations. Object detection with your custom model can be used from any REST client and can also be tested in the Maximo Visual Inspection UI.
When the reader has completed this code pattern, they will understand how to:
- Create a data set for object detection with Maximo Visual Inspection (Formerly PowerAI Vision)
- Train and deploy a model based on the data set
- Test the model via REST calls

Flow
- User uploads images to create a Maximo Visual Inspection data set
- User labels objects in the image data set prior to training
- The model is trained, deployed and tested in Maximo Visual Inspection web interface
- User can detect objects in images using a REST client
Watch the Video
Prerequisites
This code pattern requires Maximo Visual Inspection.
Go here
to learn more about trial access (Scroll down to the Give it a try section)..
Note: This code pattern was tested with Maximo Visual Inspection 1.3.0
Steps
- Clone the repo
- Login to Maximo Visual Inspection
- Create a data set
- Label the objects
- Train the model
- Deploy and test
- Run the app
1. Clone the repo
Clone the powerai-vision-object-detection locally. In a terminal, run:
git clone https://github.com/IBM/powerai-vision-object-detection
2. Login to Maximo Visual Inspection
Use your browser to access the Maximo Visual Inspection web UI for steps 3-6.
Note: The images below show the old PowerAI Vision UI, but the interface is nearly the same except the new product name.
3. Create a data set
Maximo Visual Inspection Object Detection discovers and labels objects within an image, enabling users and developers to count instances of objects within an image based on customized training.
To create a new data set for object detection training:
-
Use the
Data Setstab and click on theCreate new data setcard.
-
Provide a data set name and click
Create. -
A new data set card will appear. Click on the new card.
-
Upload one or more images using drag-and-drop or
Import files. You can usedata/coke_bottles.zipfrom your cloned repo to upload many at once.
4. Label the objects
-
Create new object labels for the data set by clicking
+ Add objectunder theObjectspulldown in the sidebar. To add multiple object labels, enter one label, clickAdd, then enter the next until you are done and then hitOK. For our example data set, add "Coca Cola", "Diet Coke", and "Coke Zero". -
Label the objects in each image by clicking on the image card and hitting
Label objects. Then chooseBoxfrom the bottom left. Select the label to use on the left and then click and drag to draw a bounding box around each object of that type in the image.
Press Save when done with each image.
-
Repeat this process for all labels and all images.
Note: You can import powerai-vision-object-detection/data/coke_bottles_exported.zip which was already labeled and exported.

Tip: Use the
Unlabeledobject filter to help you see when you are done. -
You can use the
Augment databutton to expand your data set. Label the original images first and be sure to consider whether flipped images (horizontal or vertical) are appropriate for your use case. If you use data augmentation, a new expanded data set will be created for you. -
Click
Export data setto save a copy of your work. Now that you've spent some time labeling, this zip will let you start over without losing your work.
5. Train the model
-
Open your augmented data set and click
Train model(just use the original if you did not augment). -
Be sure to select
Object detectionas theType of training. -
Select a model for speed or accuracy.
-
Take a look at the
Advanced options. You can keep the defaults, but if you'd like to speed things up, try reducing theMax iteration. -
Click the
Trainbutton.
-
When the training is done, click
Model detailsto see some metrics and graphical description of the model accuracy.
6. Deploy and test
-
Click
Deploy modelandDeployto make the model available via an API endpoint. -
Copythe API endpoint from your deployed model. Use this to test withcurl(below) and to set thePOWERAI_VISION_WEB_API_URLfor the web app (in step 7). -
Test your model in the Maximo Visual Inspection UI. Use
Importto choose a test image. The result shows you the image with bounding boxes around the detected objects and a table showing the labels and confidence scores.
-
From a command-line, you can test your deployed REST endpoint using an image file and the
curlcommand. Notice the output JSON shows multiple bottles were detected and provides the confidence, label and location for each of them. -
Make sure to unzip the
test_set.zipfile in thedatadirectory.Warning: this example used
--insecurefor convenience.$ cd data/test_set $ curl --compressed --insecure -i -F files=@coke_bottle_23.png https://host-or-ip-addr/powerai-vision-ny/api/dlapis/e4d6101f-3337-49ae-a6ba-5cb5305b28d9 My request looked like the following: curl --compressed --insecure -i -F files=@coke_bottle_23.png https://vision-p.aus.stglabs.ibm.com/visual-inspection-v130-prod/api/dlapis/6e0a7-d9da-4314-a350-d9a2c0f2b HTTP/2 200 server: nginx/1.15.6 date: Tue, 01 Dec 2020 17:22:14 GMT content-type: application/json vary: Accept-Encoding x-powered-by: Servlet/3.1 access-control-allow-origin: * access-control-allow-headers: X-Auth-Token, origin, content-type, accept, authorization access-control-allow-credentials: true access-control-allow-methods: GET, POST, PUT, DELETE, OPTIONS, HEAD content-language: en x-frame-options: SAMEORIGIN x-content-type-options: nosniff x-xss-protection: 1; mode=block strict-transport-security: max-age=15724800; includeSubDomains content-encoding: gzip {"webAPIId":"6e3480a7-d9da-4314-a350-d9aac22c0f2b","imageUrl":"http://vision-v130-prod-service:9080/vision-v130-prod-api/uploads/temp/6e3480a7-d9da-4314-a350-d9aac22c0f2b/c62cc7dc-dbc2-448d-85e8-41485a2c17f5.png","imageMd5":"ea1f6444fa7dabeda7049d426699879c","classified":[{"label":"Coke","confidence":0.995542585849762,"xmin":601,"ymin":29,"xmax":763,"ymax":546,"attr":[{}]},{"label":"Coke","confidence":0.982393741607666,"xmin":447,"ymin":40,"xmax":593,"ymax":572,"attr":[{}]},{"label":"Coke","confidence":0.8604443669319153,"xmin":67,"ymin":18,"xmax":245,"ymax":604,"attr":[{}]},{"label":"Coke","confidence":0.8339363932609558,"xmin":269,"ymin":32,"xmax":422,"ymax":589,"attr":[{}]}],"result":"success"}
7. Run the app
An example web app demonstrates how to upload a picture, use the trained and deployed model, and display the detected objects by drawing bounding boxes and labels on the image. The functionality is similar to the above testing, but the code is provided for you to customize.
Use the Deploy to IBM Cloud button OR Run locally.
Deploy to IBM Cloud

-
Press the above
Deploy to IBM Cloudbutton, clickCreate+to create an IBM Cloud API Key and then click onDeploy. -
In Toolchains, click on
Delivery Pipelineto watch while the app is deployed. -
Use the IBM Cloud dashboard to manage the app. The app is named
powerai-vision-object-detectionwith a unique suffix. -
Add your PowerAI Vision API endpoint:
- Click on the app in the IBM Cloud dashboard.
- Select
Runtimein the sidebar. - Hit
Environment variablesin the middle button bar. - Hit the
Addbutton. - Add the name
POWERAI_VISION_WEB_API_URLand set the value to the web API that you deployed (above). - Hit the
Savebutton. The app will restart automatically. - Click on
Visit App URLto use the app.
Run locally
Use your cloned repo to build and run the web app.
Note: These steps are only needed when running locally instead of using the
Deploy to IBM Cloudbutton.
-
Copy the env.sample to .env. Edit the file to set the URL to point to the web API that you deployed (above).
-
Assuming you have pre-installed Node.js and npm, run the following commands:
cd powerai-vision-object-detection npm install npm start -
Use a browser to go to the web UI. The default URL is
http://localhost:8081.
Use the web app
-
Use the
Choose Filebutton to choose a file. On a phone this should give you an option to use your camera. On a laptop, you choose an image file (JPG or PNG). -
Press the
Upload Filebutton to send the image to your web API and render the results.
-
The UI will show an error message, if you did not configure your POWERAI_VISION_WEB_API_URL or if your API is not deployed (in SuperVessel you can quickly redeploy every hour).
Links
- Maximo Visual Inspection Learning Path: From computer vision basics to creating your own apps.
- Demo on YouTube: Watch the video
- Object Detection: Object detection on Wikipedia
- TensorFlow Object Detection: Supercharge your Computer Vision models with the TensorFlow Object Detection API
- AI Article: Can Artificial Intelligence Identify Pictures Better than Humans?
- From the developers: IBM PowerAI Vision speeds transfer learning with greater accuracy -- a real world example
Learn more
- Artificial Intelligence code patterns: Enjoyed this code pattern? Check out our other AI code patterns.
- AI and Data code pattern playlist: Bookmark our playlist with all of our code pattern videos
- PowerAI: Get started or get scaling, faster, with a software distribution for machine learning running on the Enterprise Platform for AI: IBM Power Systems
License
This code pattern is licensed under the Apache License, Version 2. Separate third-party code objects invoked within this code pattern are licensed by their respective providers pursuant to their own separate licenses. Contributions are subject to the Developer Certificate of Origin, Version 1.1 and the Apache License, Version 2.